Setting Up Your Account
The Account window is where you set up your Microsoft account and connected services, which are both important for taking full advantage of Office 2013. When you first start using this new version of Office, be sure to take a few minutes to handle this important task.

![]() Click the File tab.
Click the File tab.
![]() Click Account.
Click Account.
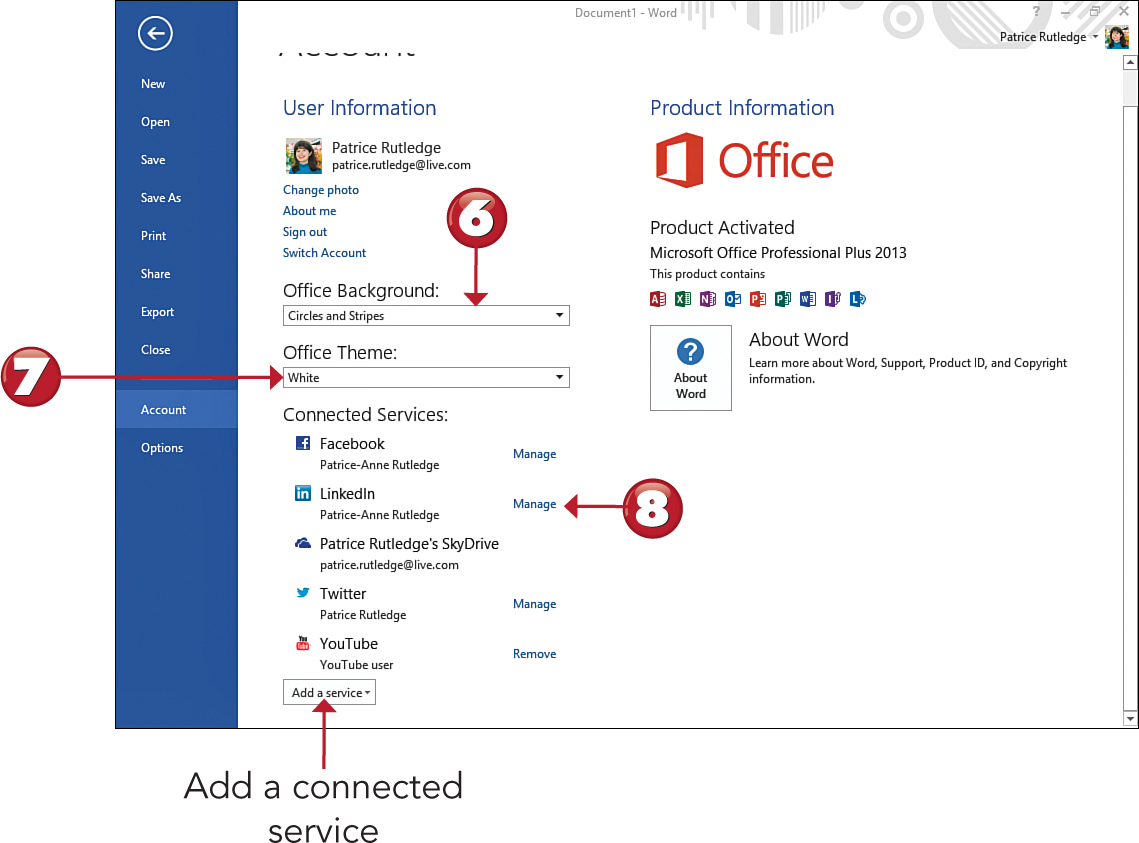
![]() Office displays information about the Microsoft account you used to install Office 2013.
Office displays information about the Microsoft account you used to install Office 2013.
![]() Click Change Photo to upload a new photo of yourself.
Click Change Photo to upload a new photo of yourself.
![]() Click Switch Account to switch to another Microsoft account.
Click Switch Account to switch to another Microsoft account.


 Note
Note
Microsoft Account Office 2013 connects you to the Web with your Microsoft account: an email and password you use to access all Microsoft services such as SkyDrive, Messenger, Hotmail, and Outlook.com. Formerly, this was called a Windows Live ID. To create a new Microsoft account, go to https://signup.live.com.
![]() Select an Office background. The default is Circles and Stripes, but you can also select another option, including Clouds, Straws, or no background.
Select an Office background. The default is Circles and Stripes, but you can also select another option, including Clouds, Straws, or no background.
![]() Select an Office theme: White (the default), Light Gray, or Dark Gray.
Select an Office theme: White (the default), Light Gray, or Dark Gray.
![]() Specify the connected services you want to use with Office.
Specify the connected services you want to use with Office.

Note
Office Theme The Office theme controls the appearance of the Office interface, not the appearance of any documents you create.
Note
Connected Services The Account window displays the services you’ve already connected with. (Office finds some services automatically based on your Microsoft account email address.) Click the Add a Service button to add more services, including Flickr, YouTube, Office 365 SharePoint, SkyDrive, Facebook, LinkedIn, and Twitter. See “Sharing a File” later in this chapter to learn how to share Office files on the social sites you connect to.