
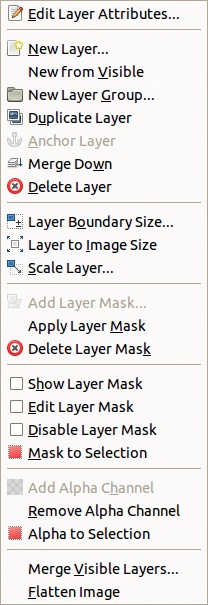
The Layers menu (Figure 11-4) is selected by right-clicking any of the layer entries in the Layers dialog or by selecting the first entry in the Configure menu of the Layers dialog. If the current layer is a text layer, this menu contains five additional entries, described in 15.8 The Text Tool. In this section, we examine each of the entries in the Layers menu.
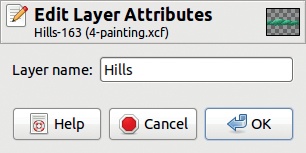
EDIT LAYER ATTRIBUTES opens the dialog shown in Figure 11-5. The only attribute that can be changed is the layer name.
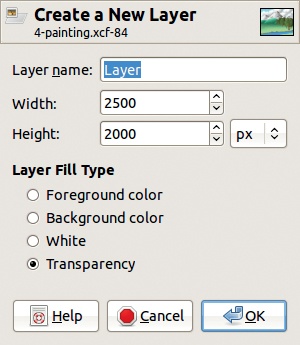
NEW LAYER opens the dialog shown in Figure 11-6. A descriptive layer name can help you quickly identify the various components of an image. If you don’t input one, a name is automatically generated, such as Layer #1. The width and height are initially the same as those of the canvas, but you can input different values. If the new layer is larger than the canvas, the areas of the layer that extend beyond the canvas won’t be visible. The new layer’s dimensions can be assigned as a percentage of the canvas dimensions, in pixels, or in a number of other units. Note that measurements in inches, millimeters, or other standard units of measurement are calculated with regard to the current resolution (see 10.1 Rulers and Units). Finally, the four radio buttons allow you to choose how the layer is initially filled. The layer can be filled with the foreground color, the background color, white, or transparency. Unless transparency is chosen, the new layer does not have an Alpha channel.
NEW FROM VISIBLE creates a new layer, initially called Visible, filled with the image as it currently appears. This new layer is placed in the stack just above the current layer. The layers contributing to this new layer are flattened before its creation such that only one new layer is created, even if several are visible.
NEW LAYER GROUP creates a new, empty layer group, initially called Layer Group. This concept is discussed in 11.3 Layer Groups.
DUPLICATE LAYER makes a copy of the current layer (or layer group), places it into the layer stack just above the current layer, and names it the same name as that the current layer plus the word copy. The copy inherits all the characteristics of the original, including its blending mode, opacity, and locks.
ANCHOR LAYER is active only when there is a floating selection. See 13.4 Using Selections. The floating selection is anchored to the last current layer.
MERGE DOWN merges the current layer with the layer below. If the current layer is invisible, it merges as if it were visible. However, if the layer below is invisible, and there is no visible layer below that, MERGE DOWN is inactive. MERGE DOWN is also inactive when the layers below the current layer form a layer group.
MERGE LAYER GROUP appears in the menu only if the current layer is a layer group. This group is replaced with a single layer, composed of all layers of the group.
DELETE LAYER deletes the active layer or layer group. Like the other Layers menu operations, this one can be undone.
The next four entry groups in the Layers menu are also found in the Image: Layer menu, and they are discussed in 11.4 The Image: Layer Menu. Therefore we skip to the last two entries in the Layers menu.
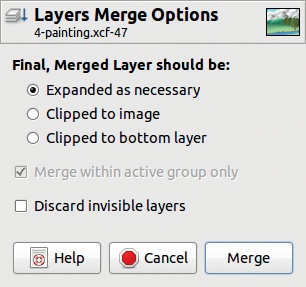
MERGE VISIBLE LAYERS acts only on the layers with the eye icon checked, and it merges them according to their respective opacity and blending mode. The dialog is shown in Figure 11-7. The new layer can be sized to match the largest layer, the canvas, or the bottom layer. If the DISCARD INVISIBLE LAYERS box is checked, the invisible layers are deleted. Otherwise, they remain in the image. Note that this operation deletes the visible layers from the image, unlike NEW FROM VISIBLE, which is generally a better choice. If you do choose to use MERGE VISIBLE LAYERS, we strongly suggest that you save a copy of the image first with Image: File > Save a Copy.
FLATTEN IMAGE replaces all the layers with a single-layer representation of the image. This is a destructive operation and should be used only after you’ve saved a copy of the image with the layers intact.