Colorizing a drawing is a great way to learn many of the digital art techniques and tools available in GIMP. In this tutorial, we’ll use paint tools like the Paintbrush and modifying tools like the Smudge tool. Colorizing is also a flexible process: As a beginner, you can add color to a small drawing reasonably quickly, while also exploring the techniques and tools, and once you’re an experienced colorist, you can spend hours producing a fine work of art. And most importantly—colorizing is fun!
Before you start colorizing, you need something to color! A black and white line drawing works best, whether drawn by you or someone else. Finding black and white line art is pretty easy if you don’t want to draw it yourself. Some artists enjoy drawing line art but lack the skill, time, or desire to add color, so they make their art available for anyone to colorize. Many comic artists pass their line art to professional colorists, who each have a unique personal style.
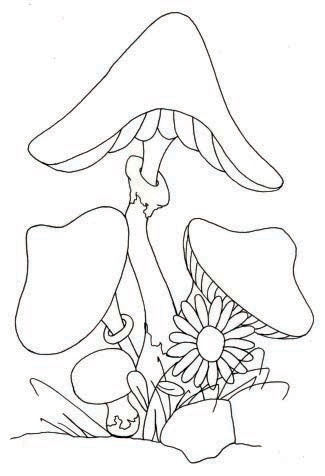
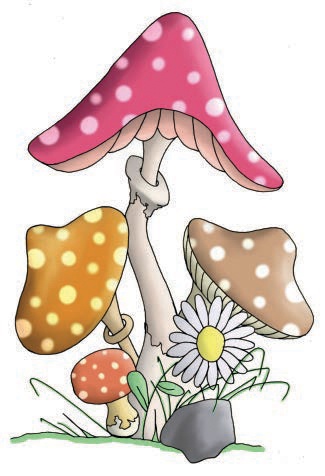
We’re going to colorize the drawing of mushrooms shown in Figure 3-1. This drawing is composed of clean, solid lines, which is ideal if you’re a beginner. If you find line art online, download the largest image you can find. A width and height of over 1000 pixels works best. Small errors disappear when the image is sized down, and GIMP can handle a large canvas size without a problem. For this tutorial, we’ll use a canvas that’s 1200 pixels wide and 1800 pixels tall.
Layers are a great asset to a colorist, as they cut down on the time required for boring things like defining objects and leave more time for the fun stuff like playing with different color combinations and adding shadows.
Keep an unaltered copy of the line art on a separate layer so you can always see the lines. If you put it at the bottom of the layer stack and start to add color, the lines will disappear! Try it for yourself: Once you’ve opened your line art image (Image: File > Open or ![]() ), create a new transparent layer. You can do this in one of four ways: Select Image: Layer > New Layer or Layer: right-click > New Layer, or press
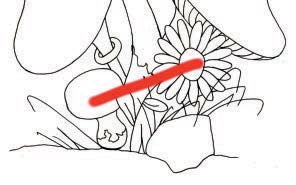
), create a new transparent layer. You can do this in one of four ways: Select Image: Layer > New Layer or Layer: right-click > New Layer, or press ![]() or the Layers dialog button as seen in Figure 3-2. Then paint a red stroke on the image:
or the Layers dialog button as seen in Figure 3-2. Then paint a red stroke on the image:
Click the Foreground Color box in the bottom-left corner of the Toolbox (top left in Figure 3-3). The foreground color is black by default.
In the Color chooser dialog that appears, choose a bright red and click OK.
In the Paintbrush tool options, check that the BRUSH is set to
Hardness 075. If it’s not, click in the left square and choose the correct brush.Change the SIZE slider (in tool options) to 70.
Scribble across the image.

Your result will probably look something like Figure 3-4.
To keep the line art visible while adding color, place the line art layer on top (Image: Layer > Stack > Raise Layer). The red stroke disappears behind the black and white drawing. To put it back on top, first create a new layer at the bottom of the layer stack. This layer will be the background and can be any color that you like.

Next, select the top layer (with the line art) and set it to Multiply mode, as shown in Figure 3-5. The red stroke should reappear, as shown in Figure 3-6. From now on, anything you paint on the middle layers will show through the white without obscuring the lines.
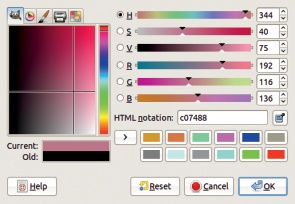
Before we get started, let’s review some basic GIMP skills that you’ll need to color a drawing. To choose new colors, open the Color chooser dialog by clicking the Foreground Color box.
Experiment with the six sliders (Hue, Saturation, Value, Red, Green, Blue) and the clickable areas on the left to make a selection. Your color selection appears in the Current color box in the bottom right.
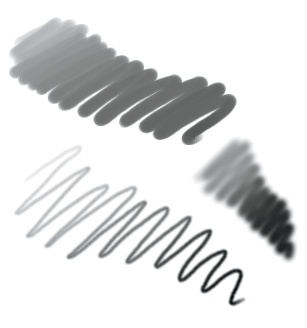
Use the Saturation and Value cursors (Figure 3-7 and Figure 3-8) to adjust the gray levels for more realistic colors. If you want a more cartoonish style, you could choose only vivid, fully saturated colors (Figure 3-9).


To add color, either use the Bucket fill tool to fill a region with one click (select Image: Tools > Paint Tools > Bucket Fill, press ![]() , or click the Toolbox button shown in Figure 3-10) or paint the area with a mouse or tablet pen, which takes longer. If using the Bucket Fill tool, make sure you check SAMPLE MERGE so the black lines (which are on a separate layer) are taken into account. You may need to play around with the THRESHOLD until you fill the object and nothing else.
, or click the Toolbox button shown in Figure 3-10) or paint the area with a mouse or tablet pen, which takes longer. If using the Bucket Fill tool, make sure you check SAMPLE MERGE so the black lines (which are on a separate layer) are taken into account. You may need to play around with the THRESHOLD until you fill the object and nothing else.
Although Bucket Fill is fast, it’s generally not very accurate. Dark gray pixels often remain gray (see Figure 3-11). You can enhance the result by continuing to experiment with the THRESHOLD, but the result may never be perfect.
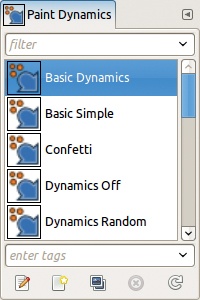
The Paintbrush tool produces a more accurate, clearer result, but using it takes longer (although you’ll get faster with experience). (Select Image: Tools > Paint Tools > Paintbrush, or press ![]() , or click the Toolbox button shown in Figure 3-12 to access the Paintbrush tool.) If you use a tablet, apply full pressure when coloring the center of an object or you’ll end up with partially transparent pixels. Alternatively, you can set the Paint Dynamics (Figure 3-13) to
, or click the Toolbox button shown in Figure 3-12 to access the Paintbrush tool.) If you use a tablet, apply full pressure when coloring the center of an object or you’ll end up with partially transparent pixels. Alternatively, you can set the Paint Dynamics (Figure 3-13) to Dynamics Off to turn off the pressure sensitivity.
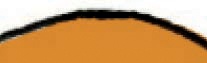
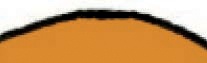
Be careful at the borders of an object. The color should go up to the darkest part of the line (over any dark gray pixels) but not beyond it. Figure 3-14 shows what happens when the borders aren’t colored carefully: On the left, the colorist didn’t go far enough, and on the right, the colorist went too far.

If you are careful and take your time, meticulously adding color where paint is missing and using the Eraser tool (select Image: Tools > Paint Tools > Eraser, or press ![]() , or click the Toolbox button shown in Figure 3-15) where you went too far, you can fill an object with color very accurately. You can see a carefully painted border in Figure 3-16. As you work, experiment with different brush sizes: Try a large brush size for painting the center of an object, and switch to a smaller size when you get near the border. Now, let’s try coloring our simple cartoon.
, or click the Toolbox button shown in Figure 3-15) where you went too far, you can fill an object with color very accurately. You can see a carefully painted border in Figure 3-16. As you work, experiment with different brush sizes: Try a large brush size for painting the center of an object, and switch to a smaller size when you get near the border. Now, let’s try coloring our simple cartoon.
The most efficient way to colorize in GIMP is to create a layer for each base color in an object and then add the color and the shading. This gives you more control and flexibility and actually makes shading a lot easier. If you choose too many different base colors, however, you’ll spend all day switching among layers.
Start with the object that’s farthest from the viewer. Create a new layer for that object, at the bottom of the stack, just above the background. In the advanced options, choose to fill the layer with transparency. In our mushroom cartoon, the farthest object is the mushroom stem, so we call this layer Small mushroom stem. Next, we choose a color and paint the mushroom stem, as shown in Figure 3-17.

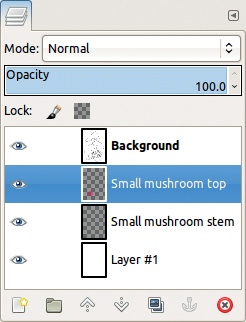
Next, create another new, transparent layer, and choose any object one step closer: In this example, either the bottom of the stem or the mushroom cap will do. Note that you can paint well beyond the lines of any object that is above the current layer, as shown in Figure 3-18. The number of layers increases quickly, so give them meaningful names, as shown in Figure 3-19.
Continue creating layers and adding colors until every object is defined and you have a basic colored drawing like the one in Figure 3-20.
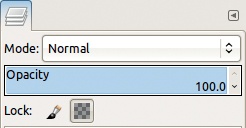
Now is a good time to step back and look at the drawing as a whole to make sure you like how the colors look together. If you want to change one, simply check the Lock alpha channel box of the corresponding layer (see Figure 3-21), choose a new color, and drag-and-drop it from the foreground color box into the image. The LOCK box keeps the transparency of each pixel unchanged, so you can fill just the area that you colored.

Now that every object has a color, let’s add some shading. You’ll need to decide which direction the light is coming from. It might come from above, from a lamp in the drawing, or from anywhere else you like.
Before adding any shading, merge all the layers of each individual object (Image: Layer > Merge Down) so the object is shaded consistently. For example, if you merge all the layers of one of the mushrooms and you decide to light it from the right, then you can add shadow on the left and light on the right, all in one stroke.


Now we’re ready to add shading. Choose the Dodge/Burn tool (select Image: Tools > Paint Tools > Dodge/Burn, or press ![]() , or click the Toolbox button shown in Figure 3-22). In Dodge mode, this tool adds light, and in Burn mode, it adds shadow. This tool lightens or darkens the opaque areas without changing the colors.
, or click the Toolbox button shown in Figure 3-22). In Dodge mode, this tool adds light, and in Burn mode, it adds shadow. This tool lightens or darkens the opaque areas without changing the colors.
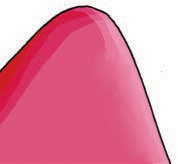
Dodge each object along the side facing the light source, and burn the other side. Dodge a large area first, and then dodge over a smaller area, closer to the light source, to create a gradient as shown in Figure 3-23.
The Dodge/Burn tool acts on pixels differently depending on whether it classifies them as dark or light. The RANGE option (Figure 3-24) changes how pixels are classified. Figure 3-23 shows shading done with the RANGE option set to MIDTONES, whereas Figure 3-25 was done with the RANGE option set to HIGHLIGHTS.
The shading added so far is crude, and although it has improved the drawing considerably, you can make the result much better by smoothing the color transitions.

Choose the Smudge tool (select Image: Tools > Paint Tools > Smudge, or press ![]() , or click the Toolbox button shown in Figure 3-26). This tool blends colors or transparencies, so if you smudge near the object’s border, you’ll get a fuzzy border. To keep the borders sharp, check the Lock alpha channelbox of the corresponding layer (Figure 3-21). After smudging, you should get a gradient like the one in Figure 3-27.
, or click the Toolbox button shown in Figure 3-26). This tool blends colors or transparencies, so if you smudge near the object’s border, you’ll get a fuzzy border. To keep the borders sharp, check the Lock alpha channelbox of the corresponding layer (Figure 3-21). After smudging, you should get a gradient like the one in Figure 3-27.
Tip: Start by smudging perpendicularly to the dodge lines and then in the same direction as the lines. Alternatively, use small circular strokes to create a more organic gradient.


Dodge, burn, and smudge each object in your drawing until you have a fully shaded drawing, like the one in Figure 3-25.
After you’ve finished shading, you can add some finishing touches, like a pattern (Figure 3-28), or hand-painted details, like the polka dots in Figure 3-29, or anything else that comes to mind.
To add texture, select the layer you want to modify and pick the Bucket Fill tool. Change its options to the ones shown in Figure 3-30: set MODE to MULTIPLY, set FILL TYPE to PATTERN FILL, choose a light pattern (a colorful pattern will change your colors too much), and set the AFFECTED AREA to FILL WHOLE SELECTION. Make sure Lock alpha channel is checked. Now click your image to see the result.
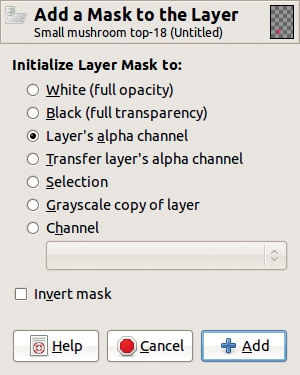
To add hand-painted polka dots, duplicate one of the mushroom cap layers by selecting Image: Layer > Duplicate Layer or Layer: right-click > Duplicate Layer, by pressing ![]() , or by clicking the Layers dialog button, as shown in Figure 3-31). Add a layer mask to the new layer (Image: Layer > Mask > Add Layer Mask), and initialize the mask to LAYER’S ALPHA CHANNEL (Figure 3-32). Next, clear the layer content (Image: Edit > Clear or
, or by clicking the Layers dialog button, as shown in Figure 3-31). Add a layer mask to the new layer (Image: Layer > Mask > Add Layer Mask), and initialize the mask to LAYER’S ALPHA CHANNEL (Figure 3-32). Next, clear the layer content (Image: Edit > Clear or ![]() ), and you have a new layer that will cover only that mushroom cap.
), and you have a new layer that will cover only that mushroom cap.
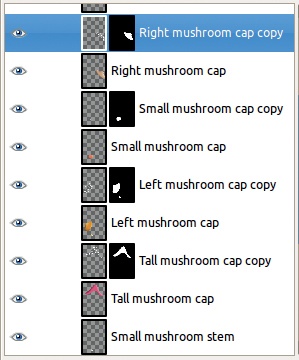
Set the layer’s MODE to GRAIN MERGE, select the Paintbrush tool, and choose white as the foreground color. Make sure Lock alpha channel is not checked this time, and start painting dots on the mushroom cap. You can paint dots on the edge of the cap without painting on the background thanks to the layer mask, and the dots will be a lighter shade of the cap color thanks to Grain Merge Mode. Create a new layer for each of the remaining caps to paint polka dots on all of them (using a layer mask as shown in Figure 3-33). You’ve completed the mushroom colorizing tutorial.