
Once GIMP is installed on your computer, you can open it as you do other applications, via a shortcut or a menu. The first thing you see when you start GIMP is the splash window, followed by the main windows: the Image window, the Toolbox window, and the multi-dialog window.
The splash window is an image that’s shown while GIMP loads. It changes with each version of GIMP and is a quick way to check which version is currently installed on your computer. The splash also displays updates on the loading process. When the splash window disappears, GIMP’s three main windows appear. By default, these windows appear as shown in Figure 9-1. If your screen is smaller than 1440 × 900 pixels, the two vertical windows will be shorter. If your screen is significantly larger, you’ll see more space between the three windows. Because these are three separate windows, you’ll also see your desktop in the background.
For some users, multi-window mode is a surprise. Most Windows and Mac OS applications, and even many GNU/Linux applications (like GNU Paint, Blender, Inkscape, or OpenOffice Draw), always use single-window mode. Multi-window mode doesn’t work well in the Windows environment and has been a source of complaint about GIMP among Windows users. GIMP 2.8 also offers single-window mode, which we describe in Single-Window Mode. For now, let’s focus on the classic multi-window mode. Most of the explanations that follow, however, also apply to single-window mode.
GIMP’s screen layout is fully customizable—you can move the windows or change the height and width of the two vertical windows, and when you quit GIMP, the changes are saved. Figure 9-2 shows a custom screen layout, where the two vertical windows are placed on the right side of the screen. The Toolbox - Tool Options window (also called the Toolbox dialog) is on the far right, and we’ve increased its width a little, so each row at the top contains six icons instead of five. To its left is the multi-dialog window, which contains several dialogs, organized into two sets of tabs.

Another GIMP window, Levels, is also shown here, along with the window of a text-editing program (which contains an early draft of Chapter 1 of this book) and a Terminal window. As you can see, multi-window mode lets you work with GIMP and other applications side by side.
The final window in Figure 9-2 is the Image window (shown in the top left). It appears once you open an image in GIMP and is labeled with the name of the image and other basic information about the image. This window also contains the menu bar (unless you’re running Ubuntu’s Unity interface or Mac OS X).
When GIMP opens, the Image window is empty, as shown in Figure 9-3. At the bottom left is the top of Wilber’s head. Wilber is the GIMP mascot, so you’ll see him all over GIMP. The top of Image window contains a menu bar with 11 or 12 entries, depending on whether you have the GAP plug-in installed. If you leave the mouse pointer in this window (or in the Wilber strip at the top of the Toolbox), you see a message that says “Drop image files here to open them.”
You can access GIMP’s features via the menus at the top of the Image window, but using keyboard shortcuts or the Toolbox icons is often more convenient. The Toolbox and the dockable dialogs also let you specify tool options and parameters.
If you’re doing detailed work on more than one image at a time, you can quickly end up with over a dozen windows open at once. Although this can get confusing, the benefit is that GIMP allows you to do many things simultaneously, rather than forcing you to cancel one operation before trying another.


You can hide all windows except the Image window by pressing ![]() . Press
. Press ![]() again to bring the windows back. By default, all the windows except the Image window are considered utility windows. You can change that using the Preferences dialog (see Chapter 22). Utility windows cannot be minimized or maximized, and they move above other open windows whenever you activate the Image window.
again to bring the windows back. By default, all the windows except the Image window are considered utility windows. You can change that using the Preferences dialog (see Chapter 22). Utility windows cannot be minimized or maximized, and they move above other open windows whenever you activate the Image window.
As of version 2.8, you can choose between multi-window mode and single-window mode. As shown in Figure 9-4, the Image: Windows menu contains a checkbox for SINGLE-WINDOW MODE. If you check it, all the existing GIMP windows are collapsed into a single window that fills the screen. Figure 9-5 shows this window in its initial configuration, with the Toolbox on the left, reduced to the width of three tools, and the multi-dialog window on the right.
You can change this initial layout. In Figure 9-6, we widened the Toolbox and opened two images at the same time. The second image is only visible as a tab at the top of the current image, so we can’t look at both images at the same time. We also opened a new dialog, Document History, which is on the bottom left, above the lower part of the Tool Options dialog. We could move this dialog so it becomes a tab in an existing dock, as in multi-window mode, by clicking and dragging its title to the title bar of that dock. The only dialog that you can’t move is the Toolbox, but you can temporarily switch to multi-window mode to do that.

As in multi-window mode, hide all docks by pressing ![]() or checking the checkbox in the Image: Windows menu. Figure 9-7 shows the result. Press
or checking the checkbox in the Image: Windows menu. Figure 9-7 shows the result. Press ![]() again to restore the docks.
again to restore the docks.
If you are working in single-window mode, you can reduce the single window so you can see other running programs, for instance, if you want to click and drag an image thumbnail from a browser or folder to GIMP. But in single-window mode, doing this is rather difficult unless you have a very large screen or a dual-screen configuration.
Sometimes when you open a new dockable dialog in single-window mode, it will be detached (a separate window), which is counter to the idea of a single window.
If you select the ADD TAB entry in the configuration menu of a dockable dialog, the new dialog is added as a new tab in the current dock, so you’ll still have just one window. If you select the Image: Windows > Dockable Dialogs menu, the new dialog is created detached.
You can drag a detached dialog to a dock, as explained in Docking Windows and Dockable Dialogs. You can detach a docked dialog using the DETACH TAB entry in its configuration menu (even in single-window mode).
The major limitation of single-window mode is that you cannot view multiple images at the same time, even if you use Image: View > New View. You can work on several images, but you must switch between them using tabs. You can click the tabs or press ![]() or
or ![]() to switch from image to image.
to switch from image to image.
Many people claim that single-window mode is the most important feature that was missing from GIMP, but there are plenty of long-time GIMP users who still prefer multi-window mode. Try both and find out which works best for you. This will depend on the operating system you use, the size of your screen, and whether you frequently work on several images at the same time.
The Toolbox window and the multi-dialog window are docking windows, or simply docks. They can contain several dialogs, and you can move a dialog from one window to another, hide it, place it outside of any dock, or dock it into another docking window.
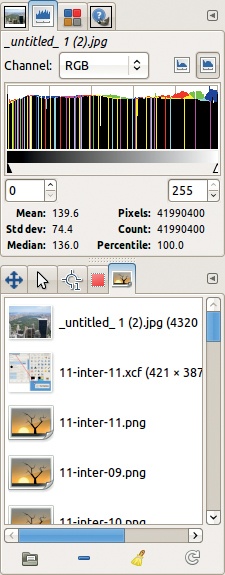
By default, the Toolbox window contains a special dialog docked at the bottom, the Tool Options dialog, which changes automatically depending on the tool currently selected. In Figure 9-1, the current tool is the Paintbrush, and the bottom dialog contains the Paintbrush options. The multi-dialog window initially contains seven dialogs. Four of them are docked in the top part of the window, and you can switch among them using tabs, which are labeled with icons. The lower half of the window contains three more dialogs. These seven dialogs are the GIMP defaults because they’re often the most useful, but you can remove any that you don’t use or add any of the dockable dialogs shown in Figure 9-8.
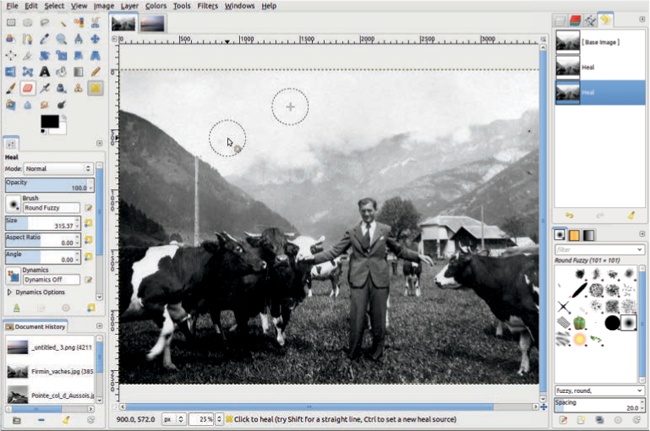
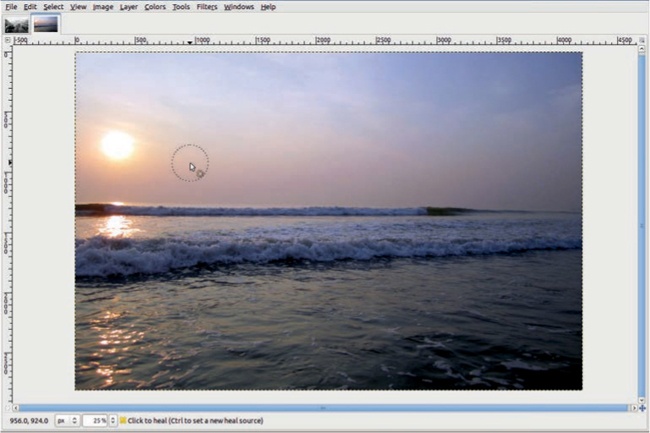
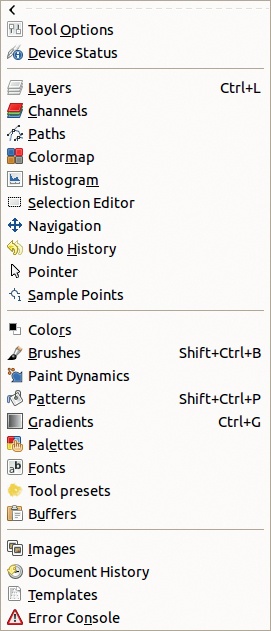
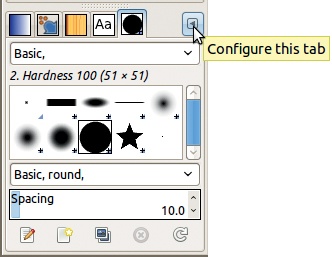
Figure 9-9 shows the position of the Tab button at the top of a dockable dialog, next to the row of tabs. The button is marked with a small triangle, and if you click it, a Tab configuration menu opens, as shown in Figure 9-10. The menu is specific to each dialog, which, in this case, is the Brushes dialog.

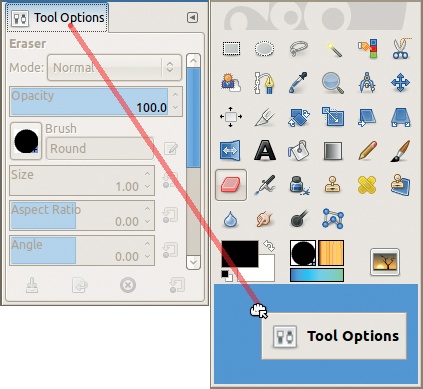
If you close a dock, you can reopen it via Image: Windows > Recently closed docks. You can rebuild the Tool Options dialog in two ways: via Image: Windows > Dockable Dialogs > Tool Options or simply by double-clicking the current tool in the Toolbox. A new window is then created, as shown in Figure 9-11. This window is a new dock, so you can dock any dockable dialogs into it on any of its four sides.
To move a dockable dialog into a dock, grab it by its icon or title and drag it to one side of the dock, as shown in Figure 9-11. In this case, the two dialogs will be side-by-side. You could also dock a dialog on the left side or at the bottom. For example, in Figure 9-12, the Tool Options dialog is being docked at the bottom of the Toolbox. Note that as you drag the dialog close to the receiving dock, the place where it will dock is emphasized.

You can close dockable dialogs with the Tab configuration menu or open them with Image: Windows > Dockable dialogs. If you drag a dialog to the side of an existing dock, the dock enlarges on that side. If you drag a dialog to the top of the dock and drop it next to the existing tabs, the dialog is added as a new tab, without enlarging the dock. You can even make a tab into an independent dock by dragging its title or icon outside the dock.
You can also close all the docks, but it’s probably a better idea to just temporarily hide them with ![]() . You can create a dock with three levels of tabs, with all dockable dialogs as tabs in a single dock, and so on. For example, Figure 9-13 shows a dock with two parts and nine tabs, none of which are opened by default.
. You can create a dock with three levels of tabs, with all dockable dialogs as tabs in a single dock, and so on. For example, Figure 9-13 shows a dock with two parts and nine tabs, none of which are opened by default.

Compared with many other graphic applications, the GIMP interface is amazingly customizable. GIMP gives you several ways to do the same thing, so you can choose the method you prefer. For example, instead of clicking and dragging, you can move dockable dialogs using the Tab configuration menu. In Figure 9-10, you see an entry for detaching the tab, as well as another menu entry for adding a tab in the same dock section as the current tab. The corresponding submenu lists all the dockable dialogs. You can even open the same dockable dialog in several different places.
In most dockable dialogs, right-clicking in the dialog opens a menu specific to that dialog, which is also the first entry of the Tab configuration menu. The LOCK TAB TO DOCK entry in the Tab configuration menu, if checked, prevents you from dragging the dialog out of the current dock but not from closing it.
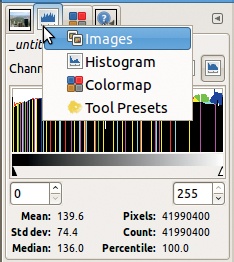
You can drag any tab to a new position in the tab list. To make a tab active, click it, or right-click somewhere in the tab list and choose its icon, as shown in Figure 9-14.
Because the Image window is at the heart of the GIMP interface, let’s make sure we’re familiar with all its features. Figure 1-15 showed the Image window with its main components, and I’ve included a version here for reference (Figure 9-15).
When opened in GIMP, an image is placed on a canvas. The Image window displays a part of the canvas, and you use vertical and horizontal sliders to move the canvas within the window. If the canvas is smaller than the window, the unused area is filled with a neutral gray. You can also move the canvas in the window in three other ways:
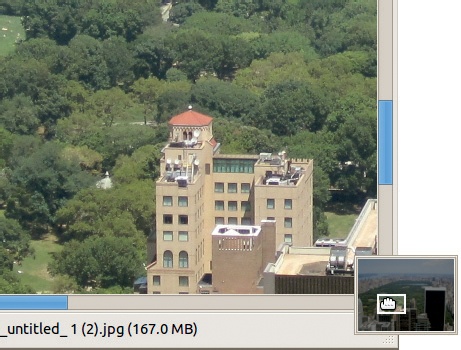

With the navigation button in the bottom-right corner of the window, as shown in Figure 9-16
By pressing the
 key while moving the mouse (but not clicking)
By using the mouse wheel to scroll up or down (pressing
 while you scroll moves the canvas to the right or the left)
The status bar at the bottom of the window displays various information: the name and size (in memory) of the current layer, a message explaining how to use the current tool, or a progress bar and cancel button if GIMP is applying a filter (Figure 9-17). Note that since version 2.8, transformation tools display their status on the canvas rather than on the status bar.
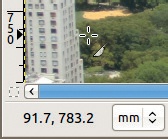
The pointer coordinates, in the bottom left of the window, specify the exact position of the mouse pointer (if it’s in the window). You can change the units for these coordinates using the drop-down menu to the right. In Figure 9-18, the coordinates are displayed in millimeters. Note that the coordinates are relative to the image and have nothing to do with the screen coordinates. For more detail, see Chapter 10.
We consider the other components of the Image window later: the rules and the zoom menu in Chapter 10 and the Quick Mask button in Chapter 13.