GIMP allows you to undo many steps, which makes undo a useful and powerful feature. This capability means that GIMP must store many successive states of the image you are working on, so the number of steps you can undo has a limit. We show how to adjust this limit in Chapter 22.

Figure 9-55 shows the entries in the Image: Edit menu that let you undo actions. We recently used IWarp and the Blend tool, but we chose to undo Blend. The menu, therefore, displays options for undoing the IWarp filter or redoing the Blend. If we did anything else before IWarp, we could then undo that, and if we undo anything after Blend, we can redo it after redoing Blend.

The text of the first two entries in the menu depends on what you’ve done to the image. ![]() is the shortcut for undo, and
is the shortcut for undo, and ![]() is the shortcut for redo. Even if a transformation or filter was processor intensive, undoing and redoing are not.
is the shortcut for redo. Even if a transformation or filter was processor intensive, undoing and redoing are not.
But computers have limited storage space, so GIMP has some limitations:
If you undo something and then change the image, you cannot redo the operation. The undo history is like a path that forks every time you make a change to the image. If you turn around and go back (using undo) and then make a change, you are heading down a new fork, and the steps you took along the previous path are lost.
Some operations cannot be undone, especially those dealing with saving and loading an image. If you save an image, close it, and then reload it, the undo history is lost. Reverting an image closes the image and then reloads it, so reverting cannot be undone.
Some complicated selection tools, like the Scissors Select tool or the Free Select tool, don’t allow you to undo while building a selection. You can undo the selection when you’ve completed it, but you cannot undo a step during its construction.
Most filters and plug-ins have full undo capabilities, but some external plug-ins don’t work properly and can even corrupt the undo history. Canceling a plug-in while it’s running can also corrupt the undo history.

The FADE entry in the Edit menu is usually grayed out. Fade is only available after you’ve just used the Bucket Fill tool, the Blend tool, or a few of the filters. Its dialog is shown in Figure 9-56. Fade modifies the blending mode and the opacity of the last operation. For example, after applying the Bucket Fill tool in normal mode with full opacity, you can change the mode to Screen and reduce the opacity using Fade. Since fading is a modification, Fade doesn’t add a step to the undo history. Unlike most things in GIMP, Fade is blocking: Once you begin, you must either fade or cancel. You can’t do something else and then return to the Fade dialog.
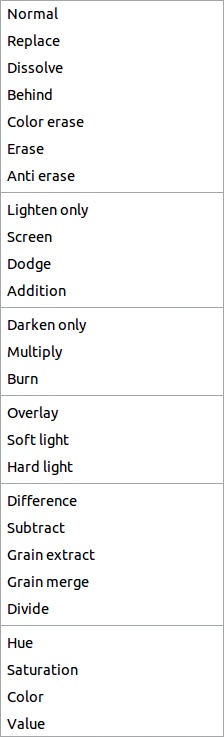
As Figure 9-57 shows, all the layer-blending modes are available, plus BEHIND and COLOR ERASE, which are available only for painting tools, and REPLACE, ERASE, and ANTI ERASE. The effect of the mode and the opacity can be seen immediately, but the effects become permanent only when you click the FADE button.
The last entry in Figure 9-55 opens the Undo History dockable dialog, shown in Figure 9-58. This dialog initially appears in the multi-dialog window and shows all the actions that you can undo. The first state of the image is at the top of the list, and the last one that can be restored is at the bottom. If you click a state, it becomes the current one.
The three buttons in the bottom row, from left to right, let you undo, redo, or clear the undo history. Clearing the history isn’t advisable unless you are in dire need of memory space.