
Layer groups are a new feature in GIMP 2.8, and the concept is still evolving.
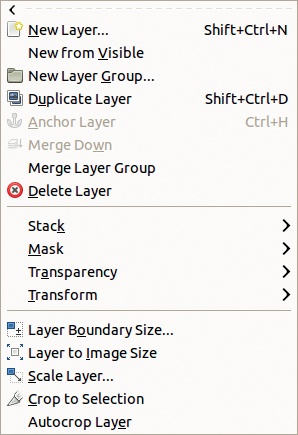
To create a new layer group, click the corresponding button in the bottom of the Layers dialog or use Image: Layer > New Layer Group or Layers: right-click > New Layer Group.
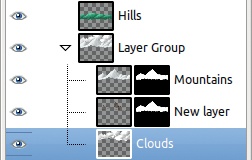
The layer group appears just above the current layer and is initially empty. A good idea is to immediately give it a meaningful name. To add a layer to a group, click and drag it to the group in the layer stack. Do the same to move a layer out of its current group or to move an entire layer group around in the stack. You can also add a new layer to a layer group, using the corresponding button in the Layers dialog or the entry in the Layers menu. Click the small triangle to show (Figure 11-8) or hide (Figure 11-9) the contents of the group. A layer group can be placed within another layer group.
A layer group is a useful way to organize the layers in a complex image. The following operations can be done on a layer group:
Locking the pixels
Changing the group opacity
Toggling visibility with the eye icon
Toggling layer links with the chain icon
Moving the group in the layer stack
Moving the layers with the Move tool
Applying a transformation to all layers (see Chapter 16)
Duplicating the layer group and its contents
Copying the layer group and its contents to another image by clicking and dragging it, or by copying and pasting it
Applying a layer blending mode to a layer group, which effects only the layers of the layer group
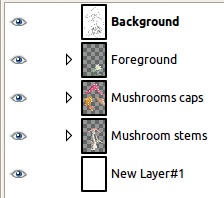
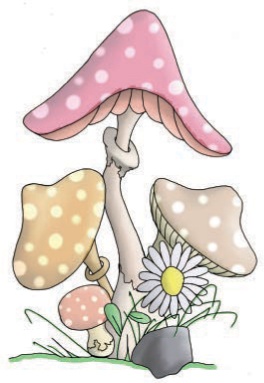
We’ll use the result of the tutorial from Chapter 3 to demonstrate the properties of a layer group. This image has 20 layers, which we organized as we built the image. Each of the four mushroom caps is composed of two layers, one of which contains a layer mask. The mushroom stems are composed of six layers. The flower and stone in the foreground are composed of four layers. Finally, there is a white background for the whole image, and another layer on the top of the stack, named Background, which is in multiply blend mode and contains the original drawing. These layers can be organized intuitively into three layer groups: Mushroom stems, Mushroom caps, and Foreground. To do this without changing the layer order in the stack, click the New Layer Group button when the topmost layer of the future group is active, and then move layers into the group by clicking and dragging them to the upper layer or to an empty layer group. Figure 11-9 shows the result when these three layer groups are minimized.

You can hide a layer group by clicking its eye icon, or you can move all of its layers simultaneously using the Move tool (see Figure 11-10). If a layer group is hidden, the layers it contains are invisible and their eye icons are stroked out. You can also change the opacity of an entire layer group (see Figure 11-11).


All the layers in a layer group must be contiguous in the layer stack. This is not the case for linking layers. For example, let’s chain together the second layer of all mushroom caps, the one containing a layer mask and used to draw the spots on the caps (see Figure 11-12). Now we can move the linked layers together, but separately from the group, as shown in Figure 11-13 (compare with Figure 11-10). The linked layers can even be in different layer groups.
Layer groups are saved in an XCF file, independently from the individual layers. In GIMP 2.8, it’s possible to rotate or scale a layer group without rotating or scaling the individual layer components of the group. When the layer group is rotated or scaled, a floating selection is created with the result of the transformation, and the initial layer group is replaced with the merged, transformed components. The individual layers, however, are unchanged.