
The three cloning tools (Clone, Heal, and Perspective Clone) let you paint cloned content from an image onto another image or another area of the same image. Like other brush tools, these tools use the current paint dynamics. Here are the features shared by all three tools:
The
 key is used to set the starting point in the image to clone. -click the area that you want to clone. Then, use the current brush to “paint” the pixels from the place that you clicked onto the target.
MODE, OPACITY, BRUSH, SCALE, ASPECT RATIO, ANGLE, FADE OUT, and APPLY JITTER work the same way that they do for all other brush tools.
HARD EDGE works like it does with the Eraser tool: When it’s checked, the fuzziness of the brush is ignored.
The ALIGNMENT option is described later.
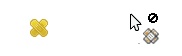
The Clone tool (![]() ) is the simplest and most broadly useful cloning tool. Its icon and pointer are shown in Figure 15-57. First select the source to clone by
) is the simplest and most broadly useful cloning tool. Its icon and pointer are shown in Figure 15-57. First select the source to clone by ![]() -clicking and then paint the target area. A thin cross marks the position that is cloned from the source layer.
-clicking and then paint the target area. A thin cross marks the position that is cloned from the source layer.
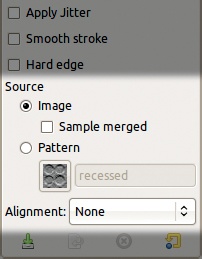
The options specific to the Clone tool are shown in Figure 15-58. These are SOURCE and ALIGNMENT.
SOURCE has two radio buttons:
IMAGE clones from a layer in an image that’s open in GIMP. The source can be in a different image or a different layer in the same image or even the same layer.
-click selects the initial position of the source. SAMPLE MERGED, if checked, makes all the visible pixels the source. When SAMPLE MERGED isn’t checked, only the active layer is used as the source, and transparent pixels are painted as transparent (and, therefore, have no effect).PATTERN clones from a pattern rather than an image, so it paints with that pattern. You can change the pattern by clicking in the corresponding field or in the Patterns dialog. No initial
-click is necessary.
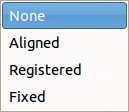
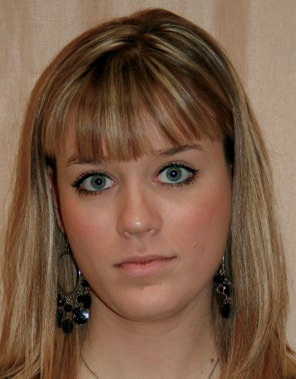
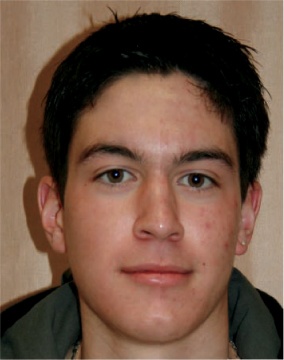
ALIGNMENT determines how the source is painted on as you move the brush. You have four choices, shown in Figure 15-59. To demonstrate, we’ll use a portrait (Figure 15-60) as the source and a plain white canvas as the target. We’ll apply the tool options shown in Figure 15-58. First, we ![]() -click the left eye and paint on the left side of the target image, and then we paint another eye shape on the right side of the image without changing the source.
-click the left eye and paint on the left side of the target image, and then we paint another eye shape on the right side of the image without changing the source.
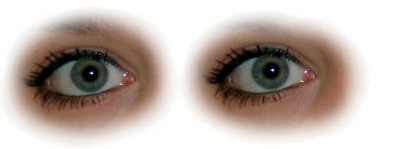
In Figure 15-61, ALIGNMENT is set to NONE, so every time we move the pointer to a different place in the target image, we start copying at the place that we last ![]() -clicked in the source image. In this case that meant we copied the left eye twice.
-clicked in the source image. In this case that meant we copied the left eye twice.


In Figure 15-62, ALIGNMENT is set to ALIGNED. With this option, when we move the pointer, the area being copied in the source image moves in the same way. This time when we paint on the right side, we copy the right eye rather than making a second copy of the left one.
In Figure 15-63, ALIGNMENT is set to REGISTERED. With this setting, the ![]() -click is irrelevant. The cloned pixels are in the same position in the source image as the pointer is in the target image, so even though we click the left eye again, we end up cloning the top of her head.
-click is irrelevant. The cloned pixels are in the same position in the source image as the pointer is in the target image, so even though we click the left eye again, we end up cloning the top of her head.
In Figure 15-64, ALIGNMENT is set to FIXED, so the source area is fixed by the ![]() -click. Since we click the eye, it’s copied over and over again as if it were a brush.
-click. Since we click the eye, it’s copied over and over again as if it were a brush.
If the source is a pattern, ALIGNED and REGISTERED both fill the painted area with the pattern. FIXED alignment uses the pattern as if it were a color brush. NONE (or no alignment) works like ALIGNED or REGISTERED alignment, except if you move the pointer, the pattern starts over, whereas in the other two modes, it continues seamlessly.
The Heal tool (![]() ) is like the Clone tool, but instead of replacing the pixels, it combines them. This tool is designed to smooth over blemishes in an image. Its icon and pointer are shown in Figure 15-65.
) is like the Clone tool, but instead of replacing the pixels, it combines them. This tool is designed to smooth over blemishes in an image. Its icon and pointer are shown in Figure 15-65.
The Heal tool options are the same as those of the Clone tool, but you can’t heal with a pattern. An example is shown in Figure 15-66. We chose a source point where the skin is smooth. Then we painted over blemishes to blend them away. We left the blemishes on the right side of the portrait for comparison. This tool requires a fair amount of processor power, so it may lag depending on your computer’s capabilities.

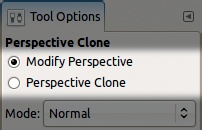
The Perspective Clone tool has no keyboard shortcut assigned to it. Its icon and pointer are shown in Figure 15-67. This tool basically combines the Clone tool and the Perspective tool (see Chapter 16). It has the same options as the Clone tool, except for a couple of additional radio buttons (Figure 15-68):
MODIFY PERSPECTIVE establishes the perspective: Click the image and then move the corners of the rectangle to set the perspective.
PERSPECTIVE CLONE actually clones objects in perspective after you’ve used MODIFY PERSPECTIVE mode.
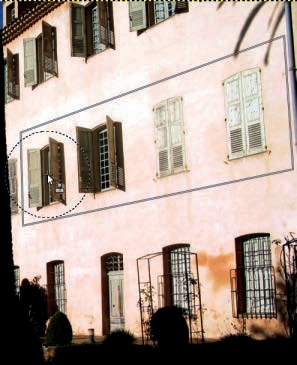
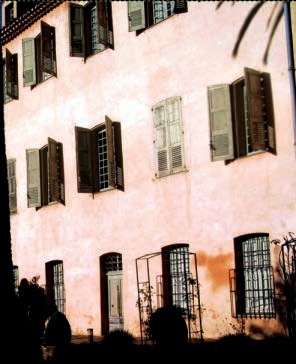
Figure 15-69 shows a house in Grasse, France. We want to replace the rightmost, closed window with the open window on the left. We set up the perspective as shown in the figure and ![]() -click the leftmost window. Next, we switch to PERSPECTIVE CLONE mode, and paint on the rightmost window, as shown in Figure 15-70.
-click the leftmost window. Next, we switch to PERSPECTIVE CLONE mode, and paint on the rightmost window, as shown in Figure 15-70.
This tool gives the best results if you clone simple geometric shapes and create a subtle perspective.