Two more tools that are useful in digital art and drawing are the Color Picker tool and the Measure tool.

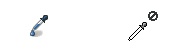
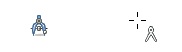
The Color Picker tool (![]() ) is used to choose a color from an image open in GIMP. Its icon and pointer are shown in Figure 15-101. After selecting the tool, click a color in an open image, and it becomes the foreground or background color. When you press the
) is used to choose a color from an image open in GIMP. Its icon and pointer are shown in Figure 15-101. After selecting the tool, click a color in an open image, and it becomes the foreground or background color. When you press the ![]() key while using a painting tool, the pointer temporarily acts as a color picker, but you can pick only one pixel in the current layer and set only the foreground color. When you release
key while using a painting tool, the pointer temporarily acts as a color picker, but you can pick only one pixel in the current layer and set only the foreground color. When you release ![]() , the painting tool is restored. Figure 15-102 shows the tool options.
, the painting tool is restored. Figure 15-102 shows the tool options.
SAMPLE AVERAGE, when checked, takes the average pixels in a square centered on the clicked pixel. Use the slider to set the radius of this square, which is outlined when you click in the image. Otherwise, only the clicked pixel is used.
SAMPLE MERGED, when checked, uses all the visible layers in an image; otherwise, only the current layer is used.
PICK MODE has four choices:
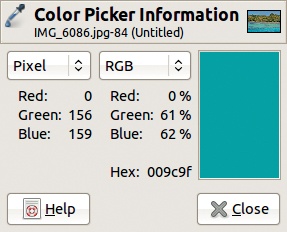
PICK ONLY shows information about the pixel you click in the Information dialog (Figure 15-103), but it does not change the foreground or background color.
SET FOREGROUND COLOR and SET BACK-GROUND COLOR let you choose which color to set, and you can toggle between these options with
 .
.ADD TO PALETTE sends the picked color to the active palette, using the Palette editor described in 22.7 Building New Palettes.
USE INFO WINDOW, when checked, opens the Color Picker Information dialog (Figure 15-103), which you can also open with
 . This dialog contains the following information:
A large rectangle containing the selected color.
The hexadecimal value of this color.
Two sets of more detailed information. By default, the information shown uses the RGB channel values as percentages. You can change the models to HSV, CMY, or CMYK.

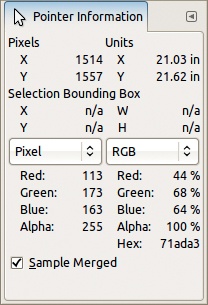
You can also get pixel information from the Pointer dockable dialog. Figure 15-104 shows an example. This dialog displays detailed information about the pointer’s current position. No option is available for sample averaging, and the SAMPLE MERGED option is checked by default. This dialog also displays the dimensions of the current layer and selection.
The Measure tool (![]() ) is used to measure a distance and angle in an image. Its icon and pointer are shown in Figure 15-105. Click an initial point to measure from and then drag to the final point.
) is used to measure a distance and angle in an image. Its icon and pointer are shown in Figure 15-105. Click an initial point to measure from and then drag to the final point.

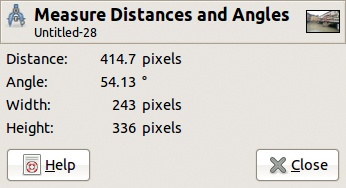
The results are displayed in the status bar at the bottom of the Image window, as shown in Figure 15-106. You can see the distance in pixels between the two points, the angle of the line with regard to the horizontal, and the dimensions in pixels of the rectangle drawn using the line’s end points. You can move the points into new positions, and the results reflect the new values.
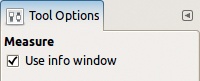
This tool has only one option, shown in Figure 15-107. If it’s checked, the tool opens a dialog, shown in Figure 15-108, which displays the same information that appears in the status bar of the Image window but with labels.