There are only three filters in the Generic menu, and only the first one has a dialog. The filters in this section are only vaguely related; all of them use a matrix to calculate new pixel values, which is a common property of filters. The truth is, the three filters in this menu are here because they didn’t fit anywhere else.
Convolution Matrix can rightly be called a generic filter, since it’s used to generate custom filters for blurring, sharpening, embossing, inverting, and much more.
The main part of the dialog, shown in Figure 17-135, is the MATRIX,a 5 × 5 array of numbers. The middle box corresponds to the current pixel. The other boxes correspond to the neighboring pixels. The filter works by multiplying every pixel near the current pixel, and the current pixel itself, by the corresponding factor in the matrix, then adding those numbers together, and dividing the total by the divisor. The process is similar to taking an average. If an offset is included, that number will be added to the calculated value. The result will be the new value for the current pixel.
The calculation is done separately for each of the three RGB channels and for the Alpha channel if there is one. Checkboxes on the right side of the dialog allow you to choose which channels are filtered. If the NORMALIZE box is checked, the divisor will be automatically set to the sum of the values in the boxes of the matrix, or 1 with an offset of 128 if the sum is zero. If the sum is negative, an offset of 255 is used.
When the current pixel is near the edge of the image, the missing pixels can be added in one of two ways: EXTEND duplicates the pixels on the border to fill the empty boxes; or WRAP takes pixel values from the opposite border, as if the image were wrapped around a cylinder.
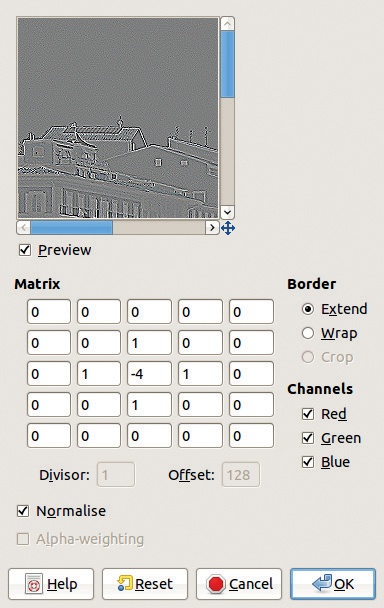
The ALPHA-WEIGHTING box, if checked, includes the Alpha channel of the current pixel when calculating new pixel values.
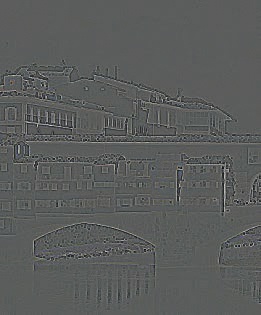
Since this is such a flexible filter, an entire chapter (at least) would be needed to show all the possible interesting uses. For the sake of space, we picked one example: an edge-detect type of filter, shown in Figure 17-136. We also used the Levels tool to improve the result.


Dilate uses a simple, preset 3 × 3 matrix. The value of the central pixel is changed to the highest value of the eight neighboring pixels. Figure 17-137 shows the result after three applications of the filter.
Erode works the same as Dilate, but it takes the lowest value of the neighboring pixels as the new pixel value. Figure 17-138 shows the result after three applications of the filter.