
As you saw when we painted the peach and the pear, shading and smudging can greatly improve the look of digitally painted objects. Dodging, burning, and smudging are common ways to add finishing touches to elements in your digital art.
As you saw in the tutorial, you can use dodging and burning to add shadows and highlights to a drawing.
Switch between dodging and burning with the TYPE option or the ![]() key. Remember that the Dodge tool lightens, and the Burn tool darkens. When you go over an area several times, each stroke increases the effect.
key. Remember that the Dodge tool lightens, and the Burn tool darkens. When you go over an area several times, each stroke increases the effect.


To create a shading gradient, you could burn a large area lightly and then reburn (darken) a smaller area, and so on. Alternatively, you can start by burning a small area that will be the darkest and then burn it again and enlarge the area, and so on, as shown in Figure 3-73 to Figure 3-75.
Figure 3-76 and Figure 3-77 show the last two steps: smudging and dodging.
You could apply just one coat of dodge or burn and then smudge it into the base color, but the result won’t be as natural. The RANGE option changes how great an effect one coat has. Although painting on shadows gives you greater control, the Dodge/Burn tool does a pretty good job without much time or effort.


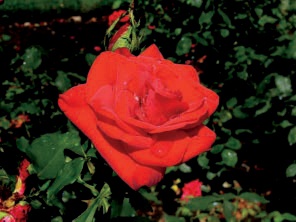
You can also use dodging and burning to make a subject stand out in a photograph, as shown in Figure 3-78 and Figure 3-79. When you dodge or burn the background, the subject of the photo stands out. You can either select the subject with the Foreground Select tool (Image: Tools > Selection Tools > Foreground Select), invert the selection, and then burn it, or you can burn the background manually using a brush.

Figure 3-80 shows the effects of dodging and burning using the three different range settings: Shadows, Midtones, and Highlights. We started with a vertical stripe comprised of four tones. From top to bottom, the tones were dark, bright and fully saturated, light, and very pale. We made 18 copies of the stripe, arranged into groups of 3. Within each group, from left to right, one, two, or three coats of dodge or burn were applied. As you can see in the figure, half of the groups were dodged, and the other half were burned, using each of the three range settings.
Use the Smudge tool to soften transitions, hide objects, or even create textures. Earlier in this chapter, we used the Smudge tool to soften the color transitions after adding shading and highlights in The Airbrush Tool and after shading with the Dodge/Burn tool in the previous section.
You can also use the Smudge tool to achieve subtle color transitions, applying drop strokes of different colors and smudging them as traditional painters do. Start by covering an area with dense strokes of one color, which gradually thin, and then do the same with different colors in different areas so the colors bleed. Next, smudge in small circular strokes. Any white background that was showing through will blend in as well, lightening the area. Continue smudging until the whole image is done, and smudge again in larger circles to make the result smoother, but use caution. The final result in Figure 3-81 looks natural because some irregularities remain.


You can also use the Smudge tool to create fur, grass, or other similar textures. The little monster shown in Figure 3-82 has very sharp edges. If we smudge perpendicular to the edge, in swift, even strokes, we can make the little guy look furry, as shown in Figure 3-83.
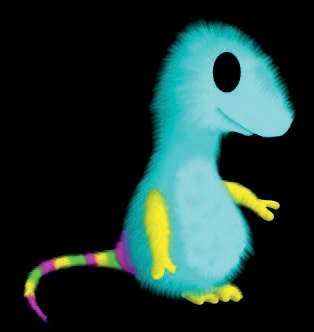

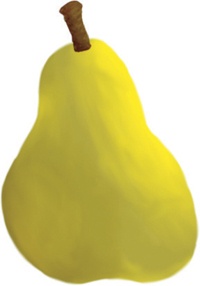


Figure 3-84 and Figure 3-85 show how the Smudge tool can create smoother transitions in the images from Figure 3-56 and Figure 3-57.