
An image loaded into GIMP is stored in the main memory of your computer, but when you save the image, it’s stored as a file. In this section, we discuss how you can load images from a file and save or export your images to a file.
The first part of the Image: File menu (see Figure 9-31) deals with creating or opening an image. In this section, we look at the first two entries, which let you create a new image.
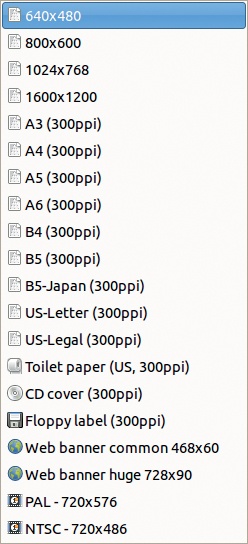
When you select Image: File > New or press ![]() , the dialog shown in Figure 9-32 appears. Click ADVANCED OPTIONS to expand the dialog as shown. The suggested IMAGE SIZE is either that of the current image, if there is one, or the last size used for creating a new image. The TEMPLATE drop-down menu, which offers several predefined sizes and resolutions, is shown in Figure 9-33. If you choose a template, the two buttons below HEIGHT let you swap the width and height.
, the dialog shown in Figure 9-32 appears. Click ADVANCED OPTIONS to expand the dialog as shown. The suggested IMAGE SIZE is either that of the current image, if there is one, or the last size used for creating a new image. The TEMPLATE drop-down menu, which offers several predefined sizes and resolutions, is shown in Figure 9-33. If you choose a template, the two buttons below HEIGHT let you swap the width and height.
Under ADVANCED OPTIONS, you can choose the X and Y resolution. The default value is 72, but change it to either the screen resolution or the intended printing resolution. You can also choose between RGB color or grayscale. Initially, the image must be filled with something, and you can choose the background color, foreground color, white, or transparency. Finally, you can add a comment if you want. When you click OK, the new image is created.

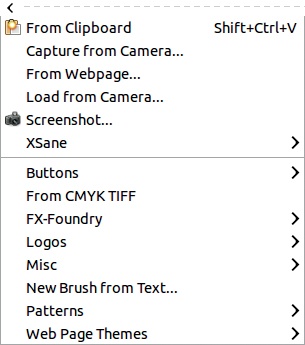
Image: File > Create opens the menu shown in Figure 9-34. The first entry is discussed in Chapter 13, and the next five entries are covered in Chapter 19, except the entry FROM WEBPAGE, described below. Some of these entries are only present if you have the XSane plug-in installed. The entries in the lower half of this menu open tools that automatically create new images designed to be buttons, logos, brushes, and so on. We cover these tools briefly in Chapter 21.
Image: File > Create > From Webpage opens the dialog shown in Figure 9-35. Enter the URL of the page you want to download (the official GIMP site is entered by default). You can enter the width in pixels of the image to be built, such as the width of the browser window. For the FONT SIZE, you can choose between five predefined sizes, from TINY to HUGE, which will also change the size of the image.
When you press CREATE, the page is downloaded, rendered into an image, and opened in GIMP. If, for example, you leave all parameters to their default values, you’ll get an image of the GIMP home page that’s 1024 × 4066 pixels. Opening a web page as an image is a good way to control how it prints, since you can resize it in GIMP.
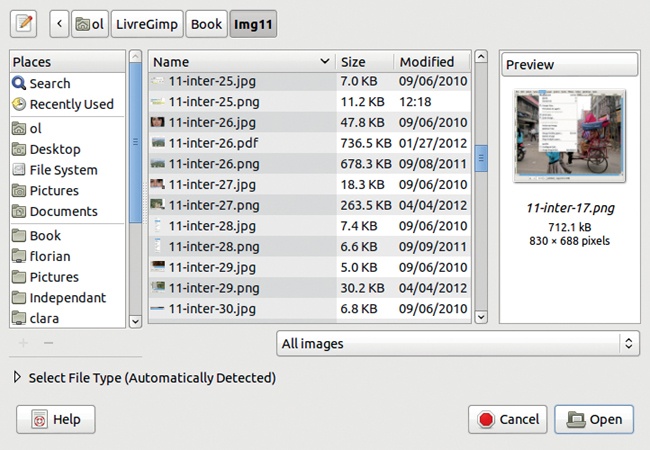
The next four entries in the Image: File menu (see Figure 9-31) deal with opening an existing file. Selecting Image: File > Open or pressing ![]() opens the dialog shown in Figure 9-36. Because we already discussed this dialog in Chapter 1 and earlier in this chapter, here we present only what we didn’t cover previously. The lower part of the PLACES pane contains bookmarks, which are saved paths. For example, you might bookmark the folder where you generally store photos. You can add or remove bookmarks with the ADD and REMOVE buttons. To add a bookmark, select the directory in the middle panel and then click ADD. To remove it, select it in the left panel and then click REMOVE. If you’re on a GNU/Linux platform with the GNOME desktop environment, you can also manage your bookmarks outside of GIMP.
opens the dialog shown in Figure 9-36. Because we already discussed this dialog in Chapter 1 and earlier in this chapter, here we present only what we didn’t cover previously. The lower part of the PLACES pane contains bookmarks, which are saved paths. For example, you might bookmark the folder where you generally store photos. You can add or remove bookmarks with the ADD and REMOVE buttons. To add a bookmark, select the directory in the middle panel and then click ADD. To remove it, select it in the left panel and then click REMOVE. If you’re on a GNU/Linux platform with the GNOME desktop environment, you can also manage your bookmarks outside of GIMP.
The button below the right panel opens the menu shown in Figure 9-37, which lists all the image formats, or file types, that GIMP can open. You can choose to look for only certain types of images.
If you click SELECT FILE TYPE, you get a list of all the available file formats with the corresponding extensions. Let GIMP automatically detect the file type because GIMP knows how to do this reliably, using the file’s internal characteristics. The extension is not what determines the file type.
Image: File > Open as Layers (![]() ) opens the same dialog, but the file you select is inserted into the current image as a new layer (or layers, if the image you’re opening is a multilayer image).
) opens the same dialog, but the file you select is inserted into the current image as a new layer (or layers, if the image you’re opening is a multilayer image).
Image: File > Open Location opens the dialog shown in Figure 9-38. You can paste a file path into the field, but clicking and dragging the image from the browser to the Toolbox (to open it as a new image) or to the current image (to open it as a new layer) is generally simpler.
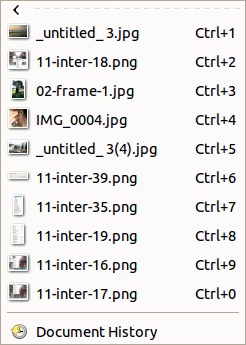
Image: File > Open Recent opens a menu similar to Figure 9-39. The last 10 images you opened are listed, which you can also open using ![]() ,
, ![]() , and so on.
, and so on.


The last entry in the Open Recent menu opens the dockable dialog shown in Figure 9-40, which allows you to browse the list of the most recent images you opened. The list can contain hundreds of images, but no image occurs more than once in this history. If you open an image that was opened previously, its entry is moved to the top of the list.
You can search for an image in the list by name using ![]() . A small field opens at the bottom of the list, and while you type, GIMP shows the first name beginning with the string you typed.
. A small field opens at the bottom of the list, and while you type, GIMP shows the first name beginning with the string you typed.
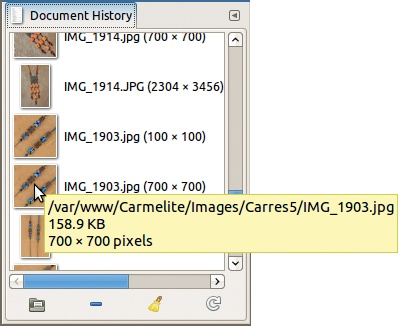
If you hover over a thumbnail, a message pops up with some general characteristics of the image (see Figure 9-41).
Right-clicking a thumbnail opens the menu shown in Figure 9-42, which lists some common actions. You can open the image as a new image, raise it if it’s already open but hidden by other windows, open the File Open dialog with this file already selected, copy the image location to the clipboard, remove the thumbnail from the history, clear the full history, refresh this thumbnail, refresh all thumbnails, and clear the history of dangling entries, which are entries corresponding to files that no longer exist.
The four buttons in the bottom row of the Document History dialog let you do the following:
Open the image (the leftmost button). If the image is already open, press
 along with this button to bring it to the front. You can also press
  and this button to open the File Open dialog.
Remove the selected entry (the button second from the left).
Clear the entire document history (the button second from the right).
Refresh the thumbnails (the rightmost button). Press
and this button to refresh all thumbnails, or press and this button to remove the dangling entries.

If a thumbnail doesn’t appear next to the image name, click to see one or double-click to open the corresponding image.
The second part of the Image: File menu (see Figure 9-31) lets you save images. If an image has been changed since you last saved it, an asterisk appears in front of its name in the title bar of the Image window. If you try to close an image without saving changes, the dialog we saw in Figure 9-20 appears. You can choose to save the file before closing it, to cancel closing, or to discard the changes. If you discard the changes, you can’t get them back.
In versions 2.6 and earlier, you could save an image in any of the output formats available. If the format was unable to represent all the information in the image, the information was discarded. If the image contained layers and the chosen format was unable to represent layers, a warning message was displayed, but after that, the image was saved without the layers. With version 2.8, you can save only in the XCF format, GIMP’s native format, which can represent all the information contained in an image, including paths, layers, and layer groups. You can export an image in a variety of formats, but unless you save in XCF, some information will be lost, and GIMP warns you before closing the image. For example, if you add a legend to a photo, saving it as XCF saves the new text layer added for the legend. Thus you can later change the text of the legend or its presentation, which would be impossible in a JPEG image in which the text layer would be merged with the photo itself.
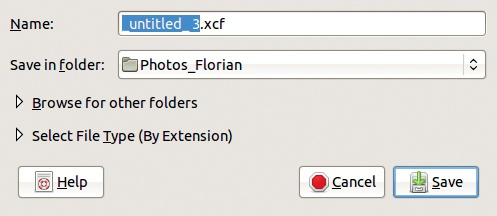


SAVE AS or ![]() opens the dialog shown in Figure 9-43. You can change the name of the file and change the path. You can select any folder or select from those you have bookmarked. The file type is automatically XCF because you’re saving rather than exporting. If you try to change the file type, you’ll get the message shown in Figure 9-44. If you expand SELECT FILE TYPE (BY EXTENSION), you get only the choices shown in Figure 9-45, which allow you to compress the file while saving it.
opens the dialog shown in Figure 9-43. You can change the name of the file and change the path. You can select any folder or select from those you have bookmarked. The file type is automatically XCF because you’re saving rather than exporting. If you try to change the file type, you’ll get the message shown in Figure 9-44. If you expand SELECT FILE TYPE (BY EXTENSION), you get only the choices shown in Figure 9-45, which allow you to compress the file while saving it.
Clicking BROWSE FOR OTHER FOLDERS expands the Save Image dialog to let you browse for existing folders or create a new one. If you choose a filename that already exists, GIMP warns you so you can change it or replace the existing file.


SAVE A COPY works like SAVE, except that GIMP asks for a filename (and location) and the current image isn’t changed or considered saved. If you plan to do anything that can’t be undone easily, saving a copy is a good idea.
REVERT is a somewhat dangerous command because it cannot be undone. Basically, it discards all changes made to the image since you last saved. A warning message appears, as shown in Figure 9-46, reminding you that all the changes and undo information will be lost.
The next section of the Image > File menu covers the export options. When exporting any image, some information is lost. If no current image is available or the image is XCF, the first entry is grayed out. If the current image has already been exported, the first entry (EXPORT TO) is replaced by OVERWRITE (see Figure 9-47 and Figure 9-48), and the word (exported) appears in its window title.
EXPORT (![]() ) is always available. This command opens a dialog similar to the Open Image dialog shown in Figure 9-36.
) is always available. This command opens a dialog similar to the Open Image dialog shown in Figure 9-36.


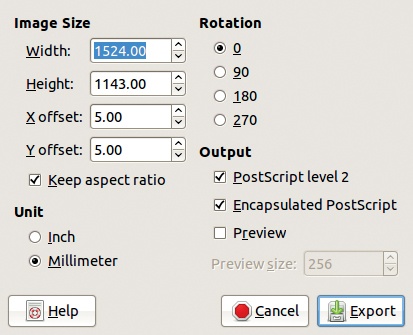
You can specify the file type by adding the appropriate extension to the filename or select a type via the SELECT FILE TYPE entry. All the major file types are available, and GIMP is even able to export to Photoshop. Although you cannot export to XCF from Photoshop, GIMP can read the PSD format. In addition to JPEG, GIF, and PNG, GIMP can export to PDF, Encapsulated PostScript (EPS), TIFF, and many other formats.
If the filename already exists, a warning message appears, and you can choose to cancel or overwrite the file. Depending on the output format, various dialogs appear. For example, Figure 9-49 shows the dialog for exporting to PNG, and Figure 9-50 shows the dialog for exporting to Encapsulated PostScript.
EXPORT TO (![]() ) uses the same name and file type as the last export, so no dialog pops up. This option is useful if you want to update an image that you’re working on that’s already been exported. If you’re doing a lot of work on an image that won’t be in XCF format, periodically save and export the image using
) uses the same name and file type as the last export, so no dialog pops up. This option is useful if you want to update an image that you’re working on that’s already been exported. If you’re doing a lot of work on an image that won’t be in XCF format, periodically save and export the image using ![]() and
and ![]() , keyboard shortcuts that work silently (that is, without opening any dialogs) after you’ve saved and exported the image once.
, keyboard shortcuts that work silently (that is, without opening any dialogs) after you’ve saved and exported the image once.

OVERWRITE is available when the image has been imported from a format other than XCF. It exports to a file with the same name and file type as the imported file. If you like, you can also export the file as a different file type.
CREATE TEMPLATE opens the dialog shown in Figure 9-51, which lets you create a new template. Saved templates can be selected from the dialog shown in Figure 9-32. The template is created from the dimensions, resolution, color space of the current image.
Manage the existing templates with the Templates dockable dialog, shown in Figure 9-52 (Image: Windows > Dockable Dialogs > Templates). The five buttons in the bottom row let you do the following:
Create a new image from the selected template.
Create a new template. Clicking this button opens the dialog shown in Figure 9-53 (with ADVANCED OPTIONS expanded). You can choose the name, size, resolution, color space, fill color, and even the icon for the new template. If you click the ICON button, you get a list of all the icons available in GIMP. Figure 9-54 shows a part of this list. The buttons in the bottom row zoom in or out and let you choose how the list is presented.
Duplicate the selected template, which opens the dialog shown in Figure 9-53 with the same parameters as the selected template.
Edit the selected template, which also opens the dialog shown in Figure 9-53, but this option allows you to change the parameters of an existing template.
Delete the selected template.

You can also access these options by right-clicking in the list of templates.