
In this section, we discuss the three main ways to interact with GIMP: opening a menu, using a keyboard command, and using the mouse to click and drag a component from one dialog to another.
You can open a menu from the Image window in three ways:
Click the menu name in the menu bar, as shown in Figure 9-29 (top).
Use the Image menu button in the top-left corner of the Image window, as shown in Figure 9-29 (middle).
Right-click the Image window, as shown in Figure 9-29 (bottom).
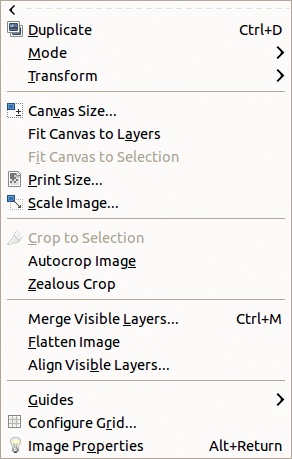
Menus that are opened from the Image menu button or from right-clicking the Image window display a dashed line at the top. If you click the dashed line, the menu becomes a separate window, as shown in Figure 9-30. This is handy if you need to use a menu multiple times. If you want to get rid of a detached menu, simply click the dashed line again. (You cannot detach a menu opened from the Image window menu bar.)
If you close the Image window from which the menu was detached, you should close the detached menu as well to avoid confusion.
Any image menu can be detached as long as it was opened by right-clicking or by pressing the menu button. Other menus, such as those opened from dockable dialogs, cannot be detached.
As you’ve certainly seen by now, GIMP gives you a number of ways to do the same task. Keyboard shortcuts are another way to access GIMP’s features and tools. They provide an alternative way to access menu entries or to toggle settings. For example, if you press ![]() or
or ![]() when scrolling with the mouse wheel in the Image window, you can zoom in or out or move the image horizontally on the canvas.
when scrolling with the mouse wheel in the Image window, you can zoom in or out or move the image horizontally on the canvas.

As with many other applications, you can use the ![]() key instead of the mouse to open a menu. Provided that the Image window is active, you’ll see that certain letters in the names of the entries in the Image window menu are underlined. Hold
key instead of the mouse to open a menu. Provided that the Image window is active, you’ll see that certain letters in the names of the entries in the Image window menu are underlined. Hold ![]() and press the corresponding key to open the corresponding menu. For example, in
and press the corresponding key to open the corresponding menu. For example, in File, the letter F is underlined, as shown in Figure 9-31, so pressing ![]() opens the File menu. Underlined letters in this menu can then be used to access submenus, but you don’t have to press the
opens the File menu. Underlined letters in this menu can then be used to access submenus, but you don’t have to press the ![]() key. For example, the letter
key. For example, the letter O in Open is underlined in the File menu. If you release ![]() and press
and press ![]() , the dialog for Image: File > Open appears. If the dialog that opens contains menu options with underlined letters, you need to press
, the dialog for Image: File > Open appears. If the dialog that opens contains menu options with underlined letters, you need to press ![]() to select the corresponding entries. For example, if you type
to select the corresponding entries. For example, if you type ![]() the Levels tool opens, AUTO is selected, and then the tool is applied. The same technique works for the other Image window menus, but in some cases, no letters are underlined, which means that none of the menu’s entries can be selected using the keyboard.
the Levels tool opens, AUTO is selected, and then the tool is applied. The same technique works for the other Image window menus, but in some cases, no letters are underlined, which means that none of the menu’s entries can be selected using the keyboard.
Figure 9-31 also shows the keyboard shortcuts for some menu entries displayed on the right. Many common GIMP commands are already associated with a keyboard shortcut, and you can also define your own or change existing shortcuts, as we explain in Chapter 22.

When you want to change a numerical value in an option field, like the size fields in the Create a new image dialog (see Creating a New Image), you can type an expression instead of a number. For example, if the field initially contains 640, type at its end *2 to get 1280, or +30 to get 670. You can also type 3000/7 to get 429. You can apply a percentage to the previous value or use different units in an expression, like 30in+40px or 4*5.4in. To check the result of the computation, use ![]() . To apply the result, use
. To apply the result, use ![]() .
.
As mentioned earlier, holding down the ![]() key and then clicking and dragging with the mouse is a handy way to move the image in its window.
key and then clicking and dragging with the mouse is a handy way to move the image in its window.
You can toggle the options for several tools by pressing ![]() ,
, ![]() , or
, or ![]() . For example, the Dodge/Burn tool alternates between Dodge and Burn when you press
. For example, the Dodge/Burn tool alternates between Dodge and Burn when you press ![]() .
.
Some keyboard shortcuts correspond to buttons rather than menu entries. For example, ![]() restores the foreground and background colors to their default values, and
restores the foreground and background colors to their default values, and ![]() swaps them.
swaps them. ![]() searches in the entries shown list-style in a dockable dialog.
searches in the entries shown list-style in a dockable dialog.
Some keyboard shortcuts are rather hidden but are useful to remember. ![]() opens and activates the Toolbox.
opens and activates the Toolbox. ![]() does the same for the Layers dockable dialog. Pressing
does the same for the Layers dockable dialog. Pressing ![]() zooms to 100%,
zooms to 100%, ![]() to 200%,
to 200%, ![]() to 400%,
to 400%, ![]() to 800%, and
to 800%, and ![]() to 1600%.
to 1600%.
For the selection tools (Chapter 13), pressing ![]() and/or
and/or ![]() before starting a selection toggles the available selection modes. For the Rectangle and Ellipse selection tools, if you press
before starting a selection toggles the available selection modes. For the Rectangle and Ellipse selection tools, if you press ![]() after starting a selection, the selection will be centered on the starting point. Pressing
after starting a selection, the selection will be centered on the starting point. Pressing ![]() or
or ![]() after starting a selection toggles different options.
after starting a selection toggles different options.
When using a drawing tool, pressing ![]() decreases the Opacity and
decreases the Opacity and ![]() increases it. Pressing
increases it. Pressing ![]() decreases the Size of the current brush,
decreases the Size of the current brush, ![]() increases it, and
increases it, and ![]() resets the Size to its initial value.
resets the Size to its initial value.
Pressing ![]() generally cancels a command and is equivalent to pressing the CANCEL button in the dialog. Pressing
generally cancels a command and is equivalent to pressing the CANCEL button in the dialog. Pressing ![]() opens the general GIMP Help, and
opens the general GIMP Help, and ![]() opens an interactive help mode. The cursor looks like a question mark, and you can click the menu or window that you want help with.
opens an interactive help mode. The cursor looks like a question mark, and you can click the menu or window that you want help with. ![]() allows you to edit a name and is equivalent to double-clicking the name. Pressing
allows you to edit a name and is equivalent to double-clicking the name. Pressing ![]() toggles between full-screen mode and normal mode.
toggles between full-screen mode and normal mode.
Another way to work with GIMP is by clicking and dragging. We already saw this earlier in the chapter when we dragged and dropped dockable dialogs to add them to or remove them from docks. Here are some other clicking and dragging shortcuts.
Dragging an image thumbnail to the Toolbox or to an empty Image window opens the corresponding file as long as it’s readable by GIMP. Dragging works with thumbnails of files stored on your computer or of images from a browser search, the Layers dialog, the Channels dialog, or even the Toolbox itself. Dragging an image thumbnail to an occupied Image window adds it as a new layer in the image.
Dragging the Toolbox image thumbnail to an XDS-compatible file manager saves the image as an XCF file.
Dragging a brush icon from the Brushes dialog to the Toolbox opens it in a new Image window, where you can edit it and then save it as a new brush. Again, if you drag the brush to an occupied Image window, the brush is applied as a new layer. You can do the same thing with a pattern, but if the pattern is dragged to an occupied Image window, it fills the current selection in the current layer.
You can click and drag layers up or down in the Layers dialog, and this also works for Channels and Paths.
In all dialogs with a delete icon at the bottom, dragging an item to this icon deletes it. Dragging to delete works in the Layers, Channels, and Paths dialogs; in a Palette Editor dialog; and in the Paint Dynamics, Patterns, and Gradients dialogs, as long as the dynamics, brush, palette, or gradient is user generated.
Dragging a color swatch to an occupied Image window fills the current selection with that color. Dragging works for the foreground and background colors in the Toolbox and for the components of a Palette Editor dialog. Dragging a color swatch to the Gradient Editor inserts this color into the gradient wherever it is dropped.
You can do many more things by simply clicking and dragging—actions that are generally quite intuitive.
