A layer mask is a grayscale image attached to a specific layer; it is the same size as that layer. The mask’s pixels set the transparency of the corresponding pixels in the layer. A white pixel in the mask specifies that the corresponding pixel in the image is completely opaque, and a black pixel specifies full transparency. A gray pixel specifies partial opacity. The pixel’s color components are unchanged, so a pixel can be strongly colored and completely transparent at the same time. This means that in a layer with a layer mask, every pixel requires 4 bytes.

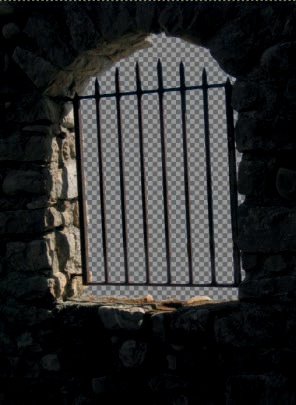
Start with the image shown in Figure 14-18. Select Image: Layer > Mask, and the menu shown in Figure 14-19 appears. The same menu, minus the last three entries, can also be selected via Layers: right-click.
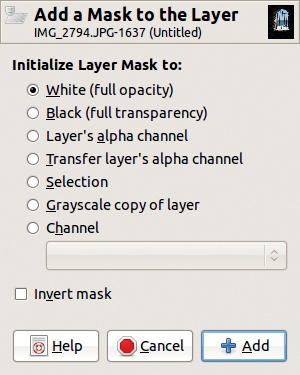
Select Add Layer Mask, and the dialog shown in Figure 14-20 appears. Several options are available for the layer mask’s initial contents:
WHITE (FULL OPACITY): The mask appears as a white thumbnail in the Layers dialog just beside the layer thumbnail. Because all its pixels are white, the layer is completely opaque, and the image looks no different. Note that this does not prevent us from manipulating the OPACITY slider in the Layers dialog, which is independent of the mask. This slider operates in combination with the layer’s MODE to specify how its pixels are combined with the underlying layers. This opacity is a characteristic of the layer, not of the individual pixels.
BLACK (FULL TRANSPARENCY): The mask appears as a black thumbnail, and the layer becomes fully transparent. Now wherever you paint on the mask with white, areas of the layer reappear. Figure 14-21 shows the Layers dialog of an image we created to demonstrate this. We loaded a photograph, added a new white layer, moved it down in the layer stack, and added a black layer mask to the top layer. Then we painted in white on the mask with the Paintbrush tool, using the
Hardness 075brush in a large size. In the resulting image, shown in Figure 14-22, the transparent areas of the top layer appear white because of the white background layer, whereas the areas where we painted on the layer mask are filled with the contents of the top layer.LAYER’S ALPHA CHANNEL: If the layer already has an Alpha channel, its contents are copied to the layer mask. Note that the Alpha channel remains intact.
TRANSFER LAYER’S ALPHA CHANNEL: This does the same thing as the previous entry, but the Alpha channel is reset to full opacity.
SELECTION: As stated previously, a selection is a grayscale image. This image is copied to the layer mask. The selected pixels are opaque; the unselected pixels are transparent.
GRAYSCALE COPY OF LAYER: The current contents of the layer are converted to a grayscale image and used for initializing the layer mask. Most of the pixels in the image are partially selected, and the level of selection is proportional to the pixel’s value. White pixels are fully selected, and darker pixels are selected to a lesser degree.
CHANNEL: If at least one channel exists, use it to initialize the layer mask. Select a channel from the menu that appears.

INVERT MASK inverts the mask. The transparent parts become opaque, and vice versa.
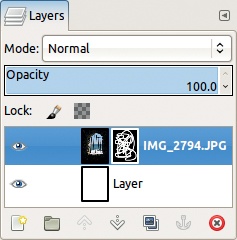
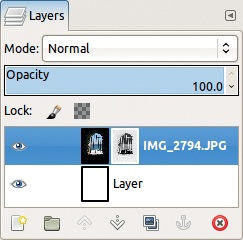
When the layer mask is created, the Layers dialog changes, as shown in Figure 14-23. A thumbnail of the mask appears to the right of the layer thumbnail. It’s enclosed in a white frame to show that it’s active, whereas the layer thumbnail is enclosed in a black frame.
Here, choose a grayscale copy of the layer as a mask and invert it. The result, shown in Figure 14-24, is that the parts of the image that were very dark are now much more visible because they are highly selected and thus opaque. But the sea landscape is now pale and dull because the layer’s light pixels are now almost transparent and reveal the white layer underneath.

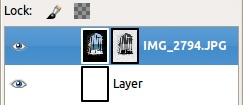
When the layer mask is active, all tools operate only on it, not on the layer itself. To toggle between the mask and the layer, click the corresponding thumbnail in the Layers dialog. The white frame always shows whether the layer or the mask is active. In Figure 14-25, the layer is active.
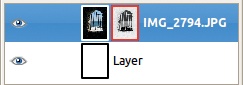

To hide the effect of the layer mask without deleting it, ![]() -click the mask thumbnail. Its frame is now red, as shown in Figure 14-26, and the mask effect is temporarily canceled. If you
-click the mask thumbnail. Its frame is now red, as shown in Figure 14-26, and the mask effect is temporarily canceled. If you ![]() -click again, the mask is activated.
-click again, the mask is activated.
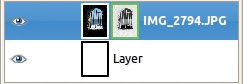
To see the mask itself, ![]() -click the mask thumbnail. Its frame is now green, as shown in Figure 14-27, and the Image window displays the mask as a grayscale image, as shown in Figure 14-28. Notice the green dotted line framing the image; this tells you a layer mask is active. If you
-click the mask thumbnail. Its frame is now green, as shown in Figure 14-27, and the Image window displays the mask as a grayscale image, as shown in Figure 14-28. Notice the green dotted line framing the image; this tells you a layer mask is active. If you ![]() -click again, the layer reappears.
-click again, the layer reappears.

You can also create, edit, or activate a layer mask via the Image: Layer > Mask menu, as shown in Figure 14-29. The checkboxes give you simple tools to display and manipulate a layer mask, and the remaining entries in this menu (and in the Layers: right-click menu) relate to the ways you can use a layer mask:
APPLY LAYER MASK: Save the effect of the layer mask in the layer’s Alpha channel, and delete the layer mask. This change should be the last one you make to a layer. Prior to applying the mask, the layer itself is unchanged—regardless of what you do to the layer mask.
DELETE LAYER MASK: Discard the layer mask; this has no effect on the layer itself.
MASK TO SELECTION: Convert the layer mask to the current selection. Where the mask’s pixels are white, the associated layer’s pixels are selected; where they are black, the layer’s pixels are deselected. But mask pixels with intermediate values lead to partially selected pixels in the associated layer. A selection is thus initiated, but the layer and the mask remain unchanged.
ADD TO SELECTION, SUBTRACT FROM SELECTION, and INTERSECT WITH SELECTION also convert the mask to a selection. Whereas Mask to Selection replaces the current selection, these three entries allow you to combine the new selection with the previous selection in various ways. These entries do not appear on the Layers: right-click menu.
The following example uses two layers with layer masks and two ordinary layers to create the composite image shown in Figure 14-30. Take the following steps to transform the image:
Open the photograph shown in Figure 14-18, and choose the Select by Color tool. Click the sky and then the sea and foam while pressing the
 key to select all of the landscape behind the window—except the rocks in the lower right. To select them as well, use Quick Mask, and this time use the Pencil tool to paint the rocks white. The Pencil tool works like the Paintbrush but without feathering or antialiasing.
When the selection is complete, add a layer mask to the background layer and initialize it with the inverted selection. Now the full window opening is transparent (Figure 14-31).
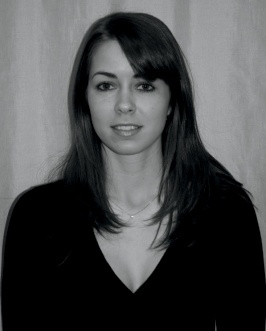
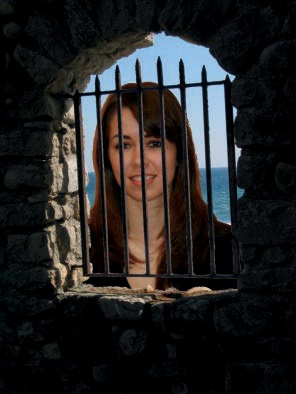
Add a new layer to the image using the photograph shown in Figure 14-32. Because this image is much larger than the previous one, scale this new layer to the canvas size with Image: Layer > Scale Layer.
Using the Fuzzy Select tool, click several times while pressing
to select the portrait’s background. Then add a layer mask to this layer, and initialize it with the selection (not inverted). The result is shown in Figure 14-33.Duplicate the layer containing the window, and delete its layer mask. You can see the scenery behind the subject has been retained. Reorder the layers as shown in Figure 14-34, and discard the white background layer.