We briefly discussed tool presets earlier in the chapter, but let’s take a closer look at them now. Tool presets are a new feature of version 2.8, and they are especially powerful when combined with brushes and paint dynamics.
Figure 15-109 (inspired by Ramón Miranda) shows how tool presets, brushes, and paint dynamics interact. In the Paintbrush’s tool options dialog (1), click the DYNAMICS button (2) to open a temporary menu of the available paint dynamics. From this menu, you can select the dynamic you want or click the button in the bottom-right corner to open the Paint Dynamics dialog (3). In this dialog, you can use the tag field only to select the dynamics of some category, here FX. You cannot edit the settings of a predefined dynamic like Confetti, but you can edit a copy of it by pressing the button labeled (4) in the Paintbrush tool options dialog. This opens the Paint Dynamics Editor (5).
In Figure 15-109, the Paint Dynamics Editor dialog appears twice. The top copy (5) shows the Mapping matrix (6) for the chosen dynamic. In this example, you see a checked box at the intersection of the SIZE row and the RANDOM column. When you display the SIZE parameters in the Paint Dynamics Editor (7), you see that the corresponding answer curve is not linear at all.
If you’re satisfied with your current settings for the Paintbrush tool and want to save them, click the bottom-left button in the Paintbrush tool options dialog to open the Tool Preset Editor (8). Here, you can choose the name of the new tool preset and its icon. If you click the suggested icon, you get a list of the many icons available, the same as in Figure 9-54. More important, you can choose what settings to save. In this example, the current foreground and background colors are not saved because the colors are selected at random in the chosen gradient. The current brush, dynamics, and gradient are saved because they are fundamental to this FX Confetti preset. Finally, the current pattern, palette, and font are irrelevant with the Paintbrush tool.
The Tool Presets dialog (9) is opened by selecting Image: Windows > Dockable Dialogs > Tool Presets. You can also open the Tool Preset Editor by clicking the first button in the bottom row of the Tool Presets dialog.
As you’ve seen, GIMP comes with 17 predefined paint dynamics. The Basic category contains seven dynamics:
Basic Simplelinks Opacity to Pressure and Angle to Random in the Mapping matrix of the Paint Dynamics Editor, which means that for a round brush, only opacity varies. The Angle-Random answer curve begins in the middle of the square, so the angle changes even if random is null.Dynamics Randomlinks Size to Random.Negative Size Pressurehas the same settings asBasic Simple, plus a link from Size to Pressure, with an inverted linear answer curve, which makes the drawing more transparent when you press more on the stylus.Pencil Genericis a complex dynamic that links Opacity to Pressure and Velocity (steep answer curve), Size to Pressure (concave answer curve), Angle to Direction, Force to Pressure, and Jitter to Pressure and Velocity (concave answer curve).Pencil Shaderhas the same settings asBasic Simple. Only the answer curves are different: Opacity-Pressure is steeper in the middle, and Angle-Random is simply linear.Pen Genericlinks Opacity to Pressure, Velocity, and Fade; Size to Pressure and Velocity; and Angle to Random. The Size-Pressure answer curve is almost linear up to the middle and then decreases to zero for the maximum pressure. The Size-Velocity curve is concave.Pressure Opacitylinks Opacity to Pressure, first with a concave and then a convex answer curve.

The FX category contains three Paint Dynamics:
Confettiis a complex dynamic, with Size, Angle, and Color linked to Random, and Hardness and Aspect ratio linked to Pressure. The Angle-Random answer curve is linear and begins in the middle.Perspectivelinks Opacity and Aspect ratio to Pressure and links Angle to Direction. All the curves are linear.Speed Size Opacitylinks Opacity to Pressure, Size to Pressure and Velocity, and Angle to Direction.
Finally, seven dynamics have no category. Their answer curves are linear unless otherwise noted:
Basic Dynamicslinks Opacity to Pressure and Fade, Size to Velocity, and Angle to Tilt. This dynamic is the most natural for simple painting.Dynamics Offhas an empty mapping matrix. Select this dynamic when you want no effect at all.Fade Taperinglinks Opacity and Size to Fade.Random Colorlinks Color to Random.Tilt Anglelinks Angle to Tilt and is useful only with a tablet that records the pen tilt.Track Directionlinks Angle to Direction.Velocity Taperinglinks Opacity and Size to Velocity.
You can extend this set of paint dynamics as needed. Use the predefined dynamics as models. Avoid defining a dynamic with too many checked boxes in its mapping matrix because its behavior will be difficult to predict.
Several of the predefined paint dynamics are especially handy when combined with some predefined tool presets, as you’ll see in Predefined Tool Presets.

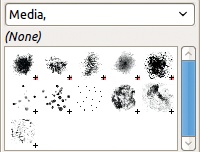

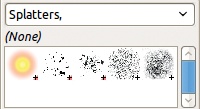
As already mentioned, GIMP’s 54 predefined brushes are divided according to their tags: Basic, Media, Sketch, Splatters, Texture, and Legacy (Figure 15-110 to Figure 15-115) .
You can define your own brushes, as detailed in 22.4 Building New Brushes. Any brushes you’ve created are listed first in the Brushes dialog, followed by the predefined brushes, which are listed in alphabetical order. A brush’s appearance in the list depends on its tag filter at the top of the dialog. Remember that when no tag is specified, the first brush in the dialog is the contents of the clipboard cropped to a maximum size of 512 × 512.


A wide variety of brushes is available on the Web at, for example, http://www.noupe.com/how-tos/1000-free-high-resolution-gimp-brushes.html and http://www.pgd-design.com/gimp/br.php. The Gimp Paint Studio (http://code.google.com/p/gps-gimp-paint-studio/) offers a large collection of brushes specifically designed for GIMP.
Brushes designed for Photoshop can also be used in GIMP. Simply place the downloaded brushes into you GIMP’s brushes folder, and refresh the Brushes dialog by pressing the button at the bottom.
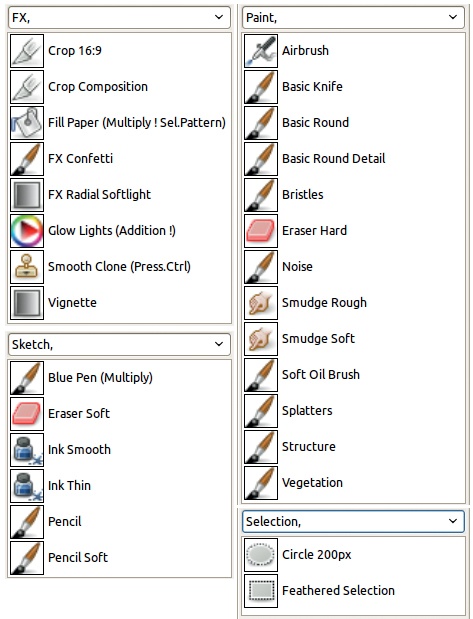
GIMP now contains 29 predefined tool presets, divided into 4 categories.
FX contains eight presets (top left of Figure 15-116):
Crop 16:9crops in a 16:9 ratio.Crop Compositionapplies the Crop tool without any setting other than HIGHLIGHT and RULE OF THIRDS.Fill Paper (Multiply! Sel. Pattern)opens the Bucket Fill tool in Multiply mode, selecting thePaperpattern (Figure 15-117) with an opacity of 50%.FX Confettiopens the Paintbrush tool with the1.Pixelbrush, theConfettipaint dynamics, theTropical Colorsgradient, and a significant jitter (Figure 15-118).FX Radial Softlightapplies the Blend tool with theFG to Transparentgradient in SOFT LIGHT mode and a RADIAL shape. You can choose the foreground color. From Figure 15-119, we achieved Figure 15-120 by choosing a bright green for the foreground color and placing the center of the gradient on the sun.Glow Lights (Addition!)opens the Paintbrush tool at 40% opacity and in ADDITION mode, using theHardness 050brush and thePressure Opacitypaint dynamics. The brush size is set to 400, and the INCREMENTAL box is checked. For example, if we take Figure 15-121, we can get Figure 15-122 by choosing a bright green color and drawing across the image with increasing pressure.Smooth Clone (Press Ctrl)opens the Clone tool with all default options, except SIZE set to 150, theDynamics Offpaint dynamics, and the SAMPLE MERGED box checked. Choose your brush, preferablyHardness 075orHardness 050, and begin cloning.Vignetteopens the Blend tool in MULTIPLY mode at 75% opacity, using theFG to BG (RGB)gradient, a RADIAL shape with an OFFSET of 25, and the DITHERING box checked. It simulates the so-called vignette effect produced by old-time, low-value cameras.


Paint contains 13 presets. All these presets but the last two use the Pressure Opacity paint dynamics. These tool presets differ in terms of the tool and brush they apply and the various tool options settings mentioned next. They constitute a set of daily tools with carefully chosen characteristics ideal for painters.
Airbrushuses theHardness 050brush with a SIZE of 500 and sets RATE to 30 and FLOW to 10.Basic Knifeapplies the Paintbrush tool (as do the next three presets) with theBlock 03brush and a SIZE of 180.Basic Rounduses theHardness 100brush with a SIZE of 80.Basic Round Detailuses theHardness 075brush with a SIZE of 20.Bristlesuses theBristles 01brush with a SIZE of 60. This tool simulates drawing as if with an old toothbrush.Eraser Harduses theBlock 01brush with a size of 80 to erase with a strong square eraser.Noiseuses the Paintbrush tool with theSponge 01brush with a size of 450 and an ANGLE of 90, which is meaningful only if you change the ASPECT RATIO.Smudge Roughuses theAcrylic 01brush with an OPACITY of 50 and a SIZE of 100, with the RATE set to 60.Smudge Softis the same asSmudge Rough, except it uses theHardness 050brush.Soft Oil Brushand the next three presets use the Paintbrush tool.Soft Oil Brushapplies theOils 02brush with a SIZE of 80. It simulates painting with oil paint.Splattersapplies theSplats 01dynamic brush with a SIZE of 200. It simulates the result of shaking your brush above your canvas.Perspectiveapplies theStructurebrush with a SIZE of 283.55, using thePerspectivePaint Dynamics. Use this preset to draw strokes that follow the shapes of forms on the canvas.Vegetationapplies theVegetation 02dynamic brush with a SIZE of 250 and thePressure Opacitypaint dynamics (Figure 15-123).
Selection contains two presets, handy for two common situations. Use these presets to generate your own ideas for defining presets:
Circle 200pxcreates a circular selection with a diameter of 200 pixels. The ANTIALIASING box is checked.Feathered Selectionopens the Rectangle Select tool with the ANTIALIASING, FEATHER EDGES (RADIUS set to 25), and ROUNDED CORNERS (RADIUS set to 50) boxes checked. The guides are set to CENTER LINES.


Sketch contains six presets, similar to the Paint presets:
Blue Pen (Multiply)applies the Paintbrush tool in MULTIPLY mode with OPACITY set to 75%, theHardness 075brush at SIZE 15, and thePen Genericpaint dynamics. The foreground color is set to (26, 47, 152) RGB, that is, a dark blue. The result simulates a sketch made with a blue ballpoint pen (Figure 15-124).Eraser Softis the same asEraser Hard, but it uses theHardness 050brush.Ink Smoothapplies the Ink tool with SMOOTH STROKE checked, QUALITY set to 75, WEIGHT to 300, ADJUSTMENT SIZE to 10, TILT to 0, and SPEED to 0.9. The tip is a round size, deformed as a narrow oval tilted to the right. These settings are good for calligraphy.Ink Thinapplies the Ink tool with ANGLE set to 0.5 and SPEED to 1. The tip shape is a simple round size. This preset is good for simulating handwriting.Pencilopens the Paintbrush tool with OPACITY set to 50%, thePencil 01brush set to a SIZE of 50, and thePencil Genericpaint dynamics. APPLY JITTER (AMOUNT set to 0.2) and INCREMENTAL are checked. This preset simulates using a soft pencil on drawing paper.Pencil Softhas the same settings, except theCharcoal 02brush is set at a SIZE of 200. It simulates using a charcoal pencil.

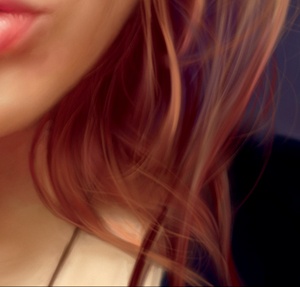
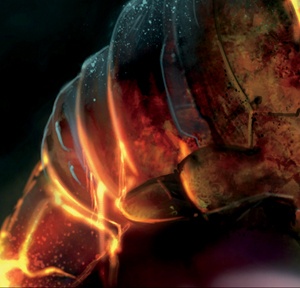
By experimenting with this set of predefined tool presets, you’ll get ideas for defining your own tool presets. Don’t forget to tag them, too, so you can retrieve them easily. You can use existing tags, but you can also invent new ones, and you can apply several tags to the same object. Defining a new tool preset is much easier than defining a new brush. And, of course, if you miss a specific paint dynamics, you can easily define it as a tool preset. Figure 15-125 to Figure 15-127 show a few examples of work that combines custom predefined brushes, paint dynamics, and tool presets, courtesy of Ramón Miranda, the main author of the GIMP Paint Studio (see http://code.google.com/p/gps-gimp-paint-studio/). GIMP Paint Studio offers a huge collection of brushes and presets designed to speed up repetitive tasks by minimizing the need to reset tool options manually when changing tools. Its main goal is to support painting tasks, as its name implies.