
Configuring Particles
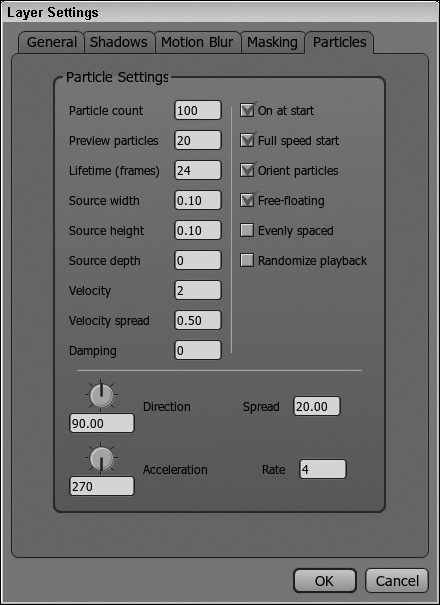
If the particle layer is selected, then within the Layer Settings dialog box is a new panel named Particles. Using the Particles panel shown in Figure 13.2, you can define properties for specifying the number of particles, how long they survive, their dimensions, speed and direction, and how randomly they move.
Figure 31.2. Particles panel in the Layer Settings dialog box.
Changing the Number of Particles
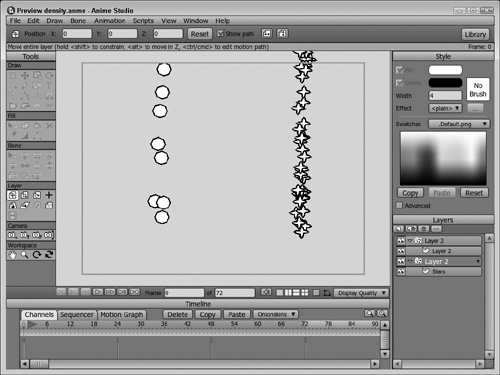
The Particle Count value sets the total number of particles that are present in the scene at a given frame. Be aware that increasing this number can slow down the render and export time for the project. The Preview Particles value is the number of particles that are visible within the working area. This value is usually a fraction of the total number, and keeping it small allows some of the particles to be visible without having to wait for a large number of particles to be drawn every time a change is made to the project. Figure 31.3 shows two sets of particles. The left set has a Preview Particles value of 20 and the right set has a Preview Particles value of 60, so many more particles are visible in the working area at right.
Controlling the Particles’ Lifetime
The Lifetime value determines how long the particles stay around the scene. It is measured in frames, so if the Lifetime value is set to 12, each new particle will move through the scene for 12 frames before it disappears. If this value is set to 0, the emitted particles will continue to move through the frame without being removed.
Setting the Particles’ Dimensions
Particles are emitted regularly from their starting location in a straight line unless you change the width, height, and depth of their source. The Source Width and Source Height values set the width and height that the particles can move from their source. Figure 31.4 shows the particle stream on the left with width and height values of 0 resulting in a straight line; the particles on the right have width and height values of 0.5.

There is also a value to change the source depth. Changing this value causes the particles to randomly appear closer to and farther from the camera, which results in smaller and larger particles, as shown in Figure 31.5.

Changing the Particles’ Speed and Acceleration
The particles’ speed as they are first emitted is controlled by the Velocity value. A value of 2 will cause the particles to move across the entire screen in one second. The Velocity Spread value defines the random variation for the velocity value. A value of 0.1 will cause about 10% of the particles to move at a different speed.
The Damping value causes a resistance to speed and can also contribute to the randomness of the particles’ movement. The Acceleration value defines how quickly the velocity is changing; its direction is determined by the pointer dial and value at the bottom of the panel. If acceleration is pointing downward, it simulates gravity. The Rate defines how quickly acceleration is slowing the particles down.
Setting the Particles’ Direction and Spread
The direction of the particle stream is determined by the Direction pointer and value. A value of 90 causes the particles to move straight up and a value of 270 causes the particles to move downward.
The Spread value defines an angle that the particles stay within. It is measured in degrees, so a spread of 30 will keep the particles within a 30-degree angle. Setting the Spread value to 360 causes the particles to move in all directions.
Other Options
The Particles panel also includes several other options. The On at Start option causes the particles to begin moving when the animation is first started. If disabled, the particles are turned off. You can enable particles at any time during the animation by right-clicking the particle layer and selecting Turn Particles On.
The Full Speed Start option causes the particles to move at full speed at frame 1. If this option is disabled, the particles will take some time to get going at frame 1. The Orient Particles option causes the particles to rotate to be aligned with the direction they are moving. If disabled, the particles maintain the current orientation throughout the animation.
The Free Floating option allows the particles to move independently of the layer and its movements. If this option is disabled, the particles will move along with the layer as the layer is moved and rotated. The Evenly Spaced option causes the particles to be emitted at regular intervals. If disabled, then the particles appear more randomly. The Randomize Playback option causes the particles to start moving at random times.
To create a firehose using particles, follow these steps:
1. | Open the Firehose.anme file from the Chapter 31 folder on the CD. This file includes a hose object that is animated using bones. |
2. | Select the New Layer button at the top of the Layers palette and choose the Particles option from the pop-up menu. Drag and drop the particles layer on the bone layer. This makes the particle layer part of the bone layer so the particles will move with the end of the firehose. |
3. | With the Translate Layer tool (1), drag the center origin and position it at the end of the firehose. |
4. | Select the New Layer button in the Layers palette to create a new vector layer. Change the Fill color in the Style palette to light blue and create a small thin triangle at the end of the firehose to look like a water stream. Drag and drop the new vector layer on the particles layer. |
5. | Double-click the particles layer to open in the Layer Settings dialog box. In the Particles panel, set the Particle Count to 400, the Preview Particles to 40, and the Direction and Acceleration values to 315. Then click the OK button to close the Layer Settings dialog box. |
6. | Click the Play button (Spacebar) to see the resulting particles stream from the end of the firehose as it whips around, as shown in Figure 31.6. |
