
Adding Perspective and Shear Effects
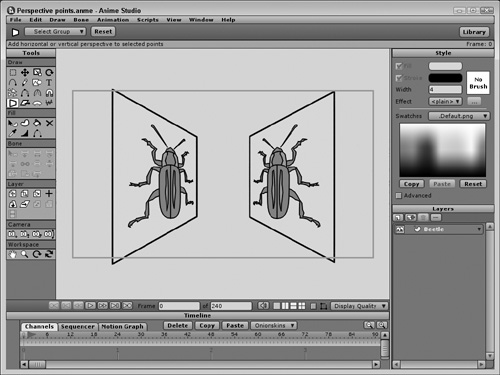
The Perspective Points tool is used to simulate the effect of having items reduce in size as they recede into the distance. If you imagine looking at a billboard sign running parallel to a street, the letters on the far end of the sign appear smaller than the letters on the sign closest to you.
For the selected set of points, these tools cause one end of the selection to increase while the opposite end decreases in size. Dragging with the Perspective Points tool to the side causes the left and right sides of the selection set to change size depending on the direction that you drag the mouse, and dragging the Perspective Points tool up and down causes the top and bottom sides of the selection set to change size. Figure 12.5 shows the resulting effect of using this tool.
Note
The Shear Points and Perspective Points tools are only available in Anime Studio Pro.
The Shear Points tool let you slant the selected set of points, causing circles to become ovals and squares to become parallelograms. Dragging to the left and right with the Shear Points tool causes the top and bottom edges of the selected points to move in opposite directions based on the direction that you drag the mouse. Dragging up and down with the Shear Points tool causes the left and right edges of the selected points to move in opposite directions. Figure 12.6 shows the results of this tool.

The Shear and Perspective Points tools work in a similar manner to the Shear and Perspective Layer tools covered in Chapter 4, “Working with Layers.”
Note
The Shear Points and Perspective Points tools are unavailable if only a single point is selected.
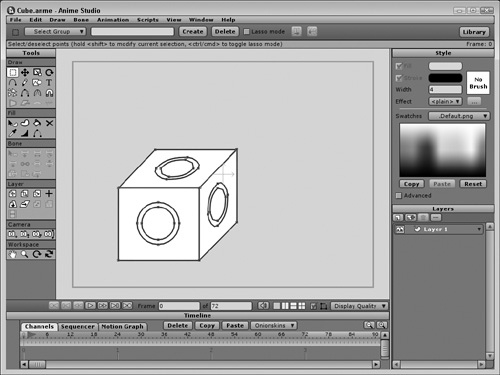
To create a simple cube, follow these steps:
1. | Select and drag in the working area with the Rectangle tool (E) while holding down the Shift key to create a square. Then add a couple of circles with the Oval (L) tool to the center of the square. |
2. | Choose the Edit, Select All (Ctrl/Cmd+A) menu command to select all the points in the project. Then create a copy using the Edit, Copy (Ctrl/Cmd+C) and the Edit, Paste (Ctrl/Cmd+V) commands. The pasted copy is placed exactly on top of the original so it doesn’t appear that anything has happened. If you move the pasted copy, the original is still there. The pasted copy is selected after you paste it. |
3. | With the pasted objects still selected, click the Shear Points X tool and drag to shear the pasted copy. |
4. | Click the Scale Points tool (S) and drag the top edge handle down to reduce the size of the pasted copy while maintaining the width of the lower edge. Select the Translate Points tool (T) and move the pasted copy so that its bottom edge aligns with the top edge of the square. |
5. | With the Select Points tool (G), select the original square’s points by dragging over the lower half of the square object and choose the Edit, Select Connected menu (Tab). |
6. | Repeat step 2 to create another copy of the original square. Then use the Translate Points tool (T) to move the new copy so that its left edge aligns with the right edge of the original square. If you hold down the Shift key while moving it, the object will stay horizontally aligned. |
7. | Select the Shear Points Y tool and drag upward until the diagonal lines of the two copied squares are parallel. Then drag the right edge handle using the Scale Points tool (S) to size the newest square copy to fit with the other square copy object. Then move the newest copy into place. Figure 12.7 shows the final cube object created using the Shear tools. |
Note
Although the created cube appears 3D, it really isn’t. However, Anime Studio can import and view 3D objects. More on this feature is covered in Chapter 29, “Using 3D Layers.”