
Understanding Channels
One of the great benefits of using keys in Anime Studio is that they are automatically created when a change is made to the project, but if every change to the project were recorded for the given frame, then locating a specific change later to make an adjustment would be difficult. Anime Studio’s answer to this dilemma is to use channels.
Channels keep track of the changes for a specific parameter such as a layer translation independent from the other parameters. This allows you to revisit and alter just the layer translation key for a given frame without changing the layer scale or layer rotation at that same frame. Each of the available channels shows up as a separate row in the Timeline palette.
Each channel keeps track of its parameter’s state for each frame, but only one state is allowed for each frame. For example, if you set a key to scale a layer to 200% at frame 10 and later you change the scale layer value at frame 10 to 50%, the key only remembers the latest change, which would be 50%. The 200% value would be overwritten for this frame.
One other tricky aspect of working with channels is that the interpolation between channel keys is also independent of all other channels. For example, if you want to create an animation where a logo flies in from the left, stops and spins around once, and then flies off to the right, you’ll need to set keys for each channel independently, including when a motion starts and stops. The next example demonstrates this effect.
When creating this simple animation, you might proceed like this:
Select the vector layer and move it to the left of the working area at frame 0 with the Layer Translate tool (T).
Move the Time Slider to frame 20 and with the Layer Translate tool (T) move the layer from the left to the middle of the working area.
Move the Time Slider to frame 40, select the Rotate Layer tool (R), and spin the layer one revolution.
Move the Time Slider to frame 60, select the Layer Translate tool (T), and move the object off to the right of the working area.
Press the Play button (Spacebar) and notice how the logo moves, as shown in Figure 16.5.
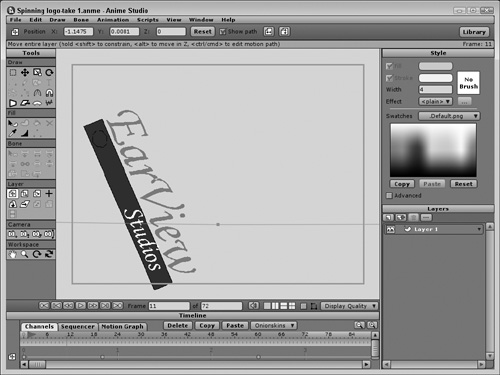
The resulting animation has the movement of the logo combined with the rotation, which is probably not what you expected. If you look at the Timeline, you’ll see a whole column of keys at frame 0 and three other keys on two different rows or channels.
What is happening is that the motion between keys is automatically interpolating between the adjacent keys, so since there is only a single Layer Rotation key at frame 40, the rotation is interpolating between its default rotation value at frame 0 and its new state at frame 40, causing the rotation to be extended across 40 frames.
The same condition happens for the Translate Layer channel. The logo’s motion is caused by the interpolation between the adjacent keys and since the states at frame 20 and frame 60 are different, the layer simply moves slowly between the two states.
The gotcha is that we didn’t create the appropriate start and stop keys for each channel because we assumed that they would be created automatically when a key in another channel was added. When setting keys, you need to be explicit about each state and create a key to stop a motion if you want that behavior.
To correct the spinning logo animation so each motion is independent, follow these steps:
1. | Open the Spinning logo-take 1.anme file from the Chapter 16 folder on the CD. This file includes the spinning logo along with the keys created in the above example. |
2. | We’ll start by addressing the layer translation motion. We want the logo to fly in from the left and stop at frame 20 and then start again at frame 40. The key at frame 20 works fine for flying the layer in, but we need to address its motion that happens while the logo spins. Drag the Time Slider to frame 40, which is the end of the spin cycle, and drag the logo with the Layer Translate tool (T) back to where it stopped at frame 20. |
3. | Click the Play button (Spacebar) and notice how the motion has changed. The logo now stands still between frames 20 and 40. |
4. | Next, we’ll deal with the logo’s rotation. The key at frame 40 tells the logo to spin a complete revolution, which it does, but it does it over the first 40 frames. We want it to spin between frame 20 and frame 40, so we’ll need to add a key at frame 20 that is the same as the key at frame 0, which is the state at the start of the rotation. Click the layer rotation key at frame 0 to select it. It turns red when selected. Then click the Copy button at the top of the Timeline palette. Drag the Time Slider to frame 20 and click the Paste button. This pastes a copy of the frame 0 key to frame 20. |
5. | Click the Play button (Spacebar) and notice how the logo enters, stops and spins, and then flies off to the right just like we wanted, as shown in Figure 16.6. |
