
Introducing the Fill Tools
When a vector layer is selected, the tools in the Draw and Fill sections of the Tools palette become available. The tools in the Draw section let you create and manipulate new points, curves, and shapes; the tools in the Fill section let you change and manipulate the fill and stroke applied to an object.
Whenever a tool is selected, it is highlighted yellow, its icon appears in the top left corner of the main window in the Options bar, any tool settings appear in the Options bar, and information on how to use the selected tool appears in the status bar directly underneath the Options bar.
Directly below the Draw tools are the Fill tools, as shown in Figure 13.1.
Figure 13.1. The Fill tools.
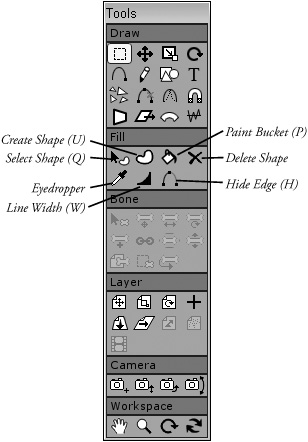
Select Shape (Q): This tool selects a shape when you click it. The selected fill is highlighted with a checkerboard pattern when selected.
Create Shape (U): This tool also selects a shape or a stroke to be filled. When selected, the shape appears as a checkerboard pattern. Pressing the Spacebar applies the current fill or stroke settings in the Style palette.
Paint Bucket (P): This tool automatically applies the current fill to the shape that is clicked on.
Delete Shape: This tool removes any applied fill from a shape when you click within the shape.
Eyedropper: This tool grabs the fill and stroke from the clicked-on object on any layer.
Line Width (W): This tool changes the line width around the selected points by dragging with the mouse.
Hide Edge (H): This tool removes any applied stroke style from the edge that you click on.