
Using Onion Skinning
Onion skinning is a feature that shows the paths of the adjacent frames next to the actual frame. This is helpful when you’re trying to line up objects during an animation. Any frame can be specified as an onion skin frame using the row of slots located directly under the frame range in the Timeline palette.
Before you can click the Onionskin bar to specify an onion skin frame, you’ll first need to enable onion skinning using the Onionskins drop-down list located at the top of the Timeline palette, as shown in Figure 17.14.
Figure 17.14. Onionskins pop-up menu.
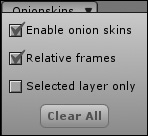
The Enable onion skins option turns on the onion skin feature. If this option is disabled, then you will not be able to click the Onionskin bar. The Relative Frames option causes all the designated onion skin frames to move along with the time slider so that the offset between them is maintained. If this option is disabled, then the specified onion skin frames remain constant as the animation plays. The Selected Layer Only Option shows onion skinning only for objects on the current layer. If disabled, then all objects on all layers are onion skinned. The Clear All button removes all onion skin markers from the Onionskin bar.
New Feature
The Onionskins pop-up menu along with the ability to turn onion skinning on and off is new to Anime Studio 6.
Once onion skinning is enabled, simply click the Onionskin bar for the frame that you want to mark. A dark gray marker appears for the marked frame, as shown in Figure 17.15. All content for the marked frames are displayed as paths. Up to eight frames can be onion skinned at a time. To turn off a specific onion skin frame, simply click its marker in the Onionskin bar.

Note
Parameter changes such as a fill color aren’t visible using onion skinning.