
Learning the Interface Elements
The entire interface is composed of the main window and four docked tool palettes. Each palette surrounds the main window. You can undock any of the palettes from the interface and move it by clicking and dragging its title bar. You can also resize most of the palettes, with the exception of the Tools palette, by dragging on either its border edge or one of its corners (it works for either docked or floating palettes).
The Main Window
All the drawing and creative work is displayed in the main window, also called the working area, as shown in Figure 2.1. There are multiple configuration options available for the main window, including the ability to split the window into multiple panes and to change the display quality. You will learn more about configuring the main window in Chapter 3, “Managing and Configuring the Workspace.”

Note
When Anime Studio is first started, a default file named StartupFile is opened automatically, rather than simply a blank page. This file is located in the Startup folder where Anime Studio is installed.
The main window also has several additional interface elements that control the entire interface, including the title bar, menu bar, tool options bar, and the working area.
Title Bar
The title bar displays the name of the open project file. If a new file is created, then the title bar lists Untitled.anme until the file is saved. Clicking the Close icon in the upper-right corner of the main window will close the program, but it offers you a chance to save your current work before exiting.
Tip
For a Windows system, double-clicking the main window title bar will expand the main window to fill the entire screen. Double-clicking a second time returns it to its previous size and location. For a Macintosh system, double-clicking the main window title bar sends the application to the Doc and hides the application. Click the Doc icon to restore the window.
Menu Bar
Of the available interface palettes, only the main window has menus. These menu commands control the entire program. Many of the menu commands can be accessed in other ways, such as keyboard shortcuts.
Tool Options Bar
In addition to menus, the main window also includes a bar of tool options. These buttons, which typically include checkboxes and a pull-down menu, are located along the top of the main window directly below the menus. They provide quick access to relevant options and parameters for the current tool. The available options will change depending on the currently selected tool. Note that some tools (Delete Edge, Select Shape, Delete Shape, Eyedropper, Hide Edge, Manipulate Bone, and Bind Layer) have no options.
Tip
You can always identify the current tool by looking at its icon that appears at the left end of the Tool Options bar. Moving the mouse over this icon reveals its name in a tooltip.
At the right end of the Tool Options bar is a Library button used to access the Library palette. This button is always available, regardless of the selected tool.
Status Bar
Underneath the Tool Options bar is the status bar. This bar provides information on how to use certain commands and describes what the interface expects you to do next. If you get stuck, you can look to the status bar for helpful information. For example, when the Add Points tool (A) is selected, the status bar reads “Add a point (press <space> to weld, hold <alt> to disable auto-welding).”
Note
Within the Preferences dialog box is an option to display the status bar at the top of the window. If this option is disabled, then the status bar will appear at the bottom of the interface.
Working Area Controls
Along the bottom edge of the main window are controls for playing back animations and changing the layout and view of the working area. These controls are explained in more detail in Chapter 3, “Managing and Configuring the Workspace.”
Tools Palette
The Tools palette, shown in Figure 2.2, includes a set of grouped buttons that execute specific tasks and work with the content in the main window. This palette is docked to the left side of the interface. The Tools palette for Windows doesn’t include a Close icon when floating because it is intended to remain open at all times, but you can dock and undock the Tools palette with the Window, Tools menu.
Figure 2.2. The Tools palette divides all the tool buttons into different groups.

Note
On Macintosh systems, the Tools palette does include a Close button that you can use to close the palette.
The tools in the Tools palette are divided into several groups: Draw, Fill, Bone, Layer, Camera, and Workspace. The tools within these groups are covered in their respective chapters that follow. The active tool is easy to identify because it is highlighted yellow in the Tools palette.
Most tools have an associated keyboard shortcut that can be used to select the tool quickly. The tool’s name and its shortcut are displayed in a tooltip if you move the cursor over the top of the tool button.
As you select different objects in the main window or as you select one of the different layers, some tools are disabled and others are enabled. Only those tools that can be selected and used on the current object or layer are enabled. Enabled tools can be selected by clicking them with either the left or right mouse button.
Tip
Anime Studio lets you edit and modify the tools used in the Tools palette and even add your own scripted tools. This advanced feature is covered in Chapter 36, “Customizing the Interface.”
Style Palette
The Style palette, shown in Figure 2.3, includes options for setting the Fill and Stroke colors, width, and effect for the selected shape. It is docked to the upper-right corner of the interface. The Style palette can be docked and undocked using the Window, Style menu or the Ctrl/Cmd+] keyboard shortcut. Much of the Style palette is covered in Chapter 15, “Setting Object Style.”
Figure 2.3. The Style palette holds the object’s fill, outline, and colors.

Layers Palette
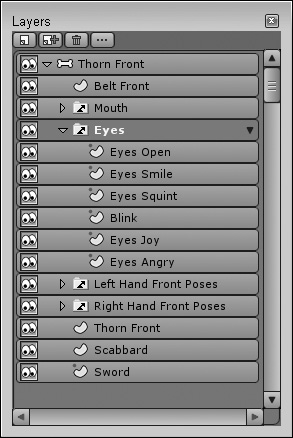
The Layers palette, shown in Figure 2.4, displays a list of the available layers in the current project. It is docked in the lower right-hand corner of the interface. It provides an easy way to quickly select from the available layers. You can also hide and unhide layers with a single click. The Layers palette can be docked and undocked with the Window, Layers menu. A general discussion of layers is presented in Chapter 4, “Working with Layers.”
Figure 2.4. The Layers palette lists all the available layers.
Timeline Palette
The Timeline palette, shown in Figure 2.5, includes the controls used to animate objects. The animation keyframes are displayed as dots on the Timeline palette, and the number of frames runs along the top of the palette. The Timeline palette is docked along the bottom edge of the interface. The Timeline palette is covered in detail in Chapter 17, “Working with the Timeline.” The Timeline palette can be docked and undocked using the Window, Timeline menu or the Ctrl/Cmd+[ keyboard shortcut.

Note
The docked Timeline palette is always reduced in size when the Layers palette is docked, but the docked Timeline palette will run across the entire bottom interface edge when the Layers palette is floating or closed, even if the Style palette is docked.
Actions Palette
The Actions palette, shown in Figure 2.6, records sequences of commands that can be replayed, and it is a huge time-saver if used correctly. (Actions are covered in more detail in Chapter 21, “Morphing Objects and Using Actions.”) All palettes are visible by default when Anime Studio is started, with the exception of the Actions palette. The Actions palette is opened and closed using the Window, Actions menu or the Ctrl/Cmd+K keyboard shortcut.
Figure 2.6. The Actions palette automates repetitive tasks.

Note
The Actions palette is only available in Anime Studio Pro.
Library Palette
The Library palette, shown in Figure 2.7, displays folders full of content that is ready to use in Anime Studio. Double-clicking a folder will open it to reveal thumbnails of content contained therein. Double-clicking a piece of content loads it into the interface. The Library palette is opened and closed using the Library button at the right end of the Tool Options bar. You can also open and close the Library palette with the Window, Library menu, or the Ctrl/Cmd+Shift+L keyboard shortcut. You can learn more about using the Library palette in Chapter 6, “Working with the Content Library.”
Figure 2.7. The Library palette contains content that may be used within Anime Studio.

New Feature
The Library palette is new to Anime Studio 6.
Note
The Library palette (and the Actions palette) cannot be docked to the main interface, and it is always floating.