
At the beginning of this chapter, we built an animation frame by frame as layers in one image. Here is a general list of the steps to use as a guide for building similar animations:

Create another layer with the object that will move; it may be cut from a photograph, drawn using paint tools, or typed in as text.
For each new position of the object, duplicate the preceding layer and apply some transformation to the new layer: Move, rotate, or deform the object, zoom in or out, and so on. Take care when doing this, or the animation will be choppy.
Because each new layer must replace the preceding one, duplicate the background layer once per object layer, intersperse these copies between the object layers, and then merge each object layer with a background layer.
The animation is finished!
You’ve just created a simple animation in which a single object moves along a fixed background. While you can use this technique to animate multiple objects, the process is awkward and repetitive. Remember that if you’re doing a repetitive task on a computer, you’re not using the computer in a clever way.
In the next section, we demonstrate some other ways to create simple animations.
The first example is so simple that duplicating the background is not necessary: Layers are progressively added to draw the petals of the daisy.
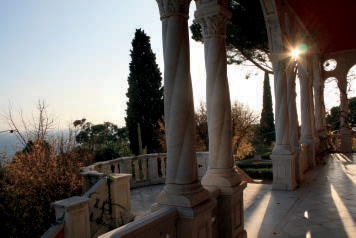
Begin with the background image shown in Figure 6-14.
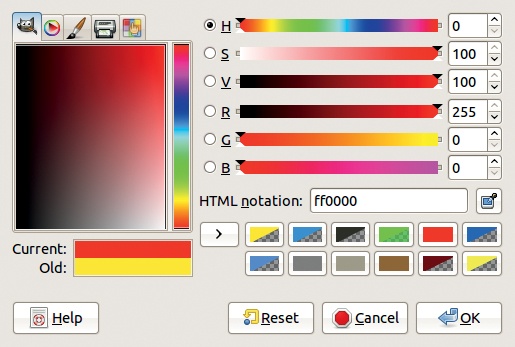
Then we draw the petals by hand with the Paintbrush tool. We draw one petal at a time, using different colors for each petal. To change the color, we change only the hue by a set amount from petal to petal. The background is rather dark, so we choose a bright, saturated color, beginning at one end of the hue scale, as shown in Figure 6-15.
Every petal has its own layer. First create a new layer. In the dialog that appears, add a number to the layer name. With the Hardness 100 brush set to a small size, draw the first petal in the upper-left corner of the image.
For the second petal, choose a color with the same saturation and value as the first one but with a different hue. To change the hue, set the new value in the field to the right of the radio button labeled H. The hue values range from 0 to 360. Because the daisy has seven petals, plus its stem, we need eight different hues. So we add 40 to the preceding hue value for each new petal, create the new layer, name it, and draw the petal in the proper place until the daisy is finished.
When the daisy is finished, we have nine layers, and the animation is almost complete. The animation will look better if it pauses at the beginning and at the end, so add an explicit duration of 1000 ms to the first and last layers by typing (1000ms) after the layer name.
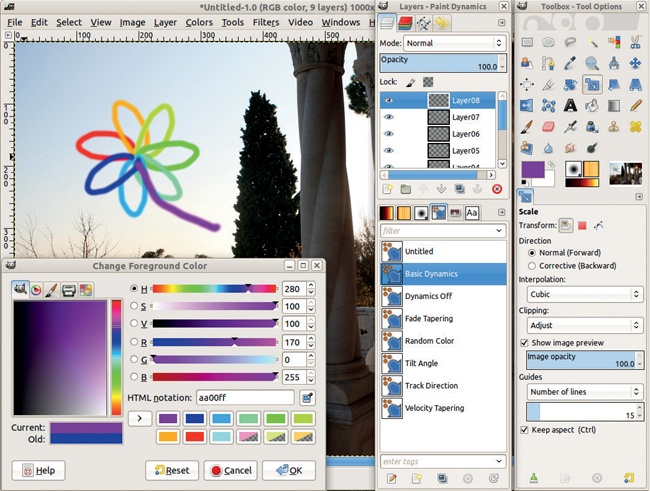
To test the animation, go to Image: Filters > Animation > Playback. Figure 6-16 shows the final image with the Layers dialog.
Notice that the Playback window always displays the image at its actual size—this can be problematic if you build an animation with an image that’s larger than your screen. When an animation takes up most of the screen, detach it from the Playback window by clicking the fourth button from the left at the top of the window.
When you’re satisfied with the animation, you can export it as an animated GIF, as shown in Method One: Frame by Frame.
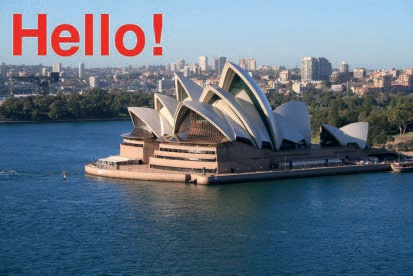
The second animation is slightly more complicated to build. This time, we want to make a word zoom toward the viewer.
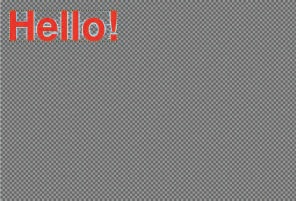
We begin with a new background image. Select the Text tool, choose your favorite font, in a large size and a bright color, and write “Hello!” on the image. Figure 6-17 shows the result, with a FreeSans Bold font in size 140 in a bright red.
Next, we build several copies of this layer, each with a smaller and smaller zoom factor and an increasing blur. We build the layers in reverse order, so the last built is the first to display. To build a smooth animation, we change the height of the layer by the same amount each time, and we use the same blurring factor.
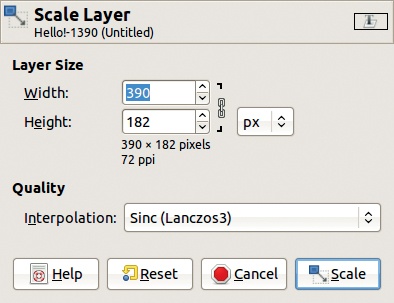
Duplicate the text layer, and work on the lower copy. Using Image: Layer > Scale Layer, reduce the layer height by 20 pixels (see Figure 6-18). Then select Image: Filters > Blur > Gaussian Blur and apply a blur with the default parameters. If you’re not sure whether the parameters are set to their default values, reset all the filters via Image: Filters > Reset all Filters.
Repeat this process four more times, always working on the lower text layer (the one that has just been transformed). You can speed up the process by pressing ![]() to repeat the last filter used.
to repeat the last filter used.
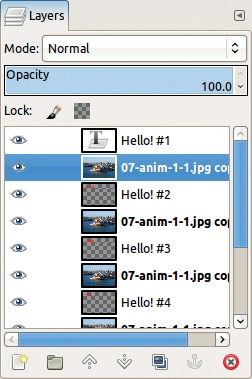
At the end, you should have six text layers. As it stands now, however, you can’t use this image as an animation because all the layers are visible. The solution is to duplicate the background layer so you have one background layer per text layer. By alternatively clicking the DUPLICATE button and the RAISE button at the bottom of the Layers dialog, you can quickly create the sequence of layers shown in Figure 6-19.
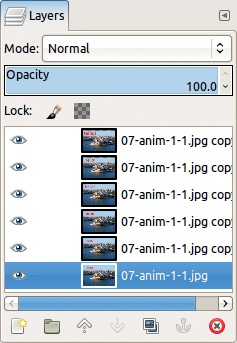
Then merge each text layer with the underlying background layer by selecting Layer: right-click > Merge Down. Keep one more version of the background at the bottom of the layer stack so the animation begins with the original background. The resulting sequence of layers is shown in Figure 6-20.
Our animation is almost ready. Because we duplicated the background layer so many times, the file is 12MB, which is quite large. But much of the background actually remains the same, creating redundancy, so we can reduce the size without losing valuable information.
GIMP provides a way to reduce the size: Apply Image: Filters > Animation > Optimize (for GIF). The filter has no dialog and does its job immediately. It generates another, smaller image file: In our case, the file is 362KB. The filter replaces parts of the image that don’t change with transparency, as shown in Figure 6-21. Because the animated word doesn’t move across the background, most of the background remains unchanged, and, as a result, the size is reduced significantly.
The optimization tool also adds the layer replacement mode (combine) to every layer except the bottom one. Therefore, the new layer does not replace the previous one but is combined with it. In the previous animation, we used the (replace) combination mode, which is the default.
We still need to do two things before this animation is complete. First, we need to change the timing of the first and last frames (bottom and top layers) to make the animation smoother. Because the optimization process automatically added a duration of 100 ms, we have to change the timing already specified for these two layers by adding another zero to the duration, so it becomes (1000ms).
Finally, we export the completed animation as a GIF.
This animation is easy to build and takes less than 10 minutes. Those of you with a little programming knowledge could even automate this process by creating a script.
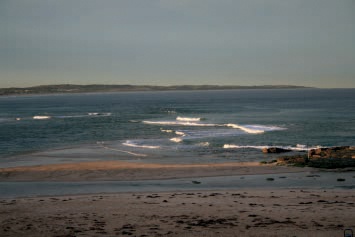
As a background, we use the photograph in Figure 6-22, a sandy beach on the North Coast of New South Wales, Australia. We want to add some rain falling on this landscape.

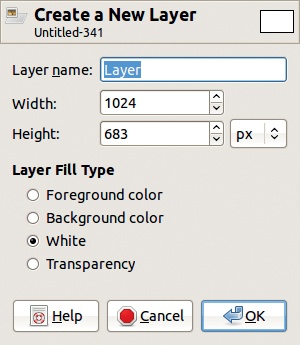
Duplicate the background image three times. Now you have four layers. Next, add a new, white layer above each background layer (see Figure 6-23). The resulting Layers dialog is shown in Figure 6-24.
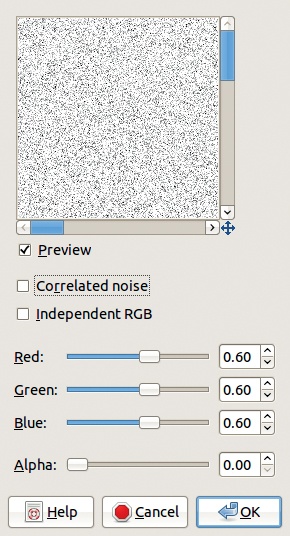
Use the white layers for the rain. First, add noise to the white layers with Image: Filters > Noise > RGB Noise, using the parameters shown in Figure 6-25. Do this for each white layer by selecting it and pressing ![]() . Change this noise into rain by applying Image: Filters > Blur > Motion Blur, using the parameters shown in Figure 6-26. Repeat this process for each white layer.
. Change this noise into rain by applying Image: Filters > Blur > Motion Blur, using the parameters shown in Figure 6-26. Repeat this process for each white layer.
The animation is almost finished. Here are the remaining steps:
Change the blend mode of every rain layer to Multiply; note that other blend modes work too, for example, Screen or even Grain Merge.
Merge each rain layer with the underlying background layer (use Layers: right-click > Merge Down).
Test the animation with Image: Filters > Animation > Playback.
Optimize the animation for GIF, and export it as an animated GIF.

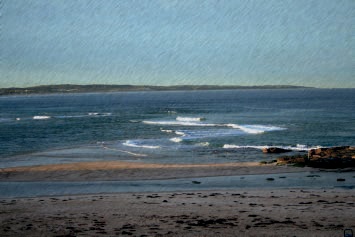

The final result appears in Figure 6-27. Of course, the actual animation is a lot more interesting than the still image shown. To see it, visit the book’s website (http://the-book-ofgimp.blogspot.com).
You can use a similar process to add snow to a picture. To demonstrate more of the tools available, in this example, we apply some alternative methods to arrive at the result. In GIMP, you’ll generally discover many different ways to complete a given task.
We begin with the image shown in Figure 6-28, a photograph taken in the northern French Alps. We create snow by again applying Image: Filters > Noise > RGB Noise but this time on a new, transparent layer. To apply the noise to a transparent layer, make sure Correlated noise is unchecked and then move the ALPHA cursor to 100.
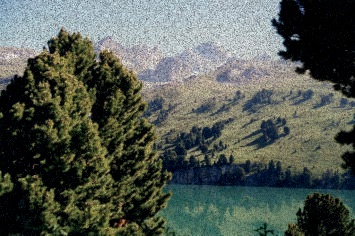

The snow is black, as shown in Figure 6-29. In the previous example, we adjusted the color of the rain when we changed the blending mode to Multiply. This time we use Image: Color > Invert to make the snow white, as it should be (see Figure 6-30).
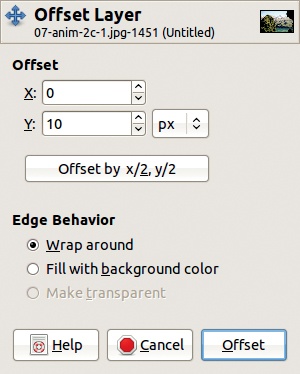
Now we want to make the snow fall slowly over the landscape. First, duplicate the snow layer and then apply the Offset tool: Select Image: Layer > Transform > Offset or press ![]() . Set a small, positive Y offset— around 10. Check the WRAP AROUND box, or the snow will disappear from the top of the image (see Figure 6-31).
. Set a small, positive Y offset— around 10. Check the WRAP AROUND box, or the snow will disappear from the top of the image (see Figure 6-31).
Duplicate this offset copy, and apply the tool again on the copy of the copy. Repeat this process several times.
As shown in Method Two: Filtering All Layers, duplicate the background, add copies under every snow layer, and merge each snow layer with the underlying background copy. The result is a working animation.
To make the snow fall gracefully, we have to generate many layers, and we have to apply the same Y offset relative to the preceding snow layer. A smooth animation would require at least 30 frames. In Animating a Still Image and 18.4 The Move Path Tool we show you two different methods for generating these layers automatically, saving a lot of time.