
In this section, we consider various techniques that are a bit more difficult and less frequently used.
GIMP is a great tool for cheating time. In a previous section, we updated an old photograph to look more recent. In an upcoming section, we try to make someone look younger. In this section, we make a modern photograph look like it was taken over 50 years ago.
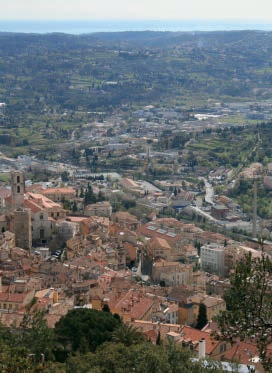
One of the most efficient ways to age a photograph is to remove the color and to give the photograph a sepia tone. We chose to age Figure 2-103, which lacks obvious modern features. If you’re feeling lazy, you can just try the filter (Image: Filters > Decor > Old Photo). The filter doesn’t have many adjustable parameters, so simply press OK. We got the result shown in Figure 2-104. The image does look old, but we can do better.

First, desaturate the image (Image: Colors > Desaturate). Select the whole image (![]() ) and copy it (
) and copy it (![]() ). Make the foreground color a sepia tone, for example, a28a65 in HTML notation. Create a new layer (
). Make the foreground color a sepia tone, for example, a28a65 in HTML notation. Create a new layer (![]() ) and choose to fill it with the foreground color. Add a Layer mask to this layer (Layers: right-click > Add Layer Mask) and check SELECTION in the dialog that appears. Paste the copy you just made into the mask by pressing
) and choose to fill it with the foreground color. Add a Layer mask to this layer (Layers: right-click > Add Layer Mask) and check SELECTION in the dialog that appears. Paste the copy you just made into the mask by pressing ![]() . Anchor the floating selection to the Layer mask (press the ANCHOR button at the bottom of the Layers dialog or press
. Anchor the floating selection to the Layer mask (press the ANCHOR button at the bottom of the Layers dialog or press ![]() ).
).


The result, which appears in Figure 2-105, is still not right. To improve it, check that the Layer mask is active (click the thumbnail if you’re not sure), and then invert the color (Image: Colors > Invert). Change the Blending mode of the top layer to COLOR. The result (Figure 2-106) is much better, but you can tweak it further if you’re still not satisfied. You can try reducing the opacity of the top layer or try using the Curves tool (Image: Colors > Curves) on the layer itself (not on the layer mask). Select the Value channel and nudge the bottom of the curve up and the top of the curve down. This should improve the contrast.

You can use some of the filters in the Image: Filters > Decor submenu to complete the aging effect. For example, Figure 2-107 results from the application of the Round Corners filter with all parameters set to twice their default values.
In the same submenu, you’ll find the Coffee Stain filter, which creates that realistic “Oh, that wasn’t a coaster?” look (Figure 2-108).
In magazines, your favorite actor or singer always looks wonderful, thanks to the magic of programs like GIMP. If you met him on the street, you might be surprised by the difference that photo retouching can make. These days hiding blemishes, removing wrinkles, and even changing the color of a person’s eyes is very easy. Let’s experiment with a portrait of a very unimportant person, one of the authors of this book. Figure 2-109 shows a rather unflattering portrait, which we’ll improve.

First, select the Levels tool and improve the general lighting throughout the picture. Next, select the areas that you’ll work on. Although we’d like to remove the glasses in this image, doing so would prove very difficult. You could try erasing them with the Clone tool, but removing the reflections completely would be a lot of work. Too much work. So leave the glasses intact. The clothes don’t need any retouching, so concentrate only on the skin. Select the work area with the Free Select tool. First, draw a rough outline around the face, and then, with the ![]() key pressed, remove the glasses from the selection. Figure 2-110 shows the result.
key pressed, remove the glasses from the selection. Figure 2-110 shows the result.
GIMP offers a number of different ways to reverse-age our subject. We’ll try the following:
Apply a very light Gaussian blur to the selection: A radius of 2 or 3 pixels is enough.
Use the Healing tool to erase blemishes and discolorations.
Finally, select the Smudge tool (
 ). Choose the
 Hardness 075brush, set its size to 12, and paint over wrinkles or anywhere that you want to make the skin look smoother. This tool works by selecting a color from the starting point and blending it into the image as you draw—like a finger smudging wet paint.

After some work, we get Figure 2-111, which is much better. The selection that you made at the beginning helped you to avoid making unwanted changes to the glasses and the clothes.
This portrait can be enhanced further: The nose is too dark, and our subject looks too serious. To retouch the nose, use the Dodge/Burn tool (![]() ) set to Dodge mode with the
) set to Dodge mode with the Hardness 075 brush in a large size. The result, which appears in Figure 2-112, isn’t spectacularly different, but it’s a bit better.
In this image, make another subtle modification: Brighten our serious subject’s mood a little. Use the Image: Filters > Distort > IWarp tool, which brings up the dialog shown in Figure 2-113. Before calling IWarp, use the Rectangle select tool to select the center of the image to get a larger view of the target area in the IWarp dialog.
Then, with the default settings, which are shown in the figure, extend the corners of the lips out slightly, nudge the middle of the upper lip up, and nudge the middle of the lower lip down. You can also move the lower eyelids up slightly. Now the subject, if not smiling, seems a little less serious.


With today’s digital cameras, taking several shots of the same scene is easy and costs nothing. As you’ve seen in several of the example photographs, choosing the proper exposure for scenes with strong contrast can be difficult, even impossible. Taking multiple shots of a high-contrast scene at different exposures is one way to handle the challenge. Many digital cameras even offer a mode called “auto exposure bracketing,” wherein the camera takes three shots at various exposures in quick succession around the optimal, automatic exposure.


Figure 2-114 and Figure 2-115 show an example. The first image was taken using the automatic exposure, whereas the second was overexposed. Open both pictures in GIMP: the first one in the normal way, the second one by using Image: File > Open as Layers or ![]() . Reduce the opacity of the top layer to 50% to check whether the images superposed properly. These photographs were taken without a tripod, and you can see that the photographer has moved slightly between shots. Using the Move tool (
. Reduce the opacity of the top layer to 50% to check whether the images superposed properly. These photographs were taken without a tripod, and you can see that the photographer has moved slightly between shots. Using the Move tool (![]() ), align the layers as carefully as you can to get the image shown in Figure 2-116. If you look closely, you’ll see that the alignment is still not quite perfect.
), align the layers as carefully as you can to get the image shown in Figure 2-116. If you look closely, you’ll see that the alignment is still not quite perfect.


Finally, try to improve the result using blending modes. Figure 2-117 shows the Color blending mode, which works well for this image. Grain merge, Soft light, and Overlay (Figure 2-118) also work nicely.