
Printing an image is easy as long as you have a printer and the proper drivers, but printing a faithful representation of what you see on the screen can be challenging.
Purchasing a printer is the first step in printing your images. There are many printer manufacturers and brands and an overwhelming number of different models. The price range is also huge, from less than $50 for the smallest and slowest ones to $15,000 and more for professional models that can print on three-foot-wide paper. There are also several printing techniques and a myriad of additional capabilities to choose from. Because this book is intended for general users, we consider only the printers intended for nonprofessional use.
The most common printing techniques are inkjet and laser. The least expensive color laser printers cost three to five times as much as the least expensive inkjet printers, but they’re much faster. On the other hand, low-cost inkjet printers generally produce much nicer images than laser printers in the same price range. You can also use glossier and heavier papers with an inkjet printer.
If you print mainly text or simple illustrations, and if you print a lot (say, several pages every day on the average), then a laser printer is probably the best choice. If you want to print mainly photographs and want a better quality output, then you should buy an inkjet printer.
The major cost in printing is not the printer or the papers but the inks. A replacement set of all the inks used by a printer can cost as much as the printer itself, or even more. This cost model is the result of a rather underhanded business model. Printer manufacturers sell printers below their fabrication cost, but they sell ink cartridges well above their real cost. In fact, the inks they use are very cheap to manufacture, and a one-liter bottle in some countries costs the same as a 5 ml cartridge in other countries. Moreover, manufacturers have devised imaginative devices and tricks to prevent customers from using generic ink cartridges that would be 5 to 10 times cheaper.
Note, however, that laser ink cartridges generally print many more pages than inkjet cartridges. The business model used here is more respectable.
Printers generally use the CMYK color model, which is explained in Chapter 12. Because the colors are layered on a white paper, using a subtractive model makes sense. The CMY model isn’t enough because generating a good black color by mixing the three basic colors is almost impossible. A standard laser or inkjet printer, therefore, uses at least four different color cartridges: Cyan, Magenta, Yellow, and Black.
Inkjet printers designed for high-quality photo printing generally have more than four different inks. In addition to CMYK, they usually have a light Cyan and a light Magenta. More expensive printers may add a matte Black and a light Gray in order to replicate the qualities of the blacks and grays present in analog black and white photography.
The quality of the output paper is also important. You will get a much better result on glossy photo paper (which is unrelated to the analog photography process), but printing on glossy paper requires more ink and takes much longer. If you make several test prints in a rather large format, you can quickly empty the ink cartridges.

When planning to buy a printer, ask yourself the following questions:
What do I intend to print?
How many pages will I print per week?
What print quality do I need?
What monthly or annual budget can I devote to printing?
When you consider all the factors, the cheapest printer is probably not the best buy. Although the initial investment is low, cheap models usually break more quickly, produce a lower-quality result, and use ink cartridges that may cost more than the printer itself. Also consider how boring it will be to watch a low-cost printer slowly exude a photograph over the course of several minutes.
To create high-quality photo prints, you should look for an inkjet printer with, at the very least, six different ink colors. Printers with separate cartridges for the various inks are preferable because they allow you to change only the cartridge that’s empty, which can save you money. Also, some printer cartridges contain the print head, whereas for other printers, the print head is a part of the printer itself. We prefer the former, despite its slightly higher cost, for two reasons:
If the print head is damaged, replacing it is extremely simple.
If you don’t print anything for several weeks, the ink generally dries in the print head and can clog the micro-holes. If the head is fixed to the printer, the only solution is to run the cleaning program, which consumes a lot of ink and does not always work.
Some printers have replaceable print heads, separate from the cartridges, which is also a better choice than fixed print heads.

If you are a GNU/Linux user, check the Open Printing page of the Linux Foundation (http://www.linuxfoundation.org/collaborate/workgroups/openprinting) before buying a printer to be sure drivers are available.
Figure 19-38 shows the section of the Image: File menu that contains entries related to printing or digitally outputting the image via email.
The last entry, Image: File > Send by Email, allows you to send a digital copy of a file directly from GIMP. Note that this tool works only if a Mail Transfer Agent is installed on the computer, which is uncommon on personal computers, so you may get an error message when you try to send the image. If so, simply save the image and attach it to an email message as you normally would.
The first entry shown in Figure 19-38 is always present, but the second one is available only if Gutenprint is installed. The print command uses printing mechanisms specific to the operating system. We’re using the GTK interface, which is available in a GNU/Linux environment. If you’re using a different operating system, the interface will be slightly different, but the concepts and features should be similar.
Image: File > Print opens the dialog shown in Figure 19-39. On the GENERAL tab, you’ll see a list of local printers. PRINT TO FILE allows you to convert the image to PDF or PostScript and save it to a chosen folder. This is the simplest way to convert an image to either of those formats. The RANGE and COPIES entries are relevant only if you’re printing more than one image at a time. The PRINT PREVIEW button converts the image to PDF and displays it using the default PDF reader. This option may be useful if you’re preparing to print a large image and want to check the parameters.
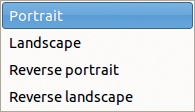
The PAGE SETUP tab is shown in Figure 19-40. In previous versions of GIMP, these options appeared in their own dialog, accessed via Image: File > Page Setup. Now everything is located in the same dialog. As is the case throughout most of the Print dialog tabs, the contents of this tab change depending on the capabilities of the printer selected on the GENERAL tab. PAPER SIZE offers a predefined selection of formats, shown in Figure 19-41. You can also add new formats with MANAGE CUSTOM SIZES, which opens the dialog shown in Figure 19-42. Here you can create, name, and specify a new size or change or delete an existing one. ORIENTATION offers the four possibilities shown in Figure 19-43.
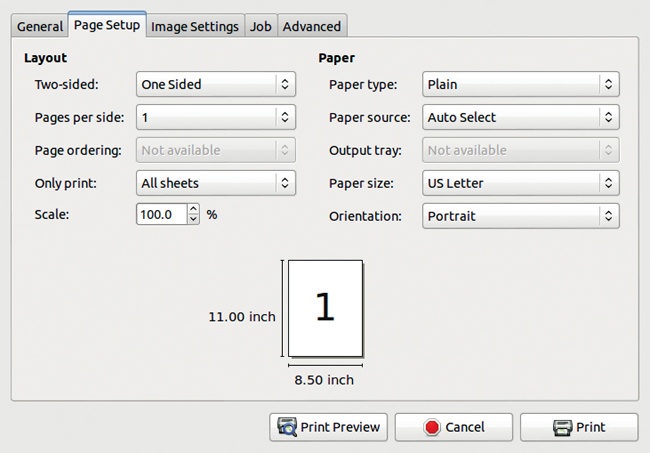

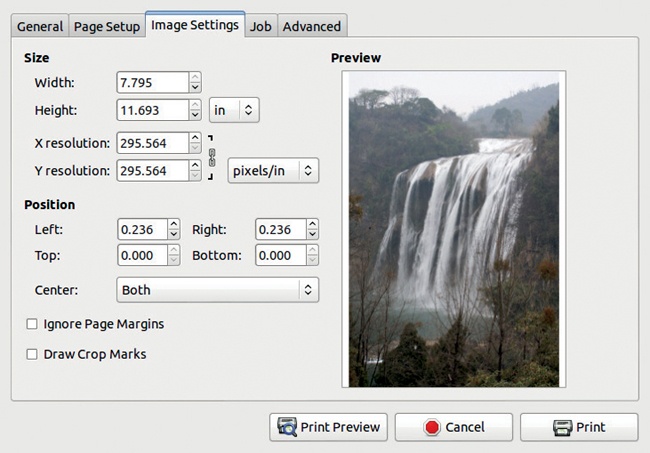
The IMAGE SETTINGS tab (Figure 19-44) can be used to change the size of the printed image via adjustments to the margins and the resolution. Note that the paper size was set in the PAGE SETUP tab. You can also add crop marks, which are useful if you plan to crop the printed picture physically.
The other tabs are not always present, depending on the active printer. Figure 19-45 shows the ADVANCED tab, in the case of a laser printer. The settings deal with printing quality, color control, and fine-tuning. For an inkjet printer, the ADVANCED tab provides more controls, and two additional tabs may precede the ADVANCED tab (IMAGE QUALITY and COLOR).

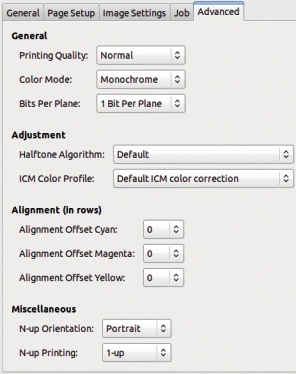
In the case of a monochrome printer, there are no extra tabs.
Gutenprint is not a component of GIMP, although it was initially developed for it to provide more options than the GTK interface. You can easily install it on any GNU/Linux distribution as well as on Mac OS X, but installing it on Windows is more difficult. To run it in GIMP, you must also install the plug-in (see Chapter 21 for more about installing plug-ins). Image: File > Print with Gutenprint should then appear and, when selected, open the dialog shown in Figure 19-46.
A preview of the current image appears on the left. If you hover the pointer over this preview, a detailed tooltip explains how to position the image. These instructions are especially important if the image is much smaller than the sheet of paper. The IMAGE POSITION and IMAGE SIZE frames at the bottom of the dialog display the numeric equivalents of what you see in the preview. The SIZE UNITS tab offers a choice among inches, points, picas, centimeters, and millimeters.
The two frames on the top right vary depending on the printer. In particular, the possible paper sizes in the PAPER SIZE frame are different for a traditional laser printer versus a multipurpose inkjet printer. Similarly, the rectangle above SET PRINTER OPTION DEFAULTS in the PRINTER SETTINGS tab shown in Figure 19-46 may contain buttons or sliders depending on the selected printer.

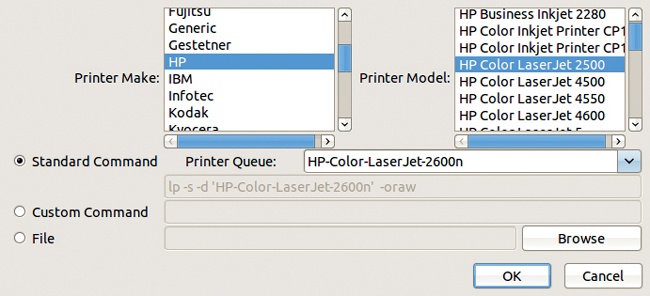
The PRINTER SETTINGS tab allows you to select a predefined printer, add a new one, or set up the current printer. The SETUP PRINTER button opens the dialog shown in Figure 19-47. You can choose the PRINTER MAKE and then the PRINTER MODEL. The number of possible printer models is huge and always increasing; although the Gutenprint developers work hard to be up-to-date, a new model may not yet be compatible.
Figure 19-46 shows the Print with Gutenprint dialog with an HP PhotoSmart P1315 printer selected. There are only a few settings available. For comparison, Figure 19-48 shows the Print with Gutenprint dialog for an Epson Stylus Photo P50. As you can see, it has options for various print qualities, media types, sources, and more. The Print with Gutenprint dialog always contains more options than the GTK printing interface, shown in Figure 19-39 to Figure 19-44.
The dialog shown in Figure 19-49 shows just a few of the many parameters and settings available with the Epson printer. This dialog is accessed by clicking the OUTPUT tab and then clicking the large ADJUST OUTPUT button in the center. These parameters are intended to be adjusted specifically for each image. Many of the sliders are inactive by default but can be activated if you check the box to the left.
Because many parameters are available, you will likely want to save settings that work well. You can do this by using the buttons at the bottom of the main window (see Figure 19-46) to either save the settings and continue fiddling with them or save them and print immediately.
If you want to use Gutenprint with a printer that is not (yet) supported, you can choose to generate a PostScript or PDF file by selecting Adobe as the printer, and then print this file using the system tool. But doing so greatly reduces the flexibility and power of Gutenprint. If you intend to use Gutenprint and are shopping for a printer, check whether the printer you’re considering is one of the more than 1400 printers supported.
