
Interacting with the Interface
If you use any other computer programs, then you’re probably familiar with using menus and the mouse. Anime Studio uses the standard paradigm for interacting with the interface, but there are some interface controls that may be new to you.
Accessing Tooltips
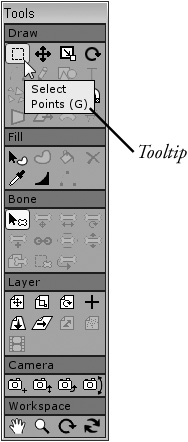
If you ever get confused trying to identify a specific tool or button in the interface, you can use the available tooltips to discover a button’s name. Tooltips are text bubbles, as shown in Figure 2.8, that appear when you hold the mouse cursor still over the top of a button; they reveal the button’s name and keyboard shortcut, if it has one. If the tooltips get annoying after a while, that’s just too bad, as there is currently no way to disable them.
Figure 2.8. Tooltips reveal the button’s name.
Using Keyboard Shortcuts
Many, but not all, commands have keyboard shortcuts that allow you to execute specific commands by pressing a keyboard key. These shortcuts provide direct access to a tool, view, or command. On menus, keyboard shortcuts are listed to the right of the menu command, and tools with keyboard shortcuts list them in the tooltip. You can find a comprehensive list of keyboard shortcuts in Appendix B, “Anime Studio Keyboard Shortcuts,” which is located online at www.courseptr.com/downloads.
Floating Palettes
Most of the default palettes are docked to the interface by default, but you can use the Window menu to make several palettes into floating palettes. Simply select the palette from the Window menu or use its keyboard shortcut and the palette will float free of the interface.
Caution
Each of the docked palettes has its own place, and you cannot change where each palette is docked.
Tip
Learning to use keyboard shortcuts will enable you to work much quicker than having to repeatedly move the mouse to a specific interface palette or menu.
Floating palettes can be positioned anywhere on the desktop by dragging their title bar. Floating palettes are marked by a checkbox to the left of their name in the Window menu. Selecting the palette again in the Window menu will dock it to the interface again.
New Feature
The capability of palettes to float free of the interface is new to Anime Studio 6.
Hiding and Viewing Interface Windows
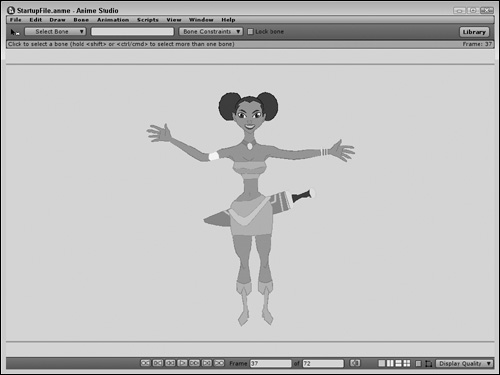
Most of the palette windows can be closed or hidden when floating by clicking the Close icon located in the upper-right corner on Windows systems or in the upper-left corner on Macintosh systems. The Tools palette is the only one that cannot be hidden. Hidden palettes can be reopened using the Window menu. Figure 2.9 shows the main window after all palettes have been made into floating palettes.
Note
Clicking the Close icon button in the main window exits the program.
Rearranging the Interface
If you drag a floating palette’s title bar, you can relocate the selected palette to a new location. You can resize some of the floating palettes by dragging their edges or corners. You can also resize docked palettes by dragging the edges between adjacent palettes. Docked palettes are maximized automatically to fill the current screen space. This will reduce the size of the adjacent palette. Figure 2.10 shows the interface with increased Style and Layers palettes and a decreased Timeline palette.

Note
All floating palettes—including the main window—can be resized, except for the Tools and Style palettes.
New Feature
The ability to resize docked palettes is new to Anime Studio 6.
Using the Right-Click Mouse Button
In some locations within the Anime Studio interface, you can access a pop-up menu by clicking the right mouse button. For example, if you right-click the Timeline palette, you can add a keyframe or change a key’s interpolation method. Right-clicking a switch layer lets you choose the active sublayer.
The right-click button is also helpful in certain situations. For example, in the Style palette, clicking a color swatch with the left mouse button selects the fill color and clicking a color swatch with the right mouse button selects the outline color. Dragging in the working area with the right mouse button will pan the view.
Using the Scroll Wheel
In addition to the right mouse button, you can also take advantage of the mouse’s scroll wheel. Scrolling in the working area will zoom the view in and out. Scrolling the mouse wheel up and down in the Timeline palette moves the Time Slider back and forth between the different frames. Finally, scrolling through the Layers palette moves you up and down through the list of layers. You can also use the scroll wheel to change a parameter value quickly.
Changing Values with the Mouse
Whenever a parameter field is selected, you can type a new value by using the keyboard, but another way to alter the value is with the scroll wheel on the mouse. Scrolling up will increase the parameter value and scrolling down will decrease it. You can also change the parameter value by right-clicking and dragging with the mouse. Dragging to the right increases the value and dragging to the left decreases it.