
Importing Images and Videos
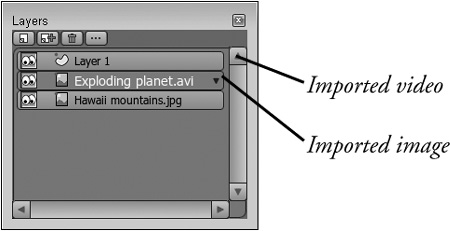
When you create an image layer by selecting it from the New Layer pop-up list in the Layers palette, a File dialog box opens from which you can locate an image or video clip to place within the layer. If you click the Cancel button in the File dialog box, then no new layer is created. Once a picture is selected, the name of the image layer in the Layers palette is automatically changed to be the image’s name, as shown in Figure 22.1.
Figure 22.1. Image layers.
Note
Even though the layer name is changed to match the image file’s name, you can still change the image layer’s name in the Layer Settings dialog box.
You can also create a new image layer by selecting the File, Import, Image or the File, Import, Movie menu command. This menu also opens a File dialog box where you can select an image or video to import. Each image layer can only hold a single image or video file.
Supported Image Formats
Anime Studio can import several different image formats, including the following:
BMP: This format is common on Windows-based computers.
GIF: This format is used on the Web and supports 256-colors.
JPEG: Another common Web format that supports 16.7 million colors. JPEG images can also be compressed to reduce their size, but severe compression can destroy the image.
PNG: The PNG format is a newer Web format. It offers compression and full alpha channel support.
Targa: This format allows lossless compression.
Caution
Although the supported image formats are filtered in the File dialog box, the File Type drop-down list doesn’t list the supported image formats.
The supported movie formats that can be imported include the following:
AVI: A Windows-based video format.
QuickTime: A video format available for Windows and Macs.
New Feature
The ability to import HD Video is new to Anime Studio 6. This feature is only available in Anime Studio Pro. Note that the output will not be HD.
Caution
Imported movies import both the video images and sound, but you cannot edit video and audio separately.
Note
Anime Studio will allow you to import an MPEG video file, but only the first frame of the loaded video will appear and be exported.
Updating an Image Layer
If you ever need to update or change the image used in an existing image layer, you can use the Source Image button in the Image panel of the Layer Settings dialog box, shown in Figure 22.2. Clicking this button opens a File dialog box where you can select a new image file to replace the current one.
Figure 22.2. Image panel in the Layer Settings dialog box.

Loading an Alpha Channel Movie
If the video file that you are loading into an image layer contains an alpha channel, Anime Studio will detect the alpha channel and use it to composite the movie with the other layers. QuickTime movies are automatically detected, but the Image panel of the Layer Settings dialog box has an option to explicitly tell Anime Studio that AVI movie has an alpha channel.
Note
You can check to see if your QuickTime movie has an alpha channel by opening the movie file in the QuickTime player and selecting the Window, Show Movie Info menu. If the movie info states that the movie has Millions of Colors+, then the + sign indicates that it has an alpha channel.
Organizing Images with Projects
When image files are used within a project, Anime Studio doesn’t embed the image files into the .ANME file but instead only keeps track of the link to the image file. This helps to keep the project files small, but it can result in missing image files if the linked images get moved. For this reason, it is best to keep the image file located with the project file. If image files are placed within a subfolder, then a relative link to the subfolder is remembered by the project.
Tip
One way to keep all the pieces of the project together is to create a project folder within the Library folder where Anime Studio is installed. Then all content included in the project including subfolders will be visible for review in the Library palette.
Caution
Losing files applies to all external files, not just to images, so 3D object, movie, and sound files can get lost also.
If the image files that are used in a project are moved to a location different from what the link is, or if the image file is renamed, then a missing file icon appears within the project, as shown in Figure 22.3. The missing icon is the size of the missing image.

Tip
Keeping all the files together in a single folder also helps when you get ready to upload the project to the Web. If the image files used by the project aren’t uploaded with the project, then they will appear as missing.