In this exercise, you’ll look at different views of a PowerPoint presentation and experiment with ways you can move around in presentations and on slides.
Note
SET UP This exercise uses the Introducing presentation located in the ~/Documents/Microsoft Press/2008OfficeMacSBS/OfficePrograms/ folder. Start PowerPoint, and then follow the steps below.
Open the Introducing presentation.
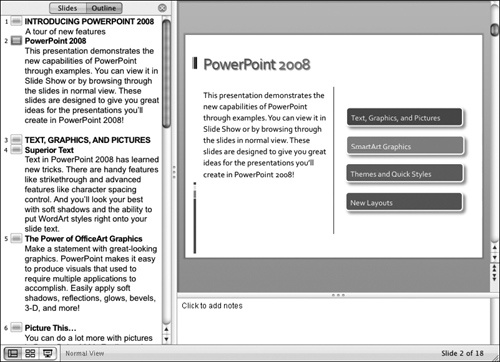
The presentation opens in Normal view. In the lower-right corner of the presentation window, PowerPoint displays the total number of slides and the position of the current slide. The current slide is indicated in the Navigation pane by a blue selection box.
At the bottom of the scroll bar on the right side of the Slide pane, click the Next Slide button to move to Slide 9.
Click the Previous Slide button to move back to Slide 8.
Drag the Slide pane scroll box slowly down to the bottom of the scroll bar, releasing the mouse button when the Slide 18 ScreenTip appears.
As you move down the scroll bar, a ScreenTip tells you the number and title (if there is one) of the slide that will be displayed if you release the mouse button at that point.
Press the Page Up key until Slide 14 appears.
Click and hold at the top end of the Slide pane scroll bar.
PowerPoint moves through all the slides in the presentation and ends with Slide 1.
In the Navigation pane, click the Outline button.
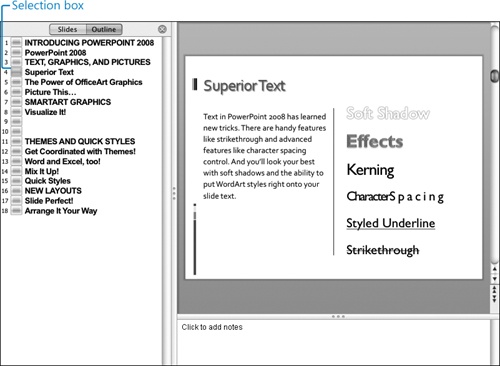
The Navigation pane changes to display the Outline page. The current slide is indicated in the Navigation pane by a gray selection box.
Press the Right Arrow key to move to Slide 2. Compare the content in the Navigation pane with the content shown on the slide.
The Outline page displays the slide title and the text contained in the text box.
In the Navigation pane, click the number, icon, title, or text for Slide 4.
Slide 4 appears in the Slide pane. Clicking any part of the slide representation on the Outline page displays the slide.
The Navigation pane expands to fill about 75 percent of the presentation window. This view is useful when you want to view or edit the text of several slides at one time.
Press Control+Shift+Z to return to the Normal view defaults.
Right-click an empty area of the Navigation pane, point to Collapse, and then click Collapse All.
The Outline page of the Navigation pane now displays only the slide titles. Slides containing only graphics don’t have a title, only a slide number and icon.
The current slide is indicated in the Navigation pane by a light blue selection box.
On the View toolbar in the lower-left corner of the presentation window, click the Slide Sorter View button (or press Control+Shift+V).
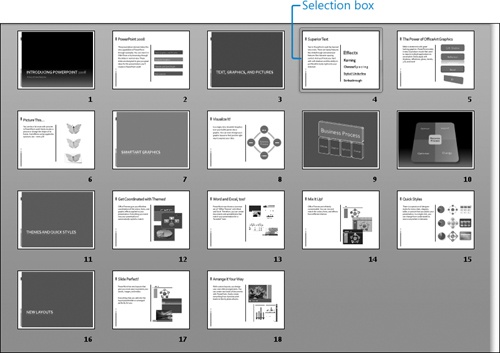
The Navigation pane and Notes pane close. All the slides now appear as thumbnails in one large pane. The current slide is indicated in the Slides pane by a light blue selection box.
PowerPoint displays the presentation in Normal view, with Slide 15 active.
Press Control+Shift+C to switch to Slide view.
The Navigation pane and Notes pane close. PowerPoint displays the current slide at the maximum size supported by the presentation window.
On the View toolbar, click the Slide Show button (or press Control+Shift+S).
PowerPoint displays a full-screen view of the first slide in the presentation.
The pointer becomes visible, and the Slide Show Options button appears in the lower-left corner of the screen. Clicking this button displays a list of slide show options.
See Also
For information about presenting a slide show, see "Run a Slide Show" in Chapter 10.
Click anywhere on the slide (not on the Slide Show Options button).
The slide show advances to the next slide.
Press the Right Arrow key.
The slide show advances to the next slide.
Continue through the presentation, using any of the following methods:
To advance to the next slide, press N, Return, Page Down, Right Arrow, Down Arrow, or the Spacebar, or click the mouse.
To return to the previous slide, press P, Page Up, Left Arrow, Up Arrow, or Delete.
As you move through the presentation, read the information on the slides to gain a better overview of PowerPoint 2008 and the variety of features we’ll discuss later in this book.
After the last slide, the slide show closes and you return to Slide view.
Tip
If you prefer, you can have PowerPoint end all slide shows with a black slide so that you have time to wrap up before closing the presentation. To turn on this function, display the PowerPoint Preferences dialog box, click the View button, and in the Slide Show area, select the End With Black Slide check box. Then click OK.