
Assigning categories to Entourage items can help you more easily locate information. Entourage 2008 for Mac uses color-coded categories, which combine named categories with color coding to provide an immediate visual cue when you are viewing your Inbox, Address Book, or other Entourage window.
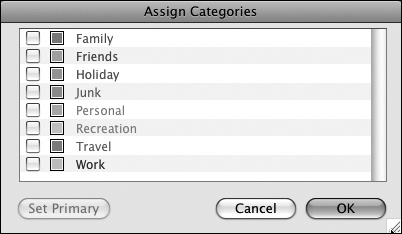
Entourage 2008 has eight built-in categories: Family, Friends, Holiday, Junk, Personal, Recreation, Travel, and Work. You can change the names or colors of the existing categories to fit your needs, and you can create your own categories.
Assigning a category to an item displays the item header information in that category’s color. You can assign a category to an item from the item window or from a module window.
To assign one category:
 Right-click the item, point to Categories, and then click the category.
- Select the item in the module window, click the Categories arrow on the program window toolbar, and then click the category you want to assign.
- Open the item in its item window, click the Categories arrow on the item window toolbar, and then click the category you want to assign.
To assign multiple categories:
Click the Categories button on the program window or item window toolbar.
In the Assign Categories dialog box, select the check boxes of the categories you want to assign.
To assign a category and select its color as the one that will show on color-coded items, click the category name (before selecting its check box) and click the Set Primary button.
In the Assign Categories dialog box, click OK.
You manage categories from the Categories window, which you can display by clicking Edit Categories in any of the Categories lists.
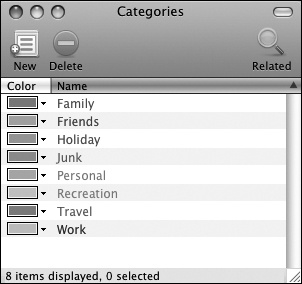
In the Categories window, you can do any of the following:
To create a new category, click the New button. Entourage inserts a new, untitled category with a color of its own choosing.
To change the name of a category, double-click the name to select it for editing, change the name, and then press Return.
To change the color associated with a category, click its color box, and then click the color you want.
To delete a category and remove any assignments of that category, click the category name, click the Delete button, and then in the message box prompting you to confirm the deletion, click Delete.
A compelling reason to use categories is that you can very quickly filter the information stored in a module to display only items with a specific category assigned to them, by clicking the category name in the Views section of the Folder list. Only the categories that are currently assigned to items appear in the Views list.