
In this exercise, you’ll add preformatted headers and footers to a document.
Note
SET UP Open the My Frost King document you created in the previous exercise or, if you didn’t complete the exercise, open the FrostKing2 document from the ~/Documents/ Microsoft Press/2008OfficeMacSBS/FinishDocuments/ folder.
In Print Layout view, display page 2 of the document, and position the insertion point at the beginning of the first paragraph of the story.
Page 1 is a cover page. The story starts on page 2.
Click the Document Elements tab of the Elements Gallery, and then click the Header category.
The Header gallery opens, displaying thumbnails of some of the available preformatted headers. Odd Pages in the Insert As list indicates that these headers are specifically designed to appear on odd-numbered pages of a document. Notice that the page numbers—represented on the thumbnails by the number sign (#)—are all on the right side of these thumbnails.
Tip
When printing a document double-sided, you can assign specific headers to odd and even pages to place information a reader might want to quickly see—such as page numbers—on the outside edge of every page. When flipping through a double-sided document (such as a book), a reader typically looks at the right page rather than the left page for reference information. For that reason, extra information is usually placed on odd-page headers rather than even-page headers.
In the Insert As list, click Even Pages.
The header thumbnails change to reflect the selected orientation. The content of the Contrast and Edge thumbnails, which on odd pages contain additional information, also changes.
Scroll through the gallery, noticing the variety of headers that are available, and then click the Sideline (Even Page) thumbnail.
Tip
As mentioned in earlier chapters, when you point to a thumbnail, the name of the associated gallery item appears in the style name area in the left pane of the gallery.
Word inserts the selected header at the top of page 2. The page number and the document title (which was saved with the document when it was entered on the cover page) appear automatically.
The text in the header is a different color from the text shown on the thumbnail in the Headers gallery, because headers and footers, like other document elements, adopt the color scheme associated with the current document theme.
See Also
For more information about themes and color schemes, see "Work with Office Themes" in Chapter 7.
In the Insert as list, click Odd Pages. Then, in the gallery, click the Sideline (Odd Page) thumbnail.
Display page 3, and verify that the matching odd-page header appears there.
In the Document Elements gallery, click the Footer category. Look at the footers available for odd pages (the current selection) and then, in the Insert as list, click All Pages.
The gallery displays the three footers available for all pages.
In the gallery, click the Simple (All Pages) thumbnail.
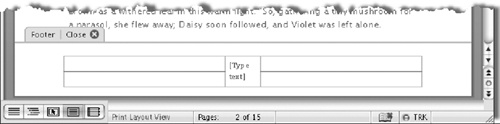
Word inserts the footer on all pages other than the cover page, and displays the first instance of it at the bottom of page 2.
In the footer, click the [Type text] placeholder to select it. Then type Louisa May Alcott.
Display the Formatting Palette in the Toolbox. In the Alignment and Spacing panel, click the Align Center button.
Word centers the text you entered in the footer.
On the tab located at the upper-left corner of the footer, click Close. Click the Document Elements tab to close the Elements Gallery. Then scroll the document to view the finished headers and footers.
Save the document in the FinishDocuments folder as My Frost King. If you’ve been working in the My Frost King document from the previous exercise, replace it with this updated version.


Add a Watermark to a Document
Sometimes, you might want words or a graphic to appear behind the text of a printed or online document. For example, you might want the word CONFIDENTIAL to appear faintly behind the text in a contract, or you might want a graphic to appear faintly behind the text in a press release. These faint background images are called watermarks. Watermarks are visible on-screen and in print, but because they are faint, they don’t interfere with the readers’ ability to view the document’s main text.
To create a graphic watermark in a document:
On the Insert menu, click Watermark.
In the Insert Watermark dialog box, click Picture, and then click the Select Picture button.
In the Choose a Picture dialog box, navigate to and double-click the image file you want to display behind the document text.
The preview pane displays a preview of the graphic as a watermark.
To display the graphic at its full color intensity, clear the Washout check box.
If you want the selected image to appear at a different scale than shown in the preview pane, change the percentage in the Scale box.
When you are satisfied with the preview, click OK.

To create an alphanumeric watermark in a document:
On the Insert menu, click Watermark.
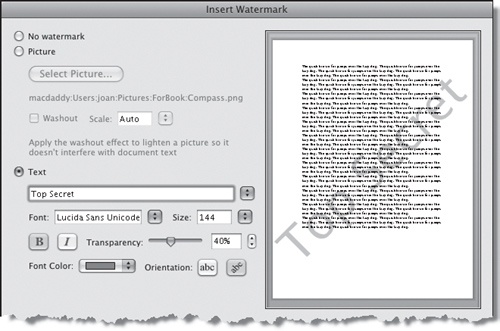
In the Insert Watermark dialog box, click Text.
In the Text box, type the characters you want to display behind the document text.
The preview pane displays a preview of the textual watermark.
Choose the font and font size. Apply bold and/or italic formatting if you want.
Set the font color first, and then the transparency. Finally, choose horizontal or diagonal orientation.
When you are satisfied with the preview, click OK.
See Also
For information about using WordArt as a watermark, see "Add a Watermark to a Slide" in Chapter 10.