In this exercise, you’ll create a new document, look at the information already contained in the document, and then add content to it by typing and by inserting the contents of an external file.
Note
SET UP You’ll create your own practice file in this exercise, and also use the AnnouncePlanner document located in th ~/Documents/Microsoft Press/2008OfficeMacSBS/CreateDocuments/ folder. Quit Word if it’s running, so we can start from scratch.
Start Word.
When Word starts, a temporary document named Document1 opens in the default Print Layout view. Blank documents created during each program session are numbered consecutively, regardless of the document type.
See Also
For information about different ways of viewing a Word document, see "Change the View" in Chapter 2.
On the toolbar, click the New arrow.
The New list expands to display the types of blank documents you can create.
Tip
Each document type is represented in the New list by a slightly different icon: the New Blank Document icon is a blank page, the New Blank Notebook Layout Document icon is a lined page, and the New Blank Publishing Layout Document icon is a page with the print area outlined. On the toolbar, the New button displays the icon of the most recently created document type. You can create a new document of that type by clicking the button instead of the arrow.
In the New list, click New Blank Document.
A second temporary document, Document2, opens. Both of the open documents exist only in the computer’s temporary memory until you save and name them.
On the Word menu bar, on the File menu, click Properties.
The Document2 Properties dialog box opens, displaying the Summary page.
Look at the General, Summary, Statistics, Contents, and Custom pages of the dialog box to see the information that is already stored with the blank document.
You can change the current properties, or enter additional information that you want to save with the document, on the Summary page and on the Custom page.
In the Document2 Properties dialog box, click Cancel.
On the Format menu, click Document.
The Document dialog box opens.
The page margins and header and footer location have been set by the currently attached document template, Normal.dotm.
In the Document dialog box, click Cancel.
On the View menu, point to Toolbars, and then click Formatting.
The Formatting toolbar opens at the top of the document window, below the Standard toolbar.
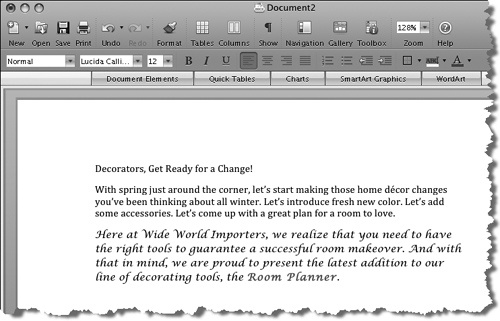
With the insertion point blinking at the beginning of the new document, type Decorators, Get Ready for a Change!
The text appears in the new document. On the Formatting toolbar, you can see the style and alignment of the current paragraph and the font, font size, and font formatting of the text, all of which have been set by the Normal document template.
Press the Return key to begin a new paragraph. Then type With spring just around the corner, let’s start making those home decor changes you’ve been thinking about all winter.
When you press the Spacebar after typing the letters d-e-c-o-r, Word changes the word from decor (with a plain "e") to décor (with an accented "é"). This occurred because the word pairing decor/décor is in the standard AutoCorrect word list.
See Also
For information about the AutoCorrect, AutoFormat, and AutoText functions, see "Word Tools and Preferences" and "Personalize Program Functionality" in Chapter 1.
Press the Spacebar, and then type Let’s introduce fresh new color. Let’s add some accessories. Let’s come up with a great plan for a room to love.
Notice that you did not need to press Return when the insertion point reached the right margin, because the text wrapped to the next line.
Press Return to begin a new paragraph. Then on the Insert menu, click File.
Note
The ellipsis (...) following the File command indicates that clicking the command opens a dialog box and requires further action on your part.
The Insert File dialog box opens, displaying its most recent configuration and file storage location.
If the dialog box doesn’t already display the contents of the ~/Documents/Microsoft Press/2008OfficeMacSBS/CreateDocuments/ folder, navigate to that folder. Then click (don’t double-click) the AnnouncePlanner document.
See Also
For information about dialog box views and navigation, see "Open, Save, and Close Office Files" in Chapter 2."
At the bottom of the dialog box, notice the options to link to the file and to insert or link to a specific range of content in the file.
In the Insert File dialog box, click Insert.
Word inserts the contents of the selected document. The inserted text retains the font formatting of the original document.
On the Standard toolbar, click the Save button.
The Save As dialog box descends, displaying the contents of the CreateDocuments folder. In the Save As box, Word suggests Decorators, the first word in the document, as a possible name for this file.
With Decorators selected in the Save As box, type Planner Announcement.
See Also
Your Save As dialog box might look different from the one shown here. For information about expanding and working in the Save As dialog box, see "Open, Save, and Close Office Files" in Chapter 2.
In the Save As dialog box, click Save.
The Save As dialog box closes, Word saves the file in the CreateDocuments folder, and the name of the document, Planner Announcement, appears on the title bar of the document window.