
Depending on the way you’re working in a file, you may find it more effective to work in a view other than the default, to change the magnification so that you can see more or less detail, or to view multiple parts of a file or multiple files at one time.
You switch among views of an Office file by using commands on the View menu or by clicking the buttons on the View toolbar in the lower-left corner of the window. Each program offers its own set of views that are appropriate to its content. For example, you can display a PowerPoint presentation in Normal view, Slide Sorter view, and Slide Show view. We discuss the views available in each program in Chapter 3.

You can change the magnification of any Office file by choosing a magnification level from the Zoom list on the Standard toolbar, by entering a magnification level in the Zoom box, or by clicking Zoom on the View menu and selecting the magnification you want in the Zoom dialog box. You can select a specific magnification level or fit the content to the window.
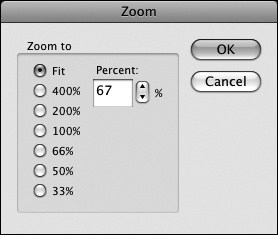
The options in the Zoom dialog box vary depending on the type of Office file you’re viewing. The range of magnification varies by program, as follows:
Program | Magnification range |
|---|---|
Excel | 10 percent to 400 percent |
PowerPoint | 10 percent to 400 percent |
Word | 10 percent to 500 percent |
See Also
In addition to changing the view of the file content, you can display and hide the toolbar area, the Elements Gallery, the Toolbox, and program-specific tools. For information, see Chapter 1.
Office files often contain multiple units of content that you will want to view and manipulate—a presentation is made up of multiple slides, a workbook of multiple worksheets, and a document of multiple pages.
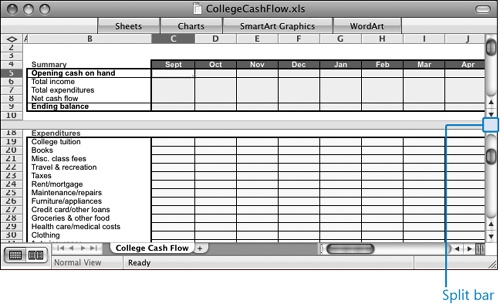
In Excel and Word, you can split the window into separate panes. Each pane has its own set of scroll bars, so you can view two areas of a worksheet or document at the same time. To split a window, drag the Split bar (at the top of the vertical scrollbar) down.
If you want to display more than one file on the screen, you can arrange and work with the separate windows. When you’re working with several open Office files of the same type (documents, workbooks, or presentations), you can automatically arrange all the open files by clicking Arrange or Arrange All on the Window menu. Clicking Arrange opens the Arrange dialog box, in which you can choose a Tiled, Horizontal, Vertical, or Cascade window arrangement.

Each window retains its own set of scroll bars, but the scroll bars of only the active window are visible.
If you’re working with several Office files of different types, you can bring all the files of one type to the front of the stack by clicking Bring All To Front on the Window menu of the relevant program.