
The more geometry changes that occur throughout your corridor, the more assemblies you will have. Civil 3D offers several tools to keep your assemblies organized and available for future use.
Storing a Customized Subassembly on a Tool Palette
Customizing subassemblies and creating assemblies are both simple tasks. However, you’ll save time in future projects if you store these assemblies for later use.
A typical jurisdiction usually has a finite number of allowable lane widths, curb types, and other components. It would be extremely beneficial to have the right subassemblies with the parameters already available on your tool palette.
The following exercise will lead you through storing a customized subassembly on a tool palette:
1. Open the Storing Subassemblies and Assemblies.dwg file (which you can download from this book’s web page).
2. Be sure your Subassemblies tool palette is displayed.
3. Right-click in the Tool Palette area, and select New Palette to create a new tool palette. Enter My Road Parts in the Name text box.
4. Select the sidewalk sub-base from the C&G 12′ Lanes Sidewalk 4:1 Daylight assembly. You’ll know it’s selected when you can see it highlighted and the grip appears at the assembly baseline.
5. Click on the dashed portion of the subassembly (i.e., a subassembly marker, not the grip point) and drag the assembly into the tool palette. It may take you several tries to get the click-and-drag timing correct, but it will work. You’ll know it is working when the cursor appears with a plus sign in the tool palette.
6. When you release the mouse button, an entry appears on your tool palette for GenericPavementStructure. Right-click this entry, and select the Properties option. The Tool Properties dialog appears (see Figure 8-50).
Figure 8-50: The Tool Properties dialog
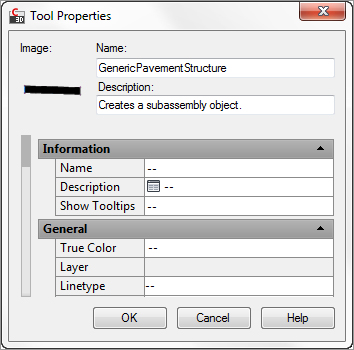
7. Replace GenericPavementStructure with Sidewalk Subbase in the Name text box. You can also change the image, description, and other parameters in this dialog. Click OK.
8. Try this process for several lanes and curbs in the drawing, if desired. The resulting tool palette looks similar to Figure 8-51.
Figure 8-51: A tool palette with three customized subassemblies

Note the tool palette entries for each subassembly point to the location of the Subassembly.NET directory, and not to this drawing. If you share this tool palette, make sure the subassembly directory is either identical or accessible to the person with whom you’re sharing.
Storing a Completed Assembly on a Tool Palette
In addition to storing individual subassemblies on a tool palette, it’s often useful to warehouse entire completed assemblies. Many jurisdictions have several standard road cross sections; once each standard assembly has been built, you can save time on future similar projects by pulling in a prebuilt assembly.
The process for storing an assembly on a tool palette is nearly identical to the process of storing a subassembly. Simply select the assembly baseline, hover your cursor over the assembly baseline, left-click, and drag to a palette of your choosing.
It’s usually a good idea to create a library drawing in a shared network location for common completed assemblies and to create all assemblies in that drawing before dragging them onto the tool palette. By using this approach, you’ll be able to test your assemblies for validity before they are rolled into production.
Organizing Assemblies within a Drawing
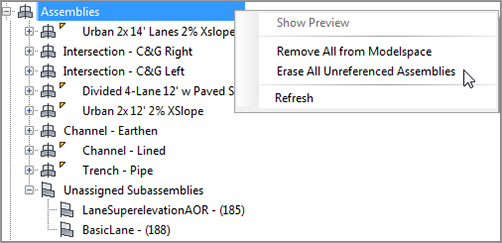
Civil 3D 2012 has new features that help you keep a drawing with many assemblies organized. In Prospector, you will see your listing of assemblies and an entry for Unassigned Subassemblies.
Unassigned Subassemblies are orphaned parts that are not attached to any main assembly. They may be left over from some assembly customization or they may just be a mistake. In either case, you will want to clean these out. Right-click on the Unassigned Assemblies collection and select Erase All Unreferenced Assemblies.
You can also choose to remove the display of the assemblies from modelspace by right-clicking on the Assemblies collection. This hides the display of the assembly but retains its definition in the drawing.
You can still use a hidden assembly in a corridor. If you need it visible again for editing purposes, right-click on the assembly and select Insert To Modelspace.
The niftiest part of this new method of organizing assemblies is that they can now be part of your Civil 3D template without having them visible.