
Although the concept of a "paperless office" is wonderful, possible, and certainly a goal that we are actively working toward at our company, it is still very necessary to print the documents, worksheets, and—perhaps to a lesser degree—slides you create in the Office programs.
You can quickly print one copy of an entire Office file on the default printer, with the default print settings, by clicking the Print button on the Standard toolbar.
If you want to print only part of the file or multiple copies, print non-standard file elements such as notes or comments, or change any other print setting, open the Print dialog box by clicking Print on the File menu or by pressing Command+P.

From the Print dialog box, you still have the option of printing the file with the default print settings—simply click Print and you’re done. Or you can change any of a multitude of settings—some which aren’t obvious because they’re located on different pages of the dialog box. From the list immediately above the settings area, you can access any of the following groups of settings:
Copies & Pages
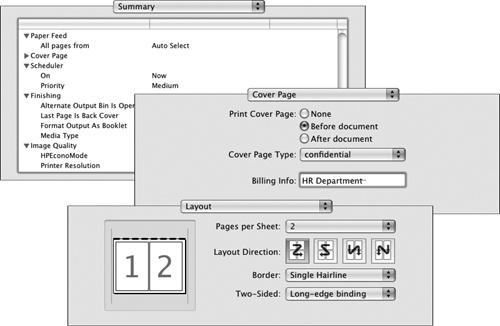
Layout
Color Matching
Paper Handling
Paper Feed
Cover Page
Scheduler
Finishing
Image Quality
From the same list, you can also display a non-editable Summary page listing all the current print settings.
The settings available from the Copies & Pages page of the Print dialog box vary between programs, but the other pages are the same in all programs.

Before you print a file, it’s usually a good idea to check how it will look on paper by previewing it. Previewing is essential for multipage files but is helpful even for one-page files. In the Print dialog box, the Quick Preview pane displays a small version of one page at a time; you can move forward and backward by clicking the Next and Previous buttons below the pane.

To display a full-size, non-editable version of the file as it will be printed, click the Preview button to open the file in the Preview program (installed with the Mac OS).