
Most of the document formatting techniques you use in Word work the same way in Excel. You can format fonts, align text horizontally and vertically, and indent text within a worksheet cell. Excel has a few additional formatting settings, which we’ll discuss here.
Excel is commonly used to store numeric data on which you can run a variety of calculations. Numeric data can take many formats, for example, whole numbers, numbers with one or more decimal places, currency values, percentages, and dates. You can more clearly express numeric data by applying a number format to it.
The simplest way to apply a numeric value is from the Number panel of the Formatting Palette.
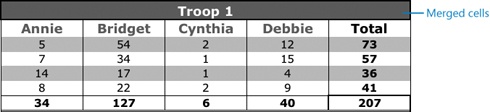
You can merge two or more cells to create one wide or tall cell. Merging cells joins the cell structure but not the cell content. When you merge multiple cells that contain content, Excel keeps only the content of the first cell; the rest is discarded.
You can apply borders to worksheet cells by using the same methods you use to apply borders to text paragraphs. You also have the option of "drawing" borders by hand. This is a convenient way to create non-standard borders.
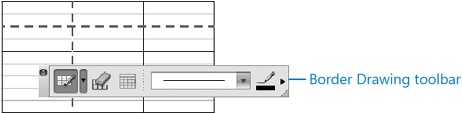
By using the tools on the Border Drawing toolbar, you can draw a single line by dragging along the cell separator where you want to draw the line, or you can create a set of lines by dragging diagonally across the range of cells in which you want to insert lines. You can control the line style, weight, and color of each line or set of lines that you insert.
To display the Border Drawing toolbar, click the Draw Border button in the Borders And Shading panel of the Formatting Palette.

The Page Setup panel of the Excel Formatting Palette includes additional settings that control the appearance of worksheet or list sheet content on the printed page.
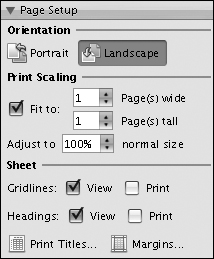
By using the commands available in this panel, you can:
Fit content to a printed page. In both Word and Excel, you can adjust the way content fits onto a printed page by scaling the content, either to a specific percentage of the actual size or to fit onto a specific number of pages. Scaling content for print doesn’t affect the size or appearance of the content when you’re viewing the document or sheet on-screen.
Display and hide gridlines and headings. For worksheets, you can specify whether gridlines and row and column headings appear on the printed page, independently of whether they appear on-screen.
Print titles. When printing a multipage worksheet containing content that has row and column titles entered in the worksheet, you can instruct Excel to print the column titles at the top of every page and the row titles on the left side of every page. This greatly simplifies the process of reading content from a worksheet containing more than one page of printed content.
Tip
If you want to print only some of the content on a worksheet, you can define a specific selection of cells as the print area. When you print a worksheet that has a print area defined, only that range of cells is printed. To set the print area, first select the range of cells you want to print. Then point to Print Area on the File menu and click Set Print Area. You can modify or clear the print area from the same menu.
You control the appearance of chart sheet content on the printed page from the Page Setup dialog box, which you can open by clicking Page Setup on the File menu. The Excel version of the Page Setup dialog box has a specific Chart tab, but the only setting available on that tab is the option to print the chart in black and white.

From the Page tab of the Page Setup dialog box in Excel, you can control page orientation, scaling, and print quality, and set the page number for the first page of the sheet content. From the Margins tab, you can specify the amount of space to be reserved at the top and bottom of the page for the header and footer, and set the outer margins of the page, which define the print area. When printing worksheets and list sheets, you can instruct Excel to center the contents of each page horizontally, vertically, or (by selecting both check boxes) in the center of the page. From the Header And Footer tab, which is available only for worksheets and list sheets, you can specify the text, pictures, or file information that will appear in the page header and footer.
Tip
In Word and Excel, you can insert the date and time fields in a header or footer. The date and time shown on the screen update when you activate the header or footer containing the field, and when you print the file. The date and time shown on a printed page will always reflect the actual time at which the file was transmitted from Word or Excel to the printer.