
In this exercise, you’ll apply styles to document content, modify the content by modifying the styles, and then modify the content by attaching a different document template.
Note
SET UP This exercise uses the SBSTemplate document and the Unstyled document located in the ~/Documents/Microsoft Press/2008OfficeMacSBS/WorkDocuments/ folder. Open the Unstyled document. Display the Formatting toolbar. In the Toolbox, display the Font Styles panel of the Formatting Palette.
Scroll through this simple one-page document to become familiar with its content.
The document contains only simple text.
In the Style list on the Formatting toolbar, and in the Styles panel of the Formatting Palette, the style of the text at the current location of the insertion point is shown as Normal. (All text in the document is currently styled as Normal.) In the Pick Style To Apply list in the Styles panel, a light-blue outline surrounds the Normal style.
In the Pick style to apply list, point to Heading 1.
A ScreenTip displays a description of the formatting associated with the style.
From the description we can ascertain that the style:
Is based on the Normal style.
Uses the default heading font associated with the current theme.
Has a specific font size and weight.
Has a color associated with the current color scheme.
Has specific paragraph spacing characteristics.
Indicates a first-level TOC entry.
With the insertion point in the first line of text, Processing Orders, click Heading 1 in the Pick style list.
The text of the active paragraph changes to match the Heading 1 style depicted in the Pick Style list. In the Styles panel and on the Formatting toolbar, the current style is shown as Heading 1.
Because the Heading 1 style is a paragraph style, as indicated by the paragraph mark to the right of the style name, it isn’t necessary to select specific text to apply the style to—it formats the current paragraph if the insertion point is active or, if part or all of multiple paragraphs are selected, all the paragraphs containing selected content.
Select the third line of text, Assessing an Order. On the Formatting toolbar, in the Style list, click Heading 2.
The selected text changes to match the Heading 2 preview in the Styles panel.
Two lines below the selected heading, select the paragraph containing the question Who is the customer?. Press and hold the Command key, and then select the paragraphs containing the next two questions—Does the customer already have an account? and What is the payment method? Be sure to select the entire paragraph, not only the words.
See Also
For information about selecting paragraphs, see "Select Text" earlier in this chapter.
In the Styles panel, or in the Style list, click Heading 3 to apply that style to the three questions.
You’ve now used all the styles available in the Styles panel.
Below the first Heading 3–styled question, select the paragraphs beginning with Individuals and Corporate. Then, on the Formatting toolbar, click the Bullets button.
The selected paragraphs change to bulleted list items, and the List Paragraph style appears in the Pick Style list.
Bonus Web Content
For information about bulleted and numbered lists, see "Organize Text in Lists in Word 2008 for Mac" on the book’s companion Web site, at www.microsoft.com/mspress/companion/9780735626171.
At the bottom of the Styles panel, click the List arrow, and then click All styles.
The content of the Pick Style list changes to include all the styles in the Normal template.
Scroll the Pick style list to view the myriad styles available. With the bulleted list items still selected, end by clicking the List Number style.
Note
The list icon to the right of the List Number style name indicates that it is a list style. The number 1 preceding the style name is part of the style preview. It indicates that the style will insert a dynamic number at the beginning of a paragraph and that consecutive List Number–styled paragraphs will be numbered consecutively, starting with the number 1.
The selected bulleted list items change to numbered list items. On the Formatting toolbar, the Bullets button is no longer selected, but the Numbering button is.
Place the insertion point in one of the Normal-styled paragraphs. In the Styles panel, under Current style of selected text, point to the Normal style preview. Then click the arrow that appears.
A list of tasks that you can perform with the current style appears.
In the list, click Modify Style.
The Modify Style dialog box opens.
A description of the formatting associated with the style appears below the preview pane. Basic formatting options are available above the preview pane.
Take note of the information in the Properties section of the dialog box. We can see that this style is not based on any other, and that the paragraph created when you press Return to end this one will also be a Normal paragraph.
In the Formatting section of the dialog box, click the Italic button.
Our purpose here is to make a change that will be immediately obvious, which this one certainly is. All the text of the document changes to italic, but the other characteristics stay as they were.
The reason that all the text changed is that the other styles in the document are based on the Normal style.
In the lower-left corner of the Modify Style dialog box, expand the Format list.
You can change any aspect of the paragraph format from the dialog boxes that open when you click an item in the list.
Click away from the list to close it, and then in the Modify Style dialog box, click OK.
In the Styles panel of the Formatting Palette, many of the style previews are now italic.
Scroll the Pick style list.
Notice that the styles now shown in italic are all based on the Normal style.
In the document, select any Normal-styled paragraph. Then, on the Formatting toolbar, click the Bold button.
The text of the selected paragraph is now italic and bold. In the Style list on the Formatting toolbar, the style is indicated as Normal, but in the Styles panel, the current style is more precisely shown as Normal + Bold.
With the Normal + Bold paragraph still selected, in the Styles panel, just below the current style preview, click the New Style button.
The New Style dialog box opens. The Formatting section of the dialog box already reflects the formatting applied to the selected text.
In the Name box, replace Style1 with My Style.
Scroll to the top of the Style based on list, and click (no style).
In the Style for following paragraph list, click Style1. Don’t select the Add to template check box or the Automatically update check box.
In the New Style dialog box, click OK.
Normal + Bold still appears in the Current Style section of the Styles panel, because creating the new style didn’t also apply it to the selection.
Click the List arrow at the bottom of the Styles panel and then, in the list, click Available styles to display a more manageable list of styles. Scroll the list to verify that it includes your new style.
Because you did not select the Add To Template check box in the New Style dialog box, this style will appear only in this document.
Press the End key to position the insertion point at the end of the paragraph. In the Pick style list, click My Style. Then press Return to start a new paragraph, and type Let’s see if this works.
The new paragraph is also formatted with the style you created.
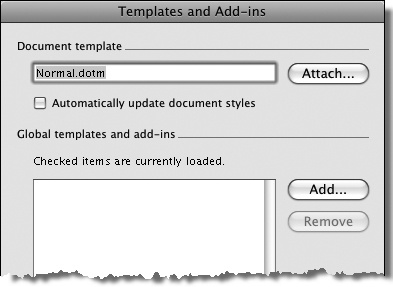
On the Tools menu, click Templates and Add-ins.
The Templates And Add-ins dialog box opens.
Click the Attach button.
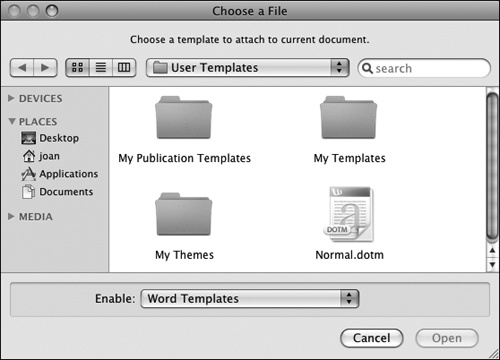
The Choose A File dialog box opens, displaying the contents of your default templates folder.
Click User Templates to display the folders on the path to this one and a list of recently accessed folders.
In the Recent Places section of the list, click WorkDocuments.
In the Choose a File dialog box displaying the contents of the WorkDocuments folder, click the SBSTemplate file, and then click Open.
In the Templates and Add-ins dialog box, select the Automatically update document styles check box so that the new template’s styles will be applied to the document content. Then click OK.


The appearance of all the text in the document changes to reflect the style definitions contained in the template you just applied, and those styles appear in the Styles panel of the Formatting Palette.
