In this exercise, you’ll look at a formatted Word document in the two views you’re most likely to use while working with documents: Print Layout view and Draft view, and then in a view you’ll use less often: Web Layout view. First you’ll explore the many ways you can view and move around in a document in Print Layout view, and then you’ll look at the same document in Draft view and Web Layout view.
Note
SET UP This exercise uses the OfficeProcedures document located in the ~/Documents/ Microsoft Press/2008OfficeMacSBS/OfficePrograms/ folder. Start Word, and then follow the steps below.
Open the OfficeProcedures document.
The document opens in Print Layout view.
Scroll through the document, noting the features that are visible.
The document consists of six pages. Each page has a gradient color background. On all pages but the first, a header appears at the top of the page and the page number appears in the lower-right corner. The document headings are formatted by using styles.
See Also
For information about styles, see "Work with Styles" in Chapter 7. For information about headers and footers, see "Add Headers and Footers" in Chapter 14.
Press Command+Home to move to the top of the document. On the toolbar, click the Zoom arrow, and then in the list, click Page Width.
The magnification level changes to display the depiction of the printed page within the width of the document window. The Zoom setting changes to reflect the new magnification level.
In the Zoom list, click Whole Page.
The entire first page appears in the document window. Note that the insertion point is still active at the beginning of the document. You can insert, edit, select, and format content at any magnification level.
In the Zoom list, click Two Pages.
The magnification changes so that you can see the document in sets of two pages side by side.
Below the vertical scroll bar, click the Next Page button (you might need to click it twice) to display the third and fourth pages of the document.
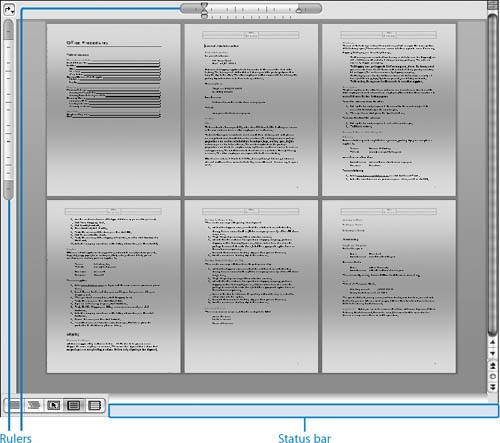
On the View menu, click Zoom. In the Zoom dialog box, with Many Pages selected, click the page picker.
In the expanded page picker, point to (but don’t click) the page icon in the second column of the second row.
2 × 2 Pages appears at the bottom of the page picker.
Move or drag the pointer down and to the right to further expand the page picker. See how far you can go! Then click the icon representing the 2 × 3 Pages configuration.
The magnification level in the Percent box changes to reflect your choice, but the page display doesn’t yet change.
In the Zoom dialog box, click OK.
The six pages of the document now appear in the document window. Even at this magnification, you can see details such as font colors, underlining, headers and footers, and headings.
On the View menu, click Ruler.
Horizontal and vertical rulers appear above and to the left of the active page. On the rulers, the active area of the page is white and the margins are blue.
Press Command+Page Down.
The insertion point moves to the top of the text on the second page. Indicators on the status bar show that the insertion point is now on page 4 of 6 and in word 589 of 1272.
When the insertion point moved to the second page, the horizontal ruler also moved. At this magnification, the measurements untis on the ruler aren’t legible.
In the Zoom list, click Page Width.
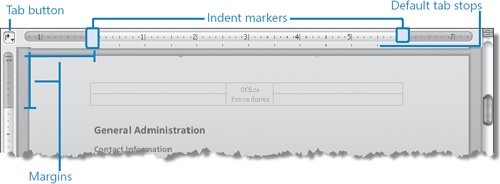
The markings on the ruler are clearly visible at this magnification level. The blue areas at the left and right ends of the horizontal ruler and the top and bottom ends of the vertical ruler indicate the page margins. The indent markers denote the left and right indents of the active paragraph.
On the horizontal ruler, gray lines below the units of measurement indicate the positions of the default tab stops. You can set custom tab stops by using the Tab button at the intersection of the horizontal and vertical rulers.


See Also
For information about indents, see "Indent Paragraphs" in Chapter 11.
Bonus Web Content
For information about tab stops, see "Present Text in a Tabular List in Word 2008 for Mac" on the book’s companion Web site at www.microsoft.com/mspress/companion/9780735626171.
In the Zoom list, click 150%.
The document text is clearly visible at this magnification.
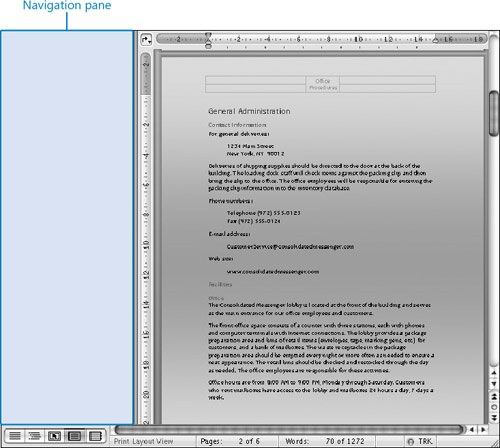
On the toolbar, click the Navigation button.
The Navigation pane opens on the left side of the document window, displaying thumbnails of the document pages.
You can display any page of the document by clicking its thumbnail in the Navigation pane. You can resize the thumbnails and change the number displayed by dragging the right border of the Navigation pane to the left or right.
In the list at the top of the Navigation pane, click Document Map.
The Navigation pane changes to display the Document Map—a hierarchical view of the headings in the document. In the Document Map, the first heading on the active page is selected.
In the Document Map, click the Shipping heading.
Word displays the page containing the selected heading.
Right-click anywhere in the Navigation pane.
A menu of Document Map options appears.
On the shortcut menu, click Show Heading 2.
The Document Map contracts to display only first- and second-level headings.
In the Document Map, click Receiving Packages.
The selected heading moves to the top of the document window.
To the left of Receiving Packages, click the right-pointing arrow.
The Document Map displays the previously hidden subheadings.
On the toolbar, click the Navigation button.
The Document Map closes.
On the toolbar, click the Show button.
Non-printing characters such as spaces, tabs, paragraph marks, and table delimiters become visible.
Click the Show button again to hide the non-printing characters. Then on the View toolbar, click the Draft View button.
The page background, headers, and footers disappear, and a simpler view of the document content is displayed, at 100 percent magnification.
Blue horizontal lines indicate automatic page breaks. A partial horizontal line and the words Page Break indicate a manual page break. You can see an example of this following the table of contents.
See Also
For information about inserting discretionary page breaks, see "Insert Page and Section Breaks" in Chapter 11.
Scroll through the document. Note the characteristics of Draft view and consider situations in which you will find it useful to work in this view.
On the View menu, click Web Layout. Scroll through this view of the document, which shows how it will appear in a Web browser if you save it as a Web page. When you finish, click Print Layout on the View menu to return to the original view.