In this exercise, you’ll practice the skills we’ve discussed in this chapter while investigating the ways of giving instructions in Word 2008. First, you’ll practice some basic window-management skills. Then you’ll explore the Word menus, toolbars, Toolbox, and Elements Gallery. Finally, you’ll look at the many aspects of Word you can control from the Word Preferences dialog box.
Note
SET UP You won’t need any practice files to complete this exercise; just follow along with the steps.
In the Dock, click the Microsoft Word program icon.
Or
Open the Finder. In the Navigation pane, under PLACES, click Applications. Open the Microsoft Office 2008 folder, and then double-click Microsoft Word.
If the Word program icon is visible in the Dock, it bounces to indicate that the program is starting. The Word splash screen appears, followed by a blank document.
Note
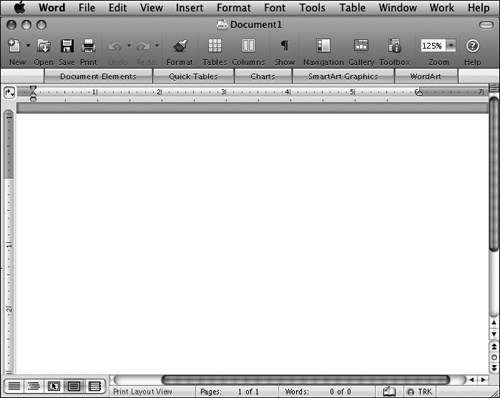
We’re not showing you the non-program related controls at the right end of the menu bar, but there will most likely be some there. The horizontal and vertical rulers shown here might not be visible, depending on your previous use of the Office programs. If the Toolbox opens, ignore it for now—we’ll talk about it later in this exercise.
The name Document1 is shown in the title bar. Word gives a sequential name to each of the temporary documents you open during a program session. (Quitting the program resets the temporary file-naming scheme.) At this point, the document is only temporary; it hasn’t been saved anywhere on your computer.
Point to the red, yellow, and green window controls in the upper-left corner of the window.
Symbols appear in the colored dots to indicate the purpose of each button.
Click the green Restore button.
The window resizes slightly to fill the available space between the menu bar and the Dock (or the bottom of the screen, if you’re not displaying the Dock). This is the default Word document window size and location.
Point to the resize handle in the lower-right corner of the document window. The shape of the mouse pointer does not change to indicate that the handle is active.
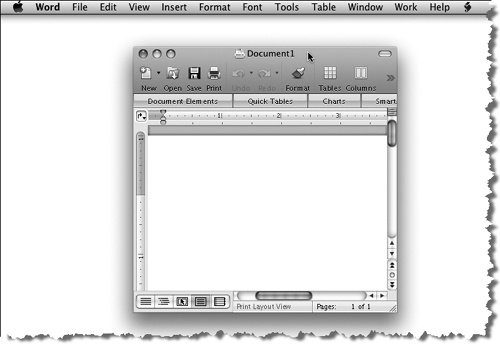
Drag up and to the left until the window is about half its previous size.
See Also
For information about dragging, see the sidebar "Mouse Manners" earlier in this chapter.
Point to the title bar at the top of the document window. Then drag the window to the center of your screen.
Click the Restore button, look at the results of this action, and then click it again.
The window switches between its default size and location and the size and location you chose.
At the left end of the title bar, click the yellow Minimize button.
The window disappears. It has been minimized to the Dock. A thumbnail of the document appears in the Files area at the right end of the Dock. The thumbnail is identified as a Word document by the Word icon (the blue W) in its lower-right corner.
Point to the document thumbnail.
A ScreenTip appears, displaying the name of the document.
In the Dock, click the Document1 thumbnail.
Or
In the Dock, click the Microsoft Word icon.
The document window returns to its previous size and location.
If the Standard toolbar is not open beneath the title bar, point to Toolbars on the View menu, and then click Standard. If any other toolbars are open (as indicated by a check mark on the Toolbars submenu, use the same method to close them.
Note
In this book, when the Standard toolbar is the only active toolbar, we refer to it in exercises simply as "the toolbar." For example, an exercise might instruct you to click the Save button on the toolbar, rather than specifying the Standard toolbar. When multiple toolbars are active, we refer to each by name to avoid confusion.
Restore the document window to its default size and location. Then point to each button on the toolbar to display its active outline and ScreenTip.
The outlines indicate which buttons have separate or integrated lists, and each ScreenTip provides an explanation of the button’s purpose.
On the Word menu bar, click View. Then on the View menu, point to Toolbars.
The Toolbars submenu appears, displaying a list of the toolbars available in Word 2008. The check mark to the left of Standard indicates that the Standard toolbar is open.
On the Toolbars submenu, click Formatting.
The Formatting toolbar opens below the Standard toolbar. These two toolbars contain commands you will frequently use when working in a Word document. The chevron at the right end of the Formatting toolbar indicates that the toolbars contain more buttons than can be shown.
At the right end of the Formatting toolbar, click the More Buttons button to display the additional buttons.
If the Toolbox isn’t already open, click the Toolbox button on the Standard toolbar. Or, if the Formatting Palette is not active in the open Toolbox, click Formatting Palette in the Toolbox section of the View menu.
The Toolbox opens, displaying the Formatting Palette.
In the Formatting Palette, click panel titles to open or close panels so that only the Font panel, the Alignment and Spacing panel, and the Bullets and Numbering panel are open.
Compare the buttons available on the Formatting toolbar to the buttons in the three open panels of the Formatting Palette. Then click the Format menu and compare the commands available from that menu to the commands on the toolbar and in the Toolbox.
Bonus Web Content
For information about bulleted and numbered lists, see "Organize Text in Lists in Word 2008 for Mac" on the book’s companion Web site, at www.microsoft.com/mspress/companion/9780735626171.
The three command structures provide very similar sets of commands. When working in the primary Office programs, you can use the command structure that you’re most comfortable with.
See Also
In this exercise we’re only looking at the commands, not using them. For information about font and paragraph formatting commands, see Chapter 11.
On the Standard toolbar, click the Gallery button.
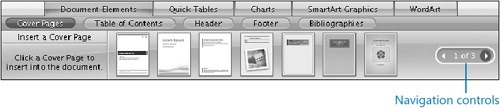
The Elements Gallery expands to display the Document Elements tab, which is divided into five groups. The first page of the Cover Pages group is visible. The navigation controls at the right end of the group indicate that additional Cover Page designs are available.
On the Document Elements tab, in the Cover Pages group, click the arrow to display the next page of thumbnails. Repeat this until you’ve viewed all the thumbnails.
Word 2008 provides 17 cover page choices, each with a distinctive graphic design.
See Also
For information about creating cover pages, see "Add Professional Cover Pages" in Chapter 14.
On the Document Elements tab, click Table of Contents. In the Table of Contents group, point to the first thumbnail.
The thumbnail magnifies to indicate that it is active, and the name of the selected design (Classic) replaces the words Insert a Table of Contents at the left end of the gallery.
At the left end of the gallery, click Manual Formatting.
The thumbnails change to reflect the selection.
View the rest of the groups on the Document Elements tab—Header, Footer, and Bibliographies. Then view the Quick Tables, Charts, SmartArt Graphics, and WordArt tabs.
We’ll work with each of these tabs in later chapters.
When you finish investigating the Elements Gallery, click the active tab once.
The Elements Gallery closes so that only the tabs are visible.
Right-click in the toolbar area (to the right of the Help button, for example), point to toolbars, and then click Formatting.
The Formatting toolbar closes.
Right-click again in the toolbar area, and then click Icon Only.
The button labels disappear from the Standard toolbar and the buttons reposition themselves. Without the labels, the toolbar buttons take up significantly less space and present a much tidier appearance.
On the toolbar, click the Toolbox button. Then in the upper-right corner of the document window, click the Hide Toolbars button.
The document window is now very tidy, with fewer things to distract you from the document content (if there was any).
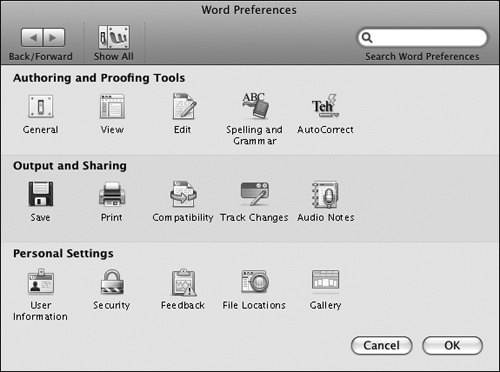
On the Word menu, click Preferences.
The Word Preferences dialog box opens.
Under Authoring and Proofing Tools, click Edit.
The Edit page of the Preferences dialog box opens.
Point to Drag-and-drop text editing.
A description of the feature appears in the Description Of Preference box at the bottom of the page.
Point to any other options that interest you, and then at the top of the page, click the Show All button to return to the preference group listing.
Investigate other options in the Preferences dialog box, and try out the Spotlight search feature by typing a feature name in the Search box to locate the preference group(s) containing related settings. When you finish, click Cancel to close the dialog box without making any changes.
Use the techniques you’ve learned to redisplay the toolbar area and the toolbar button labels. Then on the Word menu, click Quit Word.
On your own, repeat the concepts of this exercise in Excel and PowerPoint to familiarize yourself with the available commands for personalizing the programs. We’ll investigate these programs in later chapters.