In this exercise, you’ll track changes that you make to a document, and insert a comment. You’ll review and resolve the revisions, and then hide the remaining comment.
Note
SET UP Open the Fairytale document from the ~/Documents/Microsoft Press/ 2008OfficeMacSBS/ReviewDocuments/ folder. Display only the Formatting toolbar in the toolbar area at the top of the document window.
On the Tools menu, point to Track Changes, and then click Highlight Changes.
The Highlight Changes dialog box opens.
In the Highlight Changes dialog box, select the Track changes while editing check box. Then click the Options button.
The Track Changes page of the Word Preferences dialog box opens. On this page, you can specify how you want Word to indicate changes made to the document. A preview of the marks selected for each type of edit (inserted text, deleted text, changed formatting, and changed lines) is shown at the right end of each section.
Tip
You can display the Track Changes page from Word by opening the Word Preferences dialog box (click Preferences on the Word menu, or press Command+Comma) and then, under Output And Sharing, clicking Track Changes.
In the Comments section, you can specify the color of the balloons that appear in the margin when you give feedback by using the Comment feature.
See Also
For information about the Comment feature, see the previous topic, "Give Feedback on Document Content."
In the Balloons section, you can specify whether tracked changes should be shown in text balloons in the document margin, in addition to the inline underline and strikethrough formatting.
On the Track Changes page, click Cancel to close the page without making any changes. Then in the Highlight Changes dialog box, click OK.
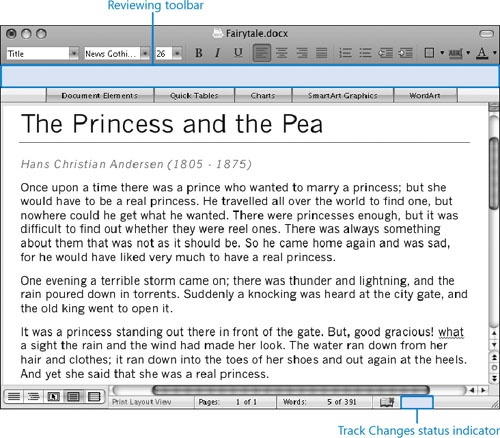
The Reviewing toolbar opens in the toolbar area with the Track Changes button pressed, and the letters TRK appear near the right end of the status bar, with a blue dot next to the letters, indicating that change tracking is turned on. (A gray dot indicates that it’s turned off.)
Point to each button on the Reviewing toolbar to display the button name in a ScreenTip.
Click the Display for Review arrow to expand the list of choices you have for displaying edited content.
Tip
When you’re tracking your changes in a document, you might find it useful to display the Final version, rather than the default Final Showing Markup version. The Final version depicts the document as it will appear with all the tracked changes implemented. The Original version depicts the document as it would appear with none of the changes implemented. The two Showing Markup versions depict different views of the tracked changes.
Click the Show button to display the list of changes you can show or hide when displaying either of the Showing Markup versions.
In the fourth line of the first paragraph of the story, select the word reel, and then type real.
The word reel changes to real. The word real is underlined (to mark it as inserted text), and is in the font color that Word has, just now, assigned to you for all changes you make, and comments you insert, in this document.
A balloon in the same color, on the right side of the page, indicates that the word reel was deleted by you, on the current date, and at the current time. The Deleted balloon is linked to the starting point of the deleted content. A vertical mark to the left of the line of text indicates that the line contains a change.
In the last line of the same paragraph, position the insertion point at the beginning of the word a, which follows the word have. Type had, and then press the Spacebar.
Word inserts and underlines the word, but no balloon appears for this simple insertion.
In the third paragraph, select the words good gracious, the comma and space preceding them, and the exclamation point that follows. Then, on the Reviewing toolbar, click the New Comment button.
Tip
You can insert a comment when the Reviewing toolbar is not visible, by clicking Comment on the Insert menu.
A balloon linked to the selected text opens on the right side of the page, ready to receive your input. The Comment balloon indicates that the comment was inserted by you, on the current date and at the current time. The blinking insertion point is visible in the Comment balloon.
Type Removing this would improve the readability of the sentence.
In the third paragraph from the end of the story, position the insertion point at the end of princes, and then type the letter s.
Word inserts and underlines the letter.
Select the last paragraph of the story and then, on the Formatting toolbar, click the Italic button.
A Formatted balloon appears on the right side of the page, indicating that you applied italic font formatting to the text. The balloon points to the starting point of the formatting change.
Press Command+Home to move to the beginning of the document. Then, on the Reviewing toolbar, click the Next button.
Tip
If a document contains both tracked changes and comments, clicking the Next or Previous button moves sequentially between both types of elements.
Word moves to the first tracked change, and selects the word reel in the Deleted balloon.
In the Deleted balloon, click the Accept Change button (the check mark).
The balloon disappears. The inserted text, real, is still indicated as a tracked change.
On the Reviewing toolbar, click the Accept Change button.
Tip
Clicking the Accept Change arrow displays a list of options. You can accept the current change, accept all the changes that are visible in the document (but none that are hidden), or accept all the changes in the document.
The underline disappears from the word real, and the font color changes to the default. The vertical marker on the left end of the line of text also disappears, indicating that there are no revisions or comments in this line.
On the Reviewing toolbar, click the Next button.
Word selects the word had. With a wavy green underline, Word’s spelling and grammar checker has marked have had as grammatically incorrect.
On the Reviewing toolbar, click the Reject Change/Delete Comment button.
Tip
Clicking the Reject Change/Delete Comment arrow displays a list of options. You can reject the current change or delete the current comment, reject all the changes in the document or only those that are visible, or delete all the comments in the document or only those that are visible.
The word had disappears, as does the wavy green line.
On the Reviewing toolbar, click the Next button.
The focus moves to the comment. This comment will need to be addressed by someone else.
Now let’s look at another way of reviewing revisions.
On the Reviewing toolbar, click the Reviewing Pane button.
The horizontal Reviewing pane opens across the bottom of the document window.
If the pane is quite short, drag the Resize handle in the center of the top border up, so you can see two items.
The first section of the Reviewing pane lists changes and comments in the main document. The first revision listed is the comment you just addressed. The colored heading above the revision text describes the type of revision (Comment), the person who made the revision (you), and the date and time of the revision.
In the Reviewing pane, click the next listed revision, the letter s.
The document shown in the window above the Reviewing pane moves so that the selected revision is visible. The insertion point is blinking in the Reviewing pane item.
Click in the document body and position the insertion point immediately before the inserted letter s.
Now let’s look at another, simpler way of moving between and resolving revisions.
On the Tools menu, point to Track Changes, and then click Accept or Reject Changes.
The Accept Or Reject Changes dialog box opens.
In the Accept or Reject Changes dialog box, click Accept.
Word accepts the change and moves immediately to the next change, the italic formatting. The accepted revision disappears from the Reviewing pane and the current revision is visible.
In the Accept or Reject Changes dialog box, click Accept.
A message box informs you that you resolved the last revision before the end of the document.
In the message box, click OK.
A message box informs you that you’ve resolved all the tracked changes in the document.
In the message box, click OK. Then, in the Accept or Reject Changes dialog box, click Close.
In the Reviewing pane, click the comment that remains in the document, to move to that location.
In the Display for Review list, click Final.
The Comment balloon disappears, but the highlight remains, to signify to a reviewer that a comment is attached to that text.
In the Show list, point to Reviewers.
Your name appears in the list. You can hide all revisions and comments made by a reviewer by clearing the check mark from in front of his or her name on this list.
In the Show list, click Comments.
The highlight disappears from the comment, and it disappears from the Reviewing pane. It’s not gone, though—it will be visible to any person displaying this document with comments shown.