
In this exercise, you’ll insert and modify shapes, clip art images, symbols, and photos.
We’ll work through this exercise in a PowerPoint presentation, but you can also apply the skills you practice here when working with Word documents or Excel worksheets.
Note
SET UP In this exercise, we’ll use the SummerActivities presentation and the Kids1 and Panda1 images located in the ~/Documents/Microsoft Press/2008OfficeMacSBS/ CreateGraphics/ folder. Open the SummerActivities presentation, and display Slide 1.
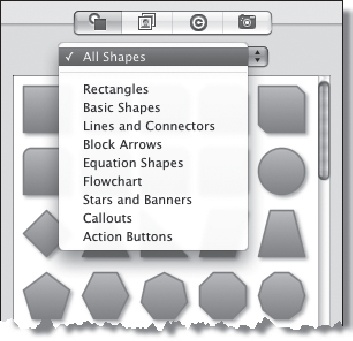
Display the Toolbox, if it isn’t already open, and on the button bar at the top, click the Object Palette button.
The Object Palette opens, displaying the Shapes page. The unfiltered page contains 172 shapes.
Click the category list to display the shape categories.
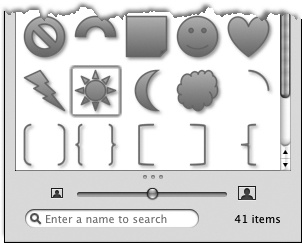
In the category list, click Basic Shapes.
The filtered page displays 41 items.
Near the bottom of the page, click the sun shape.
In the Slide pane, point to the upper-right corner of Slide 1.
The pointer changes to a plus sign to indicate that clicking the slide will add a graphic element.
Click in the space between the yellow stripe and the upper-right corner of the slide.
A sun shape appears on the slide. The shape is selected for editing.
When inserted on the slide, the sun shape has a patterned yellow fill that it picked up from the Habitat theme attached to the presentation.
See Also
For information about colors associated with themes, see "Work with Office Themes" in Chapter 7.
Drag the round diagonal resize handles to enlarge the sun shape until it overlaps the yellow stripe.
Point to the round green rotation handle. When the pointer changes to a circular arrow, drag the handle to the left to rotate the shape by about 15 degrees.
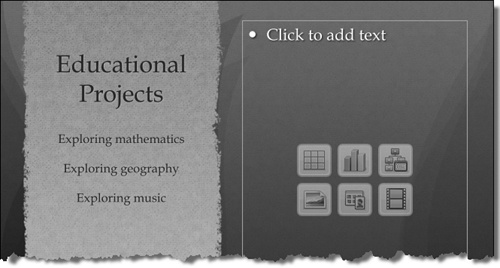
Display Slide 2.
This slide includes a multipurpose text and image box. You can insert text by clicking the placeholder at the top of the box. You can insert a table, chart, SmartArt graphic, picture, clip art image, or movie (through interfaces other than the Object Palette) by clicking the corresponding button in the center of the box.
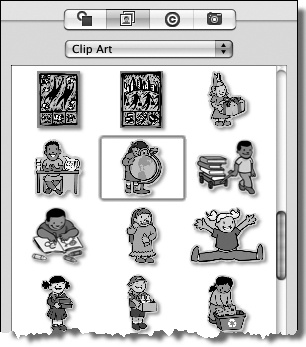
In the Object Palette, click the Clip Art button.
In the category list, click Clip Art. Scroll about halfway through the pane, to the series depicting children’s activities, and click the image of a girl looking at a globe.
Drag the selected clip art image from the Object Palette to the slide.
As you drag the image, an Add icon (a green circle labeled with a white plus sign) appears on the pointer to indicate that releasing the mouse button will copy the image to that location. When the image is over a location where you can’t drop it, such as a title bar, menu bar, toolbar, or scroll bar, the Add icon changes to a slashed circle to indicate that the operation is not allowed.
Drop the image into the content box on the right side of the slide.
A version of the image that is perfectly sized to fit the box appears, and the image buttons and placeholder text disappear.
In the Object Palette, click the Symbols button. Then in the category list, click Music.
In the left pane of Slide 2, click to position the insertion point at the beginning of the phrase Exploring music.
Drag a musical note of your choice from the Object Palette to the active text box, and drop it at the insertion point.
PowerPoint inserts the symbol at the beginning of the line as a text character. It has the same formatting as the characters that follow it. As long as the insertion point is active in the text, dragging a symbol to the text box inserts it only within the existing text structure.
Click the text box frame (so that the insertion point stops blinking). Then drag a different musical note to the text box.
This time PowerPoint inserts the symbol as a movable, resizable image.
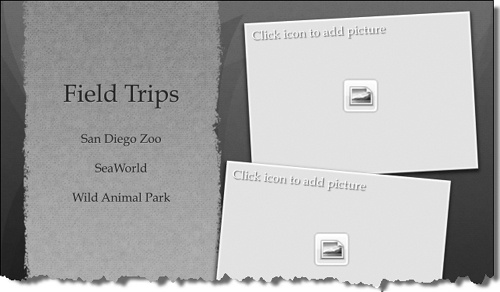
Display Slide 3.
The slide includes two picture placeholders.
In the upper photo frame, click the Add Picture icon.
The Choose A Picture dialog box opens.
Navigate to the ~/Documents/Microsoft Press/2008OfficeMacSBS/CreateGraphics/ folder. Click the Kids1 photo, and then click Insert.
An appropriately sized photo, depicting two adorable children on a field trip, appears in the upper photo frame.
In the lower photo frame, click the Add Picture icon. In the Choose a Picture dialog box displaying the contents of the CreateGraphics folder, click the Panda1 photo, and then click Insert.
An appropriately sized photo of a panda enjoying lunch appears in the lower photo frame.
Right-click the panda photo, point to Arrange, and then click Bring to Front.
The panda photo moves to the top of the photo stack.


Note
CLEAN UP Save the presentation as My Summer Activities. Close the Toolbox, and then, if you’re not going to practice on your own, quit PowerPoint.
Check Whether Graphic Effects Are Compatible with Earlier Program Versions
Some of the fancy graphic effects that are new in Office 2008 won’t look the same or have the same functionality in earlier versions of Office, due to an incompatibility between the technologies of the new and old program versions.
When you insert a shape that has effects that might not reproduce faithfully in earlier versions—such as transparency or shadows—Office 2008 immediately flags the fact in the Compatibility Report, which is available from the Toolbox. This causes the Compatibility Report button at the top of the Toolbox to flash red.
You can view a list of possible incompatibilities in the active document at any time by displaying the Compatibility Report. Clicking an item in the Results list activates the specific document element that generated the warning.

The Results list displays a separate warning for each instance of a specific incompatibility. You can remove warnings from the results list by clicking the Ignore arrow and then, in the Ignore list, clicking Ignore Once to remove the currently selected warning, Ignore All to remove all current instances of the warning, or Don’t Show Again to stop generating the warning.