
At the end of the process, you need to generate some sort of report that shows the pay items in the model, the quantities of each item, and the units of measurement. This data can be used as part of the plan set in some cases, but it’s often requested in other formats to make further analysis possible. In this exercise, you’ll look at the Quantity Takeoff tool that works in conjunction with the QTO Manager to create reports:
1. Open the QTO Reporting.dwg file.
2. From the Analyze tab’s QTO panel, select the Quantity Takeoff tool to display the Compute Quantity Takeoff dialog, shown in Figure 18-21.
Figure 18-21: The Quantity Takeoff tool with default settings
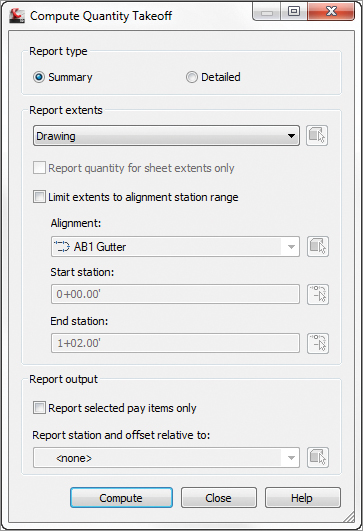
Note that you can limit the area of inquiry by drawing or selection; by sheets, if done from paper space; or by alignment station ranges. Most of the time, you’ll want to run the full drawing. You can also report on only selected pay items if, for instance, you just want a table of pipe and structures.
3. Click Compute to open the Quantity Takeoff Report dialog, as shown in Figure 18-22.
Figure 18-22: QTO reports in the default XSL format

4. From the drop-down menu on the lower-left of the dialog, select Summary (TXT).xsl to change the format to something more understandable. At this point, you can export this data out as a text file, but for the purposes of this exercise, you’ll simply insert it into the drawing.
5. Click the Draw button at bottom of the dialog, and Civil 3D will prompt you to pick a point in the drawing.
6. Click near some clear space, and you’ll be returned to the Quantity Takeoff Report dialog. Click Close to dismiss this dialog, and then click Close again to dismiss the Compute Quantity Takeoff dialog.
7. Zoom in where you picked in step 5, and you should see something like Figure 18-23.
Figure 18-23: Summary Takeoff data inserted into the drawing
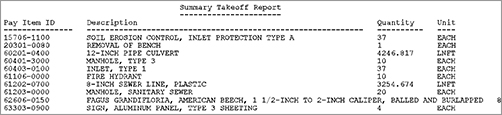
That’s it! The hard work in preparing QTO data is in assigning the pay items. The reports can be saved to HTML, TXT, or XLS format for use in almost any analysis program.
Creating Your Own Categorization File
One of the challenges in automating any quantity takeoff analysis is getting the pay item list and categories to match up with your local requirements. Getting a pay item list is pretty straightforward—many reviewing agencies provide their own list for public use to keep all bidding on an equal footing.
Creating the category file can be slightly more difficult, and it will probably require experimentation to get just right. In this example, you’ll walk through creating a couple of categories to be used with a provided pay item list.
Note that modifying the QTO Manager palette affects all open drawings. You might want to finish the other exercises and come back to this when you need to make your own file in the real world.
1. Create a new drawing from the _AutoCAD Civil 3D (Imperial) template file.
2. From the Analyze tab’s QTO panel, click the QTO Manager button to display the QTO Manager palette.
3. Click the Open Pay Item File button at the top left to display the Open Pay Item File dialog.
4. Verify that the format is CSV (Comma Delimited).
5. Browse to open the Mastering.csv file. Remember, all files can be downloaded from www.sybex.com/go/masteringcivil3d2012.
6. Click the Open button next to the Pay Item Categorization file text box to display the Open Pay Item Categorization File dialog.
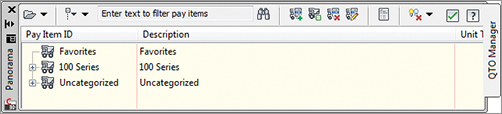
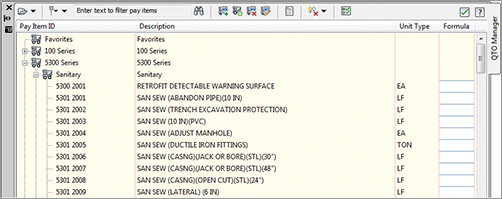
7. Browse to open the Mastering Categories.xml file, and then click OK to dismiss the dialog. Your QTO Manager dialog should look like this:
8. Launch XML Notepad. (You can download this from Microsoft as noted in Chapter 17, “Interoperability.”)
9. Browse and open the Mastering Categories.xml file from within XML Notepad.
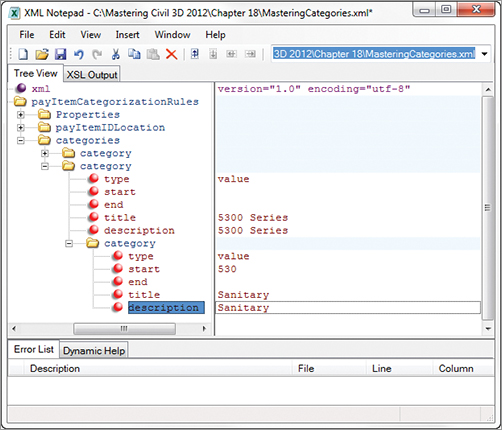
10. Right-click the category branch, as shown here, and select Duplicate.

11. Modify the values as shown to match the following image.
12. Delete the extra category branches under the new branch by right-clicking on the two extra Category listings.
13. Save and close the modified Mastering Categories.xml file.
14. Switch back to Civil 3D’s QTO Manager.
Next, you will need to reload the categorization file to view the changes.
15. Click the Open drop-down menu in the top left of the QTO Manager, and select Open Categorization File.
16. Browse to the Mastering Categories.xml file again and open it. Once Civil 3D processes your XML file, your QTO Manager should look similar to this:
Creating a fully developed category list is a bit time-consuming, but once it’s done, the list can be shared with your entire office so everyone has the same data to use.