
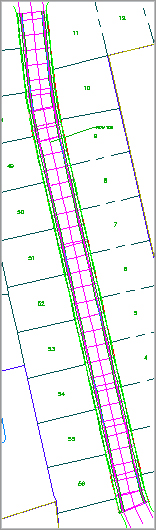
Before you create sample lines, you often start with a corridor. The corridor allows you to display the materials being used, as well as show the new surface with cut-and-fill areas. In this chapter, the corridor is a relatively short roadway (937′) designed for a residential subdivision (see Figure 12-1).
Figure 12-1: The Concord Commons corridor showing Cabernet Court road
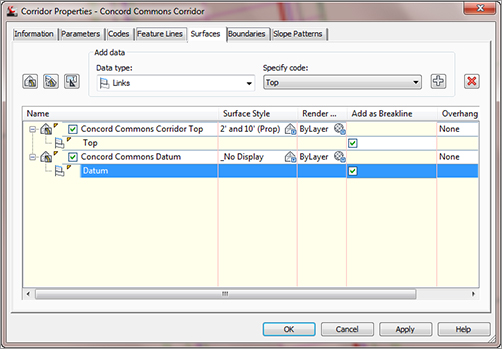
This corridor has both a top surface and a datum surface created for inclusion in the sample line group, as shown in Figure 12-2. Creating surfaces from the different links and feature lines in a corridor allows you to use sections to calculate volumes between those surfaces. These volumes are calculated by specifying which surfaces to compare when you create a materials list.
Figure 12-2: The Corridor Properties dialog
Creating the Best Possible Surface for Sampling
Note that you can create corridor surfaces in two different ways—from links and from feature lines. Links will provide you with a total surface along the width of a corridor, such as the top of pavement, top of base, and top of sub-base. Feature lines require selecting a few more objects to add into a corridor surface to accurately create the surface.
When you create your sample line group, you will have the option to sample any surface in your drawing, including corridor surfaces, the corridor assembly itself, and any pipes in your drawing. The sections are then sampled along the alignment with the left and right widths specified and at the intervals specified. Once the sample lines are created, you can then choose to create section views or to define materials.