
Curtain Systems on Mass Faces
The real reason designers play with masses is curtain systems. The relationship between masses and curtain systems (or walls, or roofs, or floors) is quite simple. Where the face of the mass is, the curtain system is. Where the face of the mass isn't, the curtain system isn't. You pick the face, make the system, and there you have it! It's that simple! Now, let's step through an example of how this is accomplished.
Creating Curtain Systems by Face Selection. We learned several limitations of curtain systems on this project that affected how we managed the faces of our mass. To save you the rework time, the limitations we found are listed here:
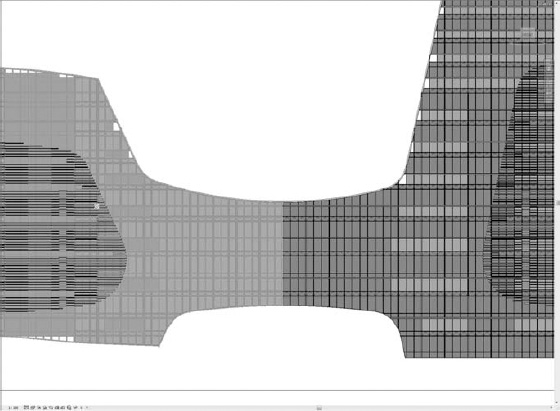
Grid Line Overlap One neat feature of curtain systems and curtain walls is that you can remove portions of the grid where you don't want a mullion or a split in the panel. The bad news is that this is a cosmetic change. We had two towers (as shown in Figure 21.26), and the entire west wall (both towers) was originally one curtain system. Since the levels had different floor-to-floor heights in each tower, we had cases where the grid from one side was less than the mullion thickness of the grid from the other side. In such cases, bad things happened. So, in this project, we eventually split the west wall in half.
FIGURE 21.26 Splitting the curtain system
Solids Overlapping on Curves We had an addition late in the game when our machine-roomless elevators switched to regular ones. All of a sudden we had to add a penthouse to the form, and the mass didn't have that level of adjustment. We created an additional form and joined it to the existing mass. On flat faces everything went as planned, but on the curved face we ended up with two distinct faces (and curtain systems as a result), with the split where the old and new face met. This issue appears to be fixed in the current version, but be wary of joining coplanar curved surfaces, because you might not get the result you want.
Pimp your system. The great part about curtain systems is all the bling you can add to a project in a relatively short amount of time. Getting to a finished product is fast. Here are some simple and quick steps that will help you add some showy features to the model:
Intermediate Grids Most real-life curtain systems aren't perfectly repeating in both directions. Fortunately, you can place curtain grids wherever you want them. Select the Curtain Grid tool and go click happy. You might not want a mullion on every line so that some panels can span over a grid. To achieve that, select a grid and click the Add/Remove Sections tool in the ribbon; then click on a section to remove (or add back) a section of the grid line.
Mullion Profiles Once your grid is set up to your satisfaction, it is time to create your profiles. Profiles can be as parametric or as dumb as you want—the only advantage to making them parametric is you have the ability to change the parameters in the project. Incorporate shading fins, fancy cap details, and anything else you like into the profile, and then just pick mullions and switch them. Don't forget that you can right-click during selection and select all the mullions along a grid line much easier than using the drag selection.

Custom Panels If you really want to pimp your system, custom panels are the way to go. Have an insulated spandrel panel behind the glazing to create a shadow-box effect? There's a custom panel for that. How about an interior pane of glass to raise the STC rating of the curtain wall? There's a custom panel for that too. There are two drawbacks to these panels, however. The first is that they cannot be placed on anything but a rectangular panel. So, all those panels with angled edges and curved tops in this project won't accept a custom panel. System panels only, please. The second drawback is that on curved (in plan) curtain systems, custom panels will come in with their origin reversed. Inside is out; outside is in. So, if you have straight and curved curtain systems you will have to make duplicate custom panels, one mirrored for use in the curved systems.

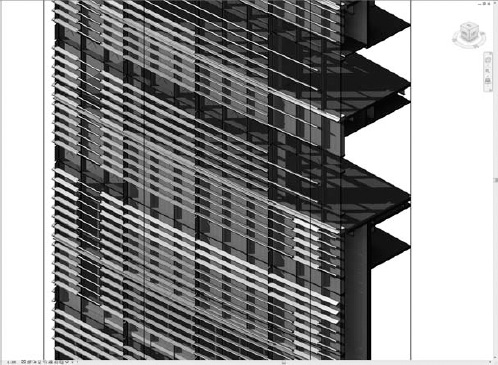
Solar Shading As mentioned earlier, you can include shading fins in mullion profiles to your heart's content. But what if you have a separate sunshading device with hundreds of fins around the whole building? Well, that sounds like a curtain system with empty panels and angled mullion profiles to us. The system in Figure 21.27 is made entirely with mullions at seven different angles.
FIGURE 21.27 Sunscreen design detail
Learn to manage change effectively. We all know real projects change—a lot. So, how does this system manage change? That's what Update To Face is for, right? Well, if you make a change that causes the face to be deleted in the mass, any association in the project to that face is gone. When that happens, you'll notice the Update To Face button becomes unavailable. If you reassign the system to a new face, you're just deleting the curtain system you had and making a new one with the type settings of that curtain system type (Figure 21.28). All that customization you just did? Gone.
FIGURE 21.28 All your customization is lost.

In our project, each façade had at least four or five hours of work devoted to adding that customization. So, any time you have to start over, change can be your worst nightmare. We had no less than 34 major changes to the building envelope (including design changes, changes to the site boundaries, changes to the maximum building height, changes to the maximum floor area ratio on the site, and more changes to the site). That's a lot of time to lose.
Now you know why it is so important to make a fully parametric mass that doesn't require reconstruction at the mass family level to adjust to changes. We weren't perfect; three of those changes required rebuilding the mass due to things we didn't anticipate (like making a side that was previously straight into a curve). But every other change was as simple as clicking Update To Face and fixing a few stray panels and mullions where the change occurred (Figure 21.29).
