
Editing Viewport Types
In the previous exercises, you might have noticed that the 3D views placed on the sheet displayed the default view title; however, we don't need the titles in this example. Revit stores options and properties related to the display of views on sheets as viewport types. Although the name conjures up memories of model space and paper space in AutoCAD, it is actually quite different. The viewport in Revit does not determine the scale or anything else about the view itself; rather, it simply sets the parameters for how a view sits on a sheet.
Let's examine how to customize viewport types by completing an exercise that continues the previous example of placing 3D views on a sheet:
- Using the sheet with the two stacked 3D plan views, select one of the views and click Edit Type in the Properties palette (Figure 20.19).
FIGURE 20.19 The type properties of a viewport
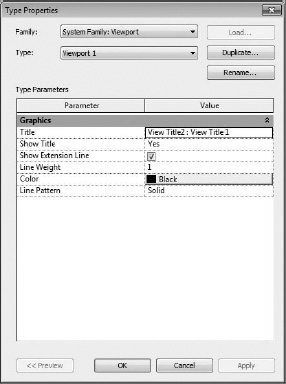
You'll notice that there are only a few properties in a viewport type, most of which are related to the extension line in the title.
- Click the Duplicate button to create a new viewport type named No Title.
First, notice that you can change the View Title family selection in the first drop-down. However, in this exercise you will not need a view title.
- Click the Show Title drop-down and select No.
An important option for the Show Title setting is When Multiple Viewports, which will display the titles only when multiple views are placed on a sheet. The view title is not displayed if only one view is placed on a sheet as in an overall floor plan.
- Click OK to close the Type Properties dialog box and you'll see that the viewport you had selected is already changed to the new type. Select the other viewport and switch it to No Title in the Type Selector.
When you have completed the exercise, you can also add some detail lines to the sheet to further embellish the descriptive presentation, as shown in Figure 20.20. Although you cannot snap to the geometry within the viewports, you can use the arrow keys to nudge the lines into alignment as required.
FIGURE 20.20 Customized viewports placed on a sheet
