
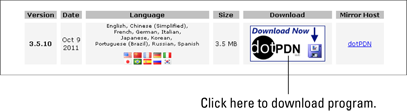
Figure 5-1: Click the Download Now button to download Paint.NET.
Using Paint.NET to Create the Cover
To create the cover of your e-book, use a graphics program that lets you easily manipulate images and text. I recommend Paint.NET, which is free and relatively simple to use (and available only in Windows).
Downloading and installing Paint.NET
To download Paint.NET, follow these steps:
1. Go to www.getpaint.net/download.html
.
2. Scroll down the page and click the Download Now button, shown in Figure 5-1.
The site has a number of other download buttons for different software, so be sure to get the right one.
3. On the page that opens, click the link under the text Free Download Now in the upper-right corner.
The Save As dialog box appears.
4. Navigate to the folder where you want to save the file and then click Save.
5. Open or unzip the file.
You should see the application (.exe) file.
6. Double-click the application to install it.
You may need to select Run or Yes.
7. Leave the default Quick Installation option selected, and click Next.
8. Select the I Agree radio button to agree to the license agreement, and click Next.
9. Wait for Paint.NET to install, leave the box Start Paint.NET checked, and then click Finish.
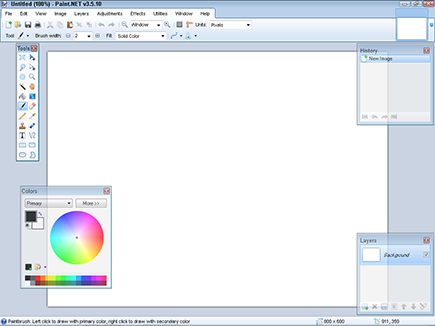
Paint.NET should load automatically, as shown in Figure 5-2.
Figure 5-2: The default Paint.NET interface.
Creating the canvas at the correct size
When you open Paint.NET, you see a number of buttons and menu options. First resize the canvas (the white area that you will create your cover upon). If you want to sell your e-book only on your own website, the canvas can be a square or a wide rectangle. If you’re selling instead at an e-book retailer, such as www.amazon.com
, make the canvas a standard shape and size. Amazon recommends a height-to-width ratio of 1.6, and the cover (and thus its canvas) has to measure at least 500 by 800 pixels.
 Create a larger canvas, if you prefer — perhaps 750 by 1200 pixels. The ratio must stay the same.
To resize the Paint.NET canvas, follow these steps:
1. Choose Image⇒Canvas Size.
The Canvas Size dialog box opens.
2. In the Pixel Size section, enter the width and height that you want for the canvas.
Figure 5-3 shows an example of 500 (width) x 800 (height) pixels.
3. Click OK.
The resized canvas appears onscreen.
Figure 5-3: Resizing the Paint.NET canvas.

Constructing the cover with separate layers
One of the most useful features in Paint.NET is the layer, which lets you easily adjust cover elements individually. Imagine that you’re creating a cover by hand, using tracing paper, with a different element drawn on each sheet — layers work in a similar way. You can add as many layers as you want, and you can easily switch them on or off to add or remove, respectively, different parts of the cover, which is an easy way to try a variety of options, such as two possible title fonts.
The default canvas has only one layer. To create a new layer, click the Add New Layer button, which is the leftmost button along the bottom of the Layers window. (If the Layers window isn’t open, choose Window⇒Layers to open it.) After you add a layer, you should see it in the Layers window, as shown in Figure 5-4. The new layer is transparent, as indicated by its gray-and-white checkerboard background.
Figure 5-4: Adding a second layer in Paint.NET.

The cover of your e-book needs at least two layers: one for the main image and one for its title and your name. You may find it easiest to have the title and name on separate layers, too.
Adding an image to the cover
To add an image to the canvas, follow these steps:
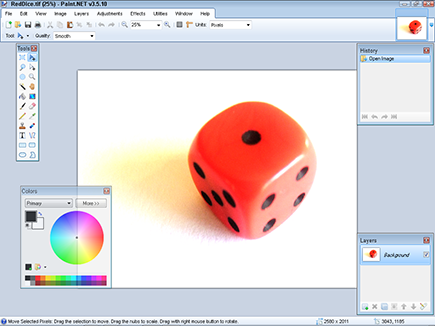
1. Open the cover image in Paint.NET, as shown in Figure 5-5.
To open the image, choose File⇒Open, navigate to the image, and click Open.
Figure 5-5: The cover image open in Paint.NET.
2. Select the image by pressing Ctrl+A to highlight the whole image and then press Ctrl+C to copy it.
If you want to copy only part of the image, use a Paint.NET selection tool to draw around the area you want to copy. The selection tools are represented by the first three icons in the leftmost column in the small Tools window (refer to Figure 5-5).
3. Return to the original canvas (the white rectangle in the upper-right corner of the Paint.NET window), and select the Background layer in the Layers window (refer to Figure 5-4).
4. Press Ctrl+V to paste the image.
You can see an example of a canvas with an image added in Figure 5-6. Note the rectangle around the image, which shows the area selected. The image can be moved by clicking and dragging.
 If the image is larger than the canvas, you have to resize the image so that it’s either smaller or the same size. To do so, go back to the image file, and choose Image⇒Resize from the Paint.NET menu bar. In the Resize dialog box, enter the new size for the image and click OK to save your changes. Then repeat Steps 2 through 4.
Figure 5-6: The image on the canvas.
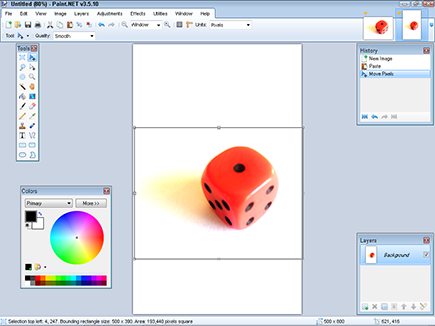
You can move the image around at this point. Just click and drag the image to move it around on the canvas. If you want to move the image again later, you can use the Paint.NET tools to select it and then click the Move tool (in the upper-right corner of the Tools window).
 Paint.NET has loads of features to let you manipulate images. If you’re happy with the way an image looks, leave it alone — but if you want to adjust colors, convert to black-and-white, add a cartoonish look or an oil-painting style, or take advantage of any other effects, try the options on the Effects menu. If you don’t like a particular effect, simply click the Undo button on the toolbar.
Adding your name and the e-book title
To add the title of the e-book to the canvas, follow these steps:
1. Select Layer 2 (which is the layer that you created).
2. In the Tools window, click the text tool (the T symbol).
If you can’t see the Tools window, choose Window⇒Tools to open it.
3. Click wherever you want to place the title on the canvas, and select a font and size from the toolbar.
4. In the Colors window, select your color.
5. Type the title.
If your text doesn’t show up on the screen, ensure that you don’t have a specific part of the cover selected. (To unselect part of the cover, click the Select tool in the Tools window and then click in the gray area outside the cover.)
You can move the title around on the canvas by positioning the cursor below and to the right of it. When a small icon with arrows on it appears, click it to reposition the text. Note that this only works immediately after placing the title; if you wish to move it again, use the Select tool to select a rectangular area that includes the title.
Experiment with placing the title below or above the image. If you want words of different sizes in the title (a feature of many e-book covers), add each word separately.
6. To add your name, create a new layer, which makes it easy to reposition the title and your name separately, and then type your name.
You’ll likely use the same font face as for the title, but in a smaller size. Try different positions for the title and name to see which position looks best. Though titles and authors’ names are generally centered on book covers, you can experiment with different positions.
You can move the text later in the same way as you move an image: Use a selection tool (I recommend the Rectangle) to select it and then click the Move tool. You can now reposition the selected text by clicking and dragging.
Figure 5-7 shows the image from Figure 5-6 with the title and the author’s name added. Note the use of different font sizes and the way the edges of the text align down the cover. To the right of the cover, you can see how the three layers have been combined.
Figure 5-7: Cover with title, image, and author’s name.

Saving the cover
To save the cover, choose File⇒Save. The file is saved in the Paint.NET format (.pdn) so that you can easily edit it later.
When you’re happy with the cover, save it as a file that can be used on the web. The .jpg extension (file type) is a good choice because it loads quickly on websites and is accepted by all major e-book retailers.
Always save the cover file in .png or .pdn format first, even if you don’t plan to edit it. These formats preserve the layers of the image and prevent your having to start from scratch if you decide to make changes when you have only the flat (single-layered) .jpg version.
To save the cover as a .jpg file, follow these steps:
1. Ensure that all layers you want to include are active (their check boxes are selected in the Layers window).
2. Choose File⇒Save As.
3. In the Save As dialog box, select JPEG from the Save As Type drop-down menu.
The Save Configuration dialog box appears.
4. Select 100% quality, and click OK.
You see a warning to reduce the file to a single layer.
5. Click Flatten.
The image is now saved.
..................Content has been hidden....................
You can't read the all page of ebook, please click here login for view all page.