Figure 12-1: Tap a button to add an account.
Prep Work: Setting Up Your Accounts
First things first. To use Mail, you need an e-mail address. If you have broadband Internet access (that is, a cable modem, FiOS, or DSL), you probably received one or more e-mail addresses when you signed up. If you’re one of the handful of readers who doesn’t already have an e-mail account, you can get one for free from Yahoo! (http://mail.yahoo.com
), Google (http://mail.google.com
), Microsoft (www.outlook.com
or www.hotmail.com
), AOL (www.aol.com
), or one of many other service providers.
 Many (if not all) free e-mail providers add a small bit of advertising at the end of your outgoing messages. If you’d rather not be a billboard for your e-mail provider, either use the address(es) that came with your broadband Internet access (yourname@comcast.net or yourname@att.net, for example) or pay a few dollars a month for a premium e-mail account that doesn’t tack advertising (or anything else) onto your messages. As mentioned, you can get a free e-mail account as part of Apple’s iCloud service.
Set up your account the easy way
Chapter 3 explains the option of automatically syncing the e-mail accounts on your computer with your iPhone. If you chose that option, your e-mail accounts should be configured on your iPhone already. You may proceed directly to the later section, “Darling, You Send Me (E-Mail).”
If you haven’t yet chosen that option but want to set up your account the easy way now, go to Chapter 3 and read the section on syncing mail accounts with the iPhone. Then you, too, can proceed directly to the “Darling, You Send Me (E-Mail)” section.
Set up your account the less easy way
If you don’t want to sync the e-mail accounts on your computer, you can set up an e-mail account on your iPhone manually. It’s not quite as easy as clicking a box and syncing your iPhone, but it’s not rocket science either.
If you have no e-mail accounts on your iPhone, the first time you launch Mail, you’re walked through the following procedure. If you have one or more e-mail accounts on your iPhone already and want to add a new account manually, start on the Home screen by tapping Settings⇒Mail, Contacts, Calendars⇒Add Account.
Either way, you should now be staring at the Add Account screen, shown in Figure 12-1. Proceed to one of the next two sections, depending on your e-mail account.
Setting up an e-mail account with the Big Guys
If your account is with Apple’s own iCloud service, Google’s Gmail, Yahoo!, AOL, or Windows Live Hotmail, tap the appropriate button on the Add Account screen now. If you’re setting up company e-mail through Microsoft Exchange, skip to the “Set up corporate e-mail” section. If your account is with a provider other than the ones listed, tap the Other button and skip to the next section.
Enter your name, e-mail address, and password, as shown in Figure 12-2. The description field is usually filled in automatically with the content you have in the address field, but you can replace that text with your own description (such as Work or Personal).

Figure 12-2: Just fill ’em in and tap Next, and you’re ready to rock.
Tap the Next button in the upper-right corner of the screen. Your e-mail provider will verify your credentials. If you pass muster, that’s all there is to setting up your account.
Setting up an account with another provider
If your e-mail account is with a provider other than iCloud, Gmail, Yahoo!, AOL, Hotmail, or Microsoft Exchange, you have a bit more work ahead of you. You’re going to need a bunch of information about your e-mail account that you may not know or have handy.
We suggest that you scan the following instructions, note the items you don’t know, and go find the answers before you continue. To find the answers, look at the documentation you received when you signed up for your e-mail account or visit the account provider’s website and search there.
Here’s how you set up an account:
1. On the Add Account screen, tap the Other button.
2. Under Mail, tap Add Mail Account.
3. Fill in the name, address, password, and description in the appropriate fields, as if you were setting up an account for iCloud, Gmail, Hotmail, Yahoo!, or AOL. Tap Next.
With any luck, that’s all you’ll have to do, although you may have to endure a spinning cursor for awhile as the iPhone attempts to retrieve information and validate your account with your provider. Otherwise, continue with Step 4.
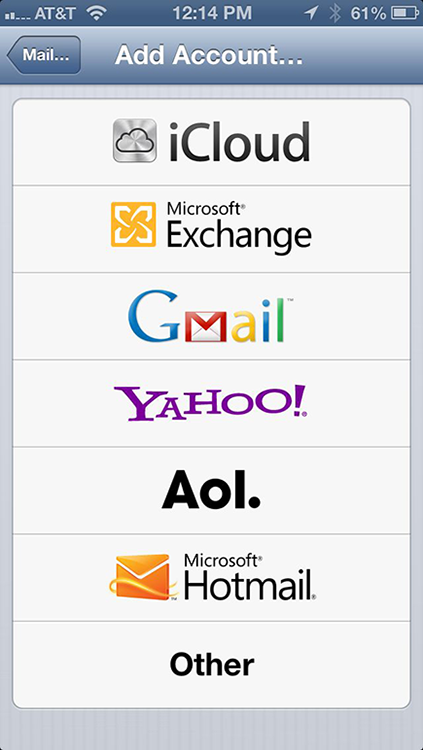
4. Tap the button at the top of the screen that denotes the type of e-mail server this account uses: IMAP or POP, as shown in Figure 12-3.
5. Fill in the Internet host name for your incoming mail server, which should look something like mail.providername.com or mail.providername.net.
6. Fill in your username and password.
7. Enter the Internet host name for your outgoing mail server, which should look something like smtp.providername.com or smtp. providername.net.
You may have to scroll down to the bottom of the screen to see the outgoing mail server fields (refer to Figure 12-3, right).
8. Enter your username and password in the appropriate fields.
9. Tap the Next button in the upper-right corner to create the account.
 Some outgoing mail servers don’t need your username and password. The fields for these items on your iPhone note that they’re optional. Still, we suggest that you fill them in anyway. That way, you won’t have to add them later if your outgoing mail server does require an account name and password, which most do these days.
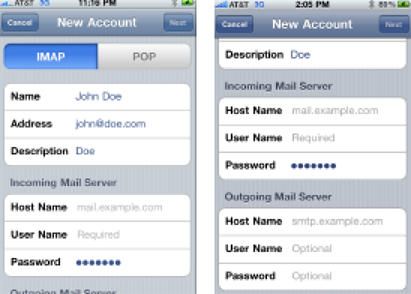
Figure 12-3: If you don’t get your e-mail from iCloud, Gmail, Hotmail, Yahoo!, or AOL, you may have a few more fields to fill in before you can rock.
Set up corporate e-mail
The iPhone is friendly for business users, in large measure because it makes nice with the Microsoft Exchange servers that are a staple in large enterprises.
What’s more, if your company supports something known as Microsoft Exchange ActiveSync, you can exploit push e-mail (messages are pushed to your iPhone automatically as opposed to being pulled in on a schedule) so that messages arrive pronto on the iPhone, just as they do on your other computers. (To keep everything up-to-date, the iPhone also supports push calendars and push contacts.) For push to work, your company must be simpatico with one of the last several iterations of Microsoft Exchange ActiveSync. Ask your company’s IT or tech department if you run into an issue.
Setting up Exchange e-mail isn’t particularly taxing, and the iPhone connects to Exchange right out of the box. However, you still might have to consult your employer’s techie types for certain settings.
Start out by tapping the Microsoft Exchange button on the Add Account screen. Fill in what you can: your e-mail address, username (usually as domainuser), and password. Or call on your IT staff for assistance.
On the next screen, shown in Figure 12-4, enter the server address, assuming that the Microsoft Autodiscovery service didn’t already find it. That address usually begins with exchange.company.com.
Figure 12-4: You’re on your way to a corporate e-mail account.
The company you work for doesn’t want just anyone to have access to your e-mail — heaven forbid if your phone is lost or stolen. So your bosses may insist that you change the passcode lock inside Settings on the phone. (The passcode is different from the password for your e-mail account.) Skip over to Chapter 14 to find instructions for adding or changing a passcode. (We’ll wait for you.) Now if your iPhone ends up in the wrong hands, your company can remotely wipe the contents clean.
After your corporate account is fully configured, you have to choose which information you want to synchronize through Exchange. You can choose Mail, Contacts, and Calendars by tapping each one. After you select an item, you see the blue On button next to it, as shown in Figure 12-5.
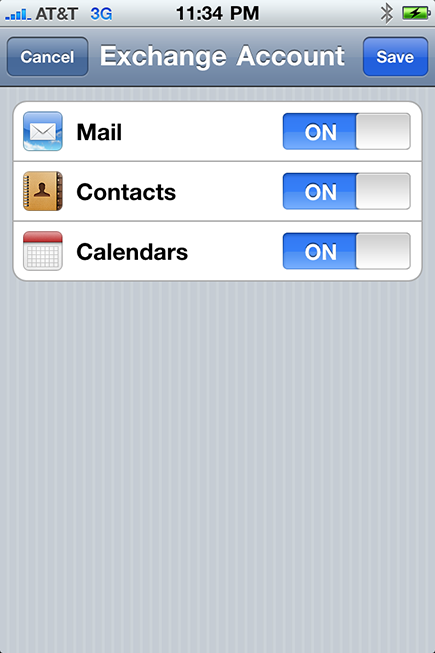
Figure 12-5: Keeping Mail, Contacts, and Calendars in sync.
By default, the iPhone keeps e-mail synchronized for three days. To sync for a longer period, head to Settings and tap Mail, Contacts, Calendars, and then tap the Mail account that is using ActiveSync. Tap Mail Days to Sync, and then tap No Limit or choose another time frame (1 day, 1 week, 2 weeks, or 1 month).
If you’re moonlighting at a second job, you can configure more than one Exchange ActiveSync account on your iPhone; there used to be a limit of just one such account per phone.
..................Content has been hidden....................
You can't read the all page of ebook, please click here login for view all page.