Creating an Actions Pane
In addition to customizing the interaction with users within a document, Windows Forms controls are used to craft custom actions panes. Actions panes should be used to provide contextual data and command options to users as they are editing/viewing a document (either a Word document or an Excel workbook file).
There are several reasons why you would elect to implement your document interface using an actions pane. One reason is that the actions pane is “linked” to the document but is not an actual part of the document; the contents of the actions pane won’t be printed when the document is printed. Another reason to implement an actions pane is to preserve the application’s document-centric focus: you can read and page through an entire document while keeping the information and commands in the actions pane in full view at all times.
Physically, actions panes are created with user controls and are represented by an Actions Pane Control item. Adding this item to your document project creates a user control class; you simply build out the UI of the control as normal. In general, though, you likely want to dynamically add or remove controls from the actions pane depending on what the user is doing within the document that is open in Word or Excel. Providing this level of contextual relevance is the strong point and target of the actions pane in the first place.
Controlling Stacking Behavior
Because the actions pane functions as a toolbar container that can be docked and moved around by the user, there is a complete control layout engine for dictating how the controls within the actions pane should be displayed. The ActionsPane.StackOrder property works with a StackStyle enum to control layout behavior. The various StackStyle values are documented for you in Table 22.3.

As we did with the custom task pane, after you have assembled a user control that you want to surface within the actions pane, you need to create a field variable to hold an instance of the control and then add the control to the actions pane.
So in the ThisWorkbook class, we add the following declaration.
private ActionsPaneControl1 approvalPane = new ActionsPaneControl1();
And the following line of code, inserted into the ThisWorkbook_Startup event, adds our user control to the workbook’s actions pane.
this.ActionsPane.Controls.Add(approvalPane);
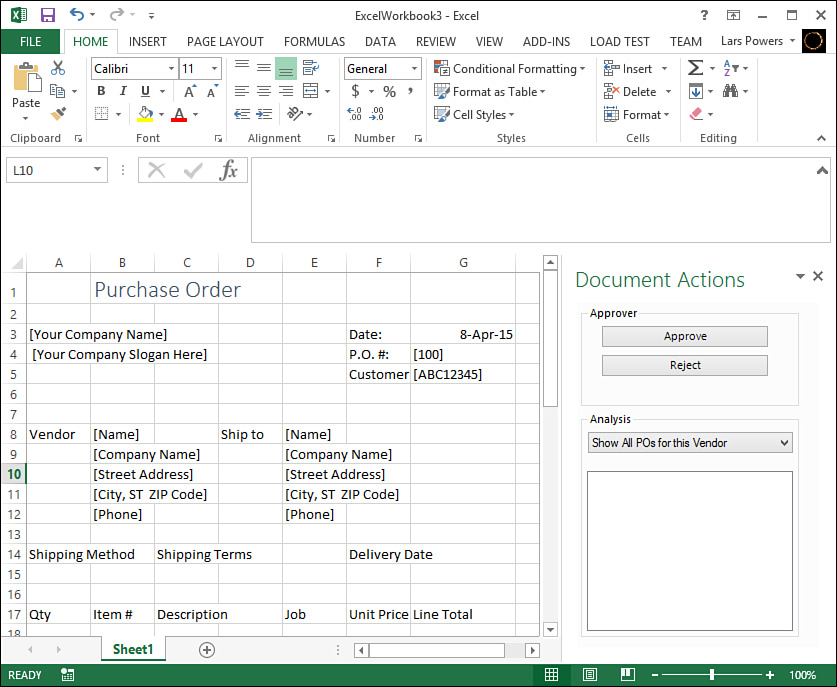
Figure 22.16 shows a custom actions pane alongside its worksheet.