
Autogenerating Bound Windows Forms Controls
Although there are various ways to approach and implement data-bound controls with Visual Studio, they all involve the same basic two steps:
1. Establish a data source.
2. Map the data-source members to controls or control properties.
From there, the Visual Studio Form Designers can generate the correct controls and place them on the form. All the data-binding code is handled for you; you just need to worry about the layout, positioning, and UI aspects of the controls.
As you might imagine, your form can have controls that use simple data binding or complex data binding or a mix of both. Now you’re ready to look at the steps involved with creating a series of controls that leverage both simple and complex data binding to display information from the AdventureWorks Employee table. In this scenario, you work with the Windows Forms Designer. The ASP.NET Web Forms Designer works in a similar fashion, and you have a chance to investigate drag-and-drop approaches for data binding in the web environment in just a bit. As we have already established, the first step is selecting a data source.
Selecting a Data Source
In Visual Studio, make sure you are working inside a Windows Forms Application project and use the Data Sources window to select a data source. If this window isn’t already visible, select View, Other Windows, Data Sources. If your current project doesn’t have any defined data sources, you need to create one. Click the Add New Data Source button in the toolbar of the window to start the Data Source Configuration Wizard. On the first page of this wizard (see Figure 13.30), select the type of the data source. There are four options here:
![]() Database—The data source resides as a table within a relational database.
Database—The data source resides as a table within a relational database.
![]() Service—The data source is a web service that returns the data to be bound to the form controls.
Service—The data source is a web service that returns the data to be bound to the form controls.
![]() Object—The data source is an object that provides the data. (This is useful when a business object from another layer of the application is responsible for delivering the data to the form.)
Object—The data source is an object that provides the data. (This is useful when a business object from another layer of the application is responsible for delivering the data to the form.)
![]() SharePoint—The data source is an object that is hosted within a SharePoint site.
SharePoint—The data source is an object that is hosted within a SharePoint site.

Because the concepts of data binding are most easily understood within the context of a database, we use the database data-source type as the underpinning for our walk-throughs in this chapter.
If you have selected the database data source type, the second page of the wizard focuses on selecting the type of data model you use. Prior versions of Visual Studio simply enabled you to model your data using data sets. Visual Studio now also enables you to build an Entity Data Model and use that as a data source for your binding. Entity Data Models are a feature of the Entity Framework, which we discuss later in this chapter. Regardless of the model you select, you need to indicate where the model gets its data (via connection string, and so on) and what data should be pulled into the model from the source database.
Select DataSet, and then click through the next two pages of the wizard, which will capture the connection and connection string to use. The final page of the wizard enables you to select which of the objects in the database should be used for the source data. You can select from any of the data elements present in any of the various tables, views, stored procedures, or user-defined functions in the database. For the purposes of this example, we have selected a DataSet model that pulls its data from the AdventureWorks database, and we have selected a few employee table data columns that are of interest: BusinessEntityID, LoginID, HireDate, rowguid, BirthDate, Gender, SalariedFlag, VacationHours, SickLeaveHours, and CurrentFlag.
At the conclusion of the wizard, your selected data source is visible in the Data Sources window (see Figure 13.31).

Note
If you have chosen to use a DataSet as your data model, behind the scenes Visual Studio is really just using the data source information collected in the Data Source Configuration Wizard to create a typed data set. This data set is then stored as a project item in the current project.
With the data source in place, you’re ready to move on to the next step: mapping the data-source elements to controls on your form.
Mapping Data Sources to Controls
The really quick and easy way to create your data-bound controls is to let Visual Studio do it for you. From the Data Sources window, click the drop-down button on the data-source name to reveal a menu (see Figure 13.32).

This menu enables you to set the control generation parameters and really answers the question of which controls you want generated based on the table in the data source. By setting this to DataGridView, you can generate a DataGridView control for viewing and editing your data source. The Details setting enables you to generate a series of simple data-bound controls for viewing or editing data in the data source.
For this example, select Details, and then drag and drop the data source itself from the Data Sources window and onto a blank form.
Figure 13.33 shows the results. In just two short steps, Visual Studio has done all of the following for you:
![]() Autogenerated a set of Label, TextBox, and DataTimePicker controls
Autogenerated a set of Label, TextBox, and DataTimePicker controls
![]() Autogenerated a tool strip with controls for navigating among records in the data source, saving changes made to a record, deleting a record, and inserting a new record
Autogenerated a tool strip with controls for navigating among records in the data source, saving changes made to a record, deleting a record, and inserting a new record
![]() Created all the necessary code behind the scenes to establish a connection to the data source, read from the data source, and commit changes to the data source
Created all the necessary code behind the scenes to establish a connection to the data source, read from the data source, and commit changes to the data source

You have essentially created an entire data-enabled application from scratch with absolutely no coding on your part.
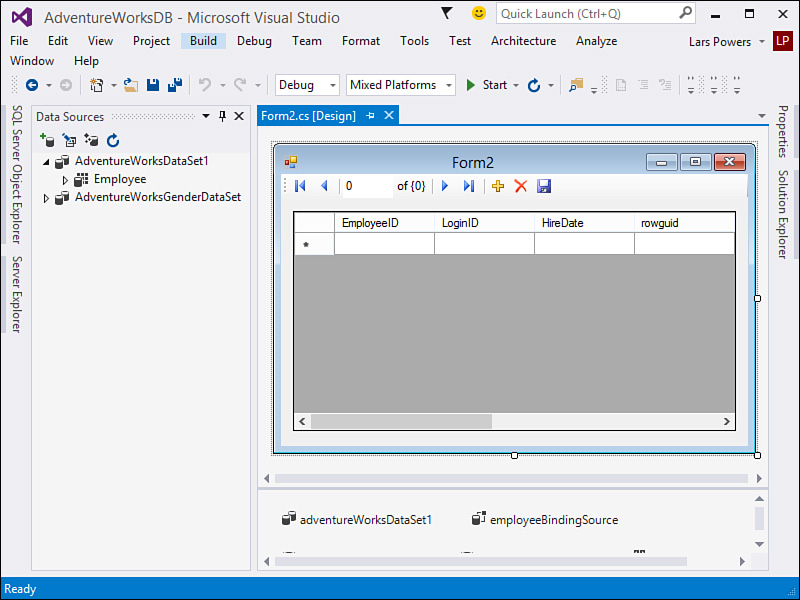
The approach of using simple data binding might not fit into the user interface design, so you always have the option of working in the complex data-binding world and using the DataGridView as an alternative. Figure 13.34 shows the results of autogenerating a DataGridView instance using this same process.
Customizing Data-Source Mappings
Refer again to Figure 13.31 and look at the individual data elements that show up under the Employee data source. Each of these is displayed with a name and an icon. The name is, of course, the name of the data element as defined in the database. The icon represents the default mapping of that data type to a .NET control. For example, the Title field maps to a TextBox control, and the BirthDate field maps to a DataTimePicker control. Visual Studio actually attempts to provide the best control for any given data type. But feel free to manually indicate the specific control you want used. If you want to display the value of the EmployeeID column in a label instead of a text box (in recognition of the fact that you cannot edit this value), it would be easy enough to change this before generating the controls by selecting the EmployeeID column in the Data Sources window and then clicking the drop-down arrow to select Label instead of TextBox.
In addition to changing the control to data type mapping on an individual level, you can affect the general default mappings that are in place by selecting the Customize option from that same drop-down menu. The Visual Studio Options dialog box opens with the Windows Forms Designer page selected. Using the settings there (see Figure 13.35), you can specify the default control type that you want to apply for each recognized data type.
