
Adding Project Items
Every major piece of potential extension capability is represented by its own project item. As we discussed earlier, creating a command that can be triggered from a custom Visual Studio menu selection is one potential way to surface an extension inside of the IDE. And this would be crafted and added into our VSIX project by using a tool window project item. Figure 15.3 shows the available project items.
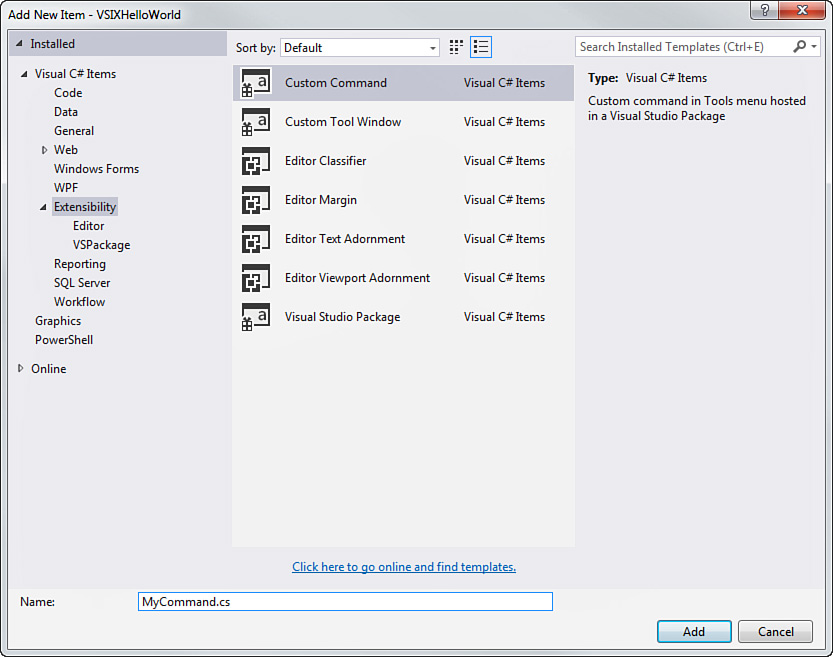
The available project items prefixed with Custom are the traditional Visual Studio extension items. You will see others in the list prefixed with Editor. These are project items that leverage a slightly different framework (the Managed Extensions Framework, MEF) to allow you to customize the code editor inside of Visual Studio. We cover those types of extensions in the next chapter.
Let’s add a custom command item.
Custom Commands
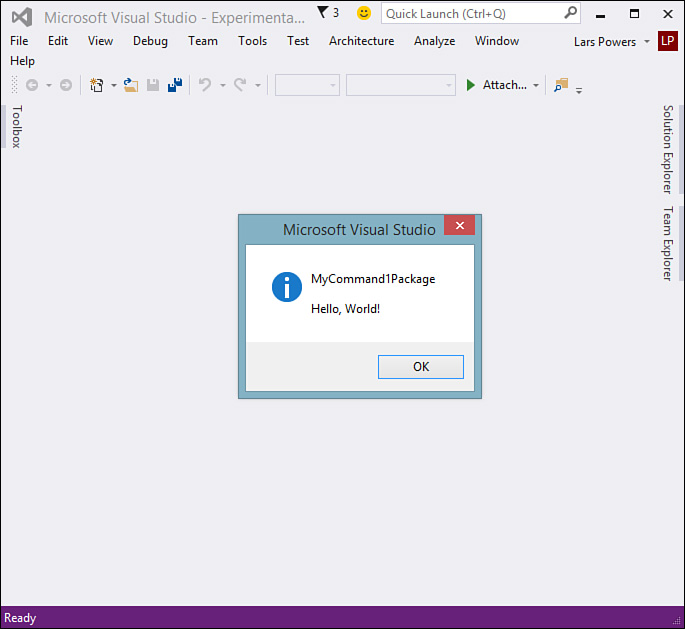
A custom command is nothing more than a menu or toolbar item that kicks off a specific piece of code. To implement a traditional Hello World application, we can first create a menu command within the IDE and then, in response to someone clicking on that command, we can show a MessageBox with our "Hello World" text.
Select the Custom Command project item from the Add New Item dialog (see Figure 15.3), give it a name, and then click OK to add it to the project.
The first thing you will notice is that this one project item template actually creates multiple files for us: a command class file that implements the specifics of our command, image files to use as menu icons, and various package files that integrate and map our command into the IDE. (We’ll talk more about these in a bit.)
To implement our command logic, we simply need to write code within the command C# code file. Specifically, because the command class already has plumbing in place to write the command to an event handler, we will add our code to the event handler.
private void ShowMessageBox(object sender, EventArgs e)
{
//Show a MessageBox to prove we were here
IVsUIShell uiShell = (IVsUIShell)Package.GetGlobalService(typeof(SVsUIShell));
Guid clsid= Guid.Empty;
int result;
Microsoft.VisualStudio.ErrorHandler.ThrowOnFailure(uiShell.ShowMessageBox(
0,
ref clsid,
"MyCommand1Package",
"Hello, World!",
string.Empty,
0,
OLEMSGBUTTON.OLEMSGBUTTON_OK,
OLEMSGDEFBUTTON.OLEMSGDEFBUTTON_FIRST,
OLEMSGICON.OLEMSGICON_INFO,
0, //false
out result));
}
At this stage, the package doesn’t actually do anything. You still have to implement your custom logic. What the project item template has done, however, is implement much (if not all) of the tedious plumbing required to do the following:
![]() Wire the extension into the IDE
Wire the extension into the IDE
![]() Expose it via a menu command
Expose it via a menu command
![]() Intercept the appropriate extensibility events to make the extension work
Intercept the appropriate extensibility events to make the extension work
Our VSIX project is actually ready to run at this stage because all the required integration and wrapper code is included for you within files that the project item template created.
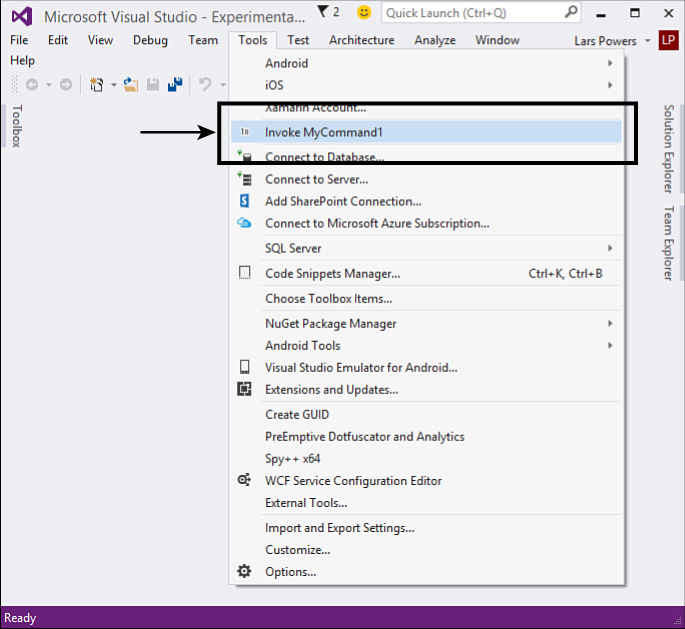
Debugging the extension project launches a separate instance of Visual Studio (called the “experimental instance”); the extension will be registered and installed into that instance. We are free to then test our extension.
By default, menu commands will show up under the IDE’s Tools menu. Figure 15.4 shows our new menu command displayed within the experimental Visual Studio instance. And Figure 15.5 shows the results of clicking on that menu item.
Tool Windows
Creating a custom tool window is just as easy as creating a custom command: just add the custom tool window project item to your project.
Figure 15.6 shows a new VSIX project after adding the tool window project item. Just as with our prior command example, this project item template adds all the various, required files to your project. In addition to the plumbing and integration code and the class that implements the tool window’s user interface (UI), you get a custom command added to the project that will, by default, display the tool window.

Tool windows are nothing more than user controls that implement their UI using XAML. (We introduce the core concepts of XAML in Chapter 21, “Building WPF Applications,” and in Chapter 23, “Developing Windows Store Applications.”
Figure 15.7 shows the default tool window running as an extension in the IDE. Custom tool windows are, by default, launched through the View, Other Windows menu.
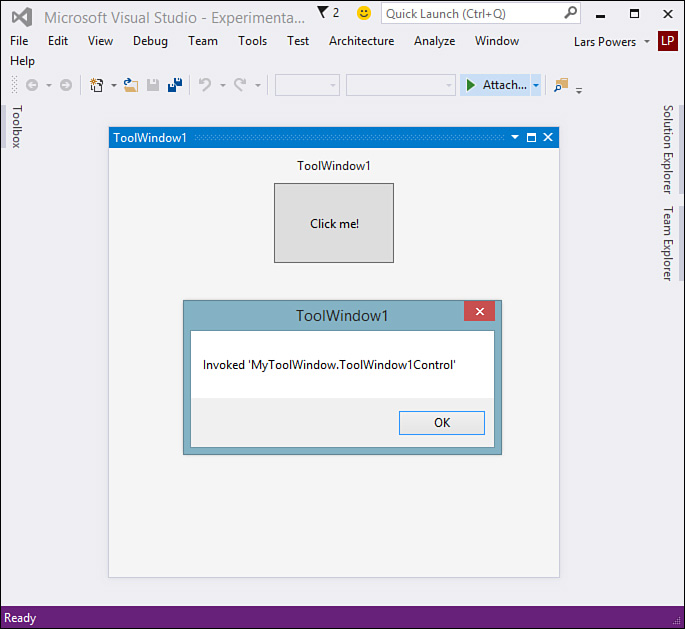
To change the tool window UI, edit the user control class (in this case, ToolWindow1Control is defined within the ToolWindow1Control.xaml and ToolWindow1Control.xaml.cs files).
Now that you have a baseline of code to work with, you’re ready to examine the source to understand the overall structure and layout of an extension.