
Writing a Query
The primary tool that facilitates the development of SQL statements is the query/view designer, which is a graphical tool that enables you to build queries with a point-and-click interface. After a query is written, this tool enables you to execute that query, view the returned results, and even perform basic troubleshooting by examining the query execution plan.
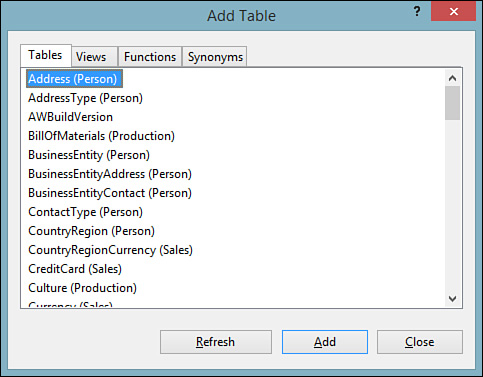
Creating a new select query against a table is as simple as right-clicking the database in Server Explorer and then selecting New Query. An initial prompt gathers a list of the tables, views, functions, and synonyms to use as the target of the query (see Figure 13.13).
Tip
The visual query design tools we are discussing are, for some reason, only available when you have established a connection to SQL Server using the .NET Framework Provider for OLE DB. If you are trying to follow along with the instructions here and find that you are stuck with only the SQL editor (no visual tools), it is likely that your data connection in Server Explorer is using the native .NET Framework Provider for SQL Server. Conversely, you can only add or edit stored procedures if your data connection is using the native client and not the OLE DB client.
So, to recap: to use the visual tools, make sure your database connection is configured using the OLE DB Provider. To edit/create stored procedures, make sure you are using a connection that leverages the native SQL Server provider.
After you have selected the objects you want the query to target, the query designer opens. As Figure 13.14 illustrates, the designer has four panes:
![]() Criteria pane—This pane enables you to select, via a point-and-click diagram, the data columns to include in the select statement, sorting, and alias names.
Criteria pane—This pane enables you to select, via a point-and-click diagram, the data columns to include in the select statement, sorting, and alias names.
![]() Diagram pane—This pane is similar to the diagram in the database diagram designer; it graphically depicts the database object relationships. This makes creating joins a simple action of using existing relationships or creating new ones right within this tool.
Diagram pane—This pane is similar to the diagram in the database diagram designer; it graphically depicts the database object relationships. This makes creating joins a simple action of using existing relationships or creating new ones right within this tool.
![]() Results pane—After the query is executed, this pane holds any data returned as a result. Note that this pane is equipped with navigation controls to enable you to page through large resultsets.
Results pane—After the query is executed, this pane holds any data returned as a result. Note that this pane is equipped with navigation controls to enable you to page through large resultsets.
![]() SQL pane—The SQL pane holds the actual SQL syntax used to implement the query. You can alter the statement manually by typing directly into this pane, or you can leverage the designer and let it write the SQL for you based on what you have entered into the diagram and criteria panes.
SQL pane—The SQL pane holds the actual SQL syntax used to implement the query. You can alter the statement manually by typing directly into this pane, or you can leverage the designer and let it write the SQL for you based on what you have entered into the diagram and criteria panes.

You can show or hide any of these panes at will. Right-click anywhere in the designer and select the Pane fly-out menu to select or deselect the visible panes.
Fine-Tuning the SQL Statement
To flesh out the select statement, you can indicate which columns from which tables you want returned by placing a check next to the column in the diagram pane. You use the criteria pane to specify a sort order, provide alias names for the return columns, and establish a filter for the resultset. As you select these different options, the designer turns them into SQL, visible in the SQL pane.
We are using the AdventureWorks sample database in a SQL Server Express 2014 instance for most of this chapter. If you want to follow along, you can download a copy of this database and others by visiting http://MSFTDBProdSamples.codeplex.com/. AdventureWorks is also the sample database used by the SQL Server 2014 Books Online help collection.
Figure 13.15 shows the completed “Employee” query, with results visible in the bottom pane.

Specifying Joins and Join Types
When you add multiple related tables to the query designer, the designer uses their foreign key relationships to automatically build a JOIN clause for the query. You also have the option to create joins on table columns that don’t have an existing relationship. You do this the same way that you specify relationships in the database diagram designer: you select and drag the column from one table to another within the diagram pane. The columns to be joined must be of compatible data types; for instance, you can’t join a varchar column with an integer column.
Joins are created using a comparison operator. By default, this is the equal operator; in other words, return rows where the column values are equal across the join. But you have control over the actual comparison operation used in the join. For example, perhaps you want the resultset to include rows based on a join where the values in Table A are greater than the values in Table B on the joined columns. You can right-click the join relationship line in the diagram pane and select Properties to see the properties for the join; clicking the ellipsis button in the Join Condition and Type property reveals the Join dialog box, shown in Figure 13.16.

Other Query Types
By default, creating queries from the Server Explorer results in a select query. But the query designer is equally adept at building other query types. If you want, for instance, an insert query, you can change the type of the query loaded in the designer by selecting Query Design, Change Type.
Table 13.1 shows the different query types that the designer supports.

Tip
If you just want to quickly see the data contents of any given table, you can right-click the table within the Server Explorer and then select Show Table Data. This initiates a new query/view designer with a SELECT * statement for the given table. By default, only the results pane is visible. This functionality is ideal for testing scenarios in which you need to quickly edit data in the database or observe the effects of SQL statements on a table.