Creating/Calling REST-Based WCF Services
As discussed previously, REST-based services allow your services to be called by any device that communicates HTTP (which is nearly everything). We demonstrated this approach using Web API. However, WCF can also be configured to work as REST-based services. REST makes your services URL-accessible from HTTP requests using GET, POST, PUT, and DELETE. They can also support JSON message format and can then be called using jQuery and AJAX.
You indicate support for REST through attributes on the WCF service methods. These attributes, WebGet and WebInvoke, are described as follows:
![]()
WebGet—Indicates the service can be called using HTTP GET
![]()
WebInvoke—Identifies the service as supporting the HTTP verbs of POST, PUT, and DELETE
Both of these attributes have the property UriTemplate. This property is used to route URL requests to a specific web-hosted, URL-addressable service and pass the appropriate parameters. This is just like the MVC and Web API routing with which you may be familiar. You define the UriTemplate property to your domain, a name to identify your service, and then the parameters you intend to pass. For example, the following interface method indicates a call to the Get method using the URL http://localhost/CustomerService.svc/Get/1 to return a Customer instance by the id parameter. You can indicate additional parameters with UriTemplate by appending them to the URL using /{parameter}.
[OperationContract]
[WebGet(UriTemplate = "Get/{id}")]
Customer Get(int id);
The WebGet and WebInvoke attributes also include the ResponseFormat property. This allows you to indicate the format (XML or JSON) you want to use when sending a response back to the request, as in ResponseFormat = WebMessageFormat.Json.
You must also configure an HTTP endpoint for the services to be called. You can do this in your service web.config file by editing the XML, or you can use the WCF Configuration editor. The example that follows walks you through both options.
Update WCF Services to Accept REST Requests
Let’s look at an example. We are going to update the WCF project CustomerServices created earlier to support REST services. Recall that this project is a WCF Services Application and contains the Customer class as a DataContract, the ICustomerProfile interface for the service, and the CustomerProfile class that implements the interface. (Refer to Listings 19.15 through 19.17.)
We need to update the ICustomerProfile interface to indicate support for REST. Listing 19.18 shows the completed example. First, we added a using statement to the top for System.ServiceModel.Web (if it was not already there). Next, notice the use of WebGet and WebInvoke. We set the UriTemplate to work similar to a Web API request. The ResponseFormat is set to return JSON for those services that return customer data. Notice that WebInvoke includes the parameter Method to indicate the HTTP verb we want to respond to (POST, PUT, or DELETE).
LISTING 19.18 The ICustomerProfile Interface Definition
using System.Collections.Generic;
using System.ServiceModel;
using System.ServiceModel.Web;
namespace CustomerServices
{
[ServiceContract]
public interface ICustomerProfile
{
[OperationContract]
[WebGet(ResponseFormat = WebMessageFormat.Json)]
IEnumerable<Customer> GetList();
[OperationContract]
[WebGet(UriTemplate = "Get/{id}", ResponseFormat = WebMessageFormat.Json)]
Customer Get(string id);
[OperationContract]
[WebInvoke(Method = "DELETE", UriTemplate = "Delete/{id}")]
void Delete(string id);
[OperationContract]
[WebInvoke(Method = "POST", UriTemplate = "Create")]
void Create(Customer customer);
[OperationContract]
[WebInvoke(Method = "PUT", UriTemplate = "Update")]
void Update(Customer customer);
}
}
Notice in Listing 19.18 that we changed the Get and Delete methods to accept a string value instead of an int. This is required by the WCF REST-based HTTP web services. We must also then edit the code in CustomerProfile for both these service methods to accept a string and not an int. Of course, we convert the string to int as a first step within the method.
The final step to set up the CustomerProfile WCF services as REST based is to add an HTTP binding to the web.config file. You can do so either by manually editing the XML in the config file or by using the WCF config editor. Let’s look at the latter option first.
1. In Solution Explorer, right-click Web.config and choose Edit WCF Configuration.
2. Under the Configuration tree (left side), choose the Advanced folder, Endpoint Behaviors. Click the link New Endpoint Behavior Configuration (or right-click the folder and choose the same).
3. In the Behavior edit screen, name the behavior web. Click the Add button to add an element. From the Stack Element drop-down, choose webHttp. Figure 19.26 shows an example.

4. Navigate to the Services folder. If you do not see the CustomerProfile service, you will need to add it. Click the Create a New Service link. This will launch the New Service Element Wizard.
For the first dialog, select CustomerServices.CustomerProfile (you can browse to this by selecting your compiled dll in the bin folder) and click Next.
On the service contract page of the wizard, select CustomerServices.ICustomerProfile and click the Next button.
Select the communication mode of HTTP and select Next.
Select Basic Web Service interoperability and click Next.
Set the address to your service endpoint as http://localhost:PORT#/CustomerProfile.svc and click Finish. You should now have the CustomerServices.CustomerProfile Service in the WCF configuration editor (see the left side of Figure 19.27).
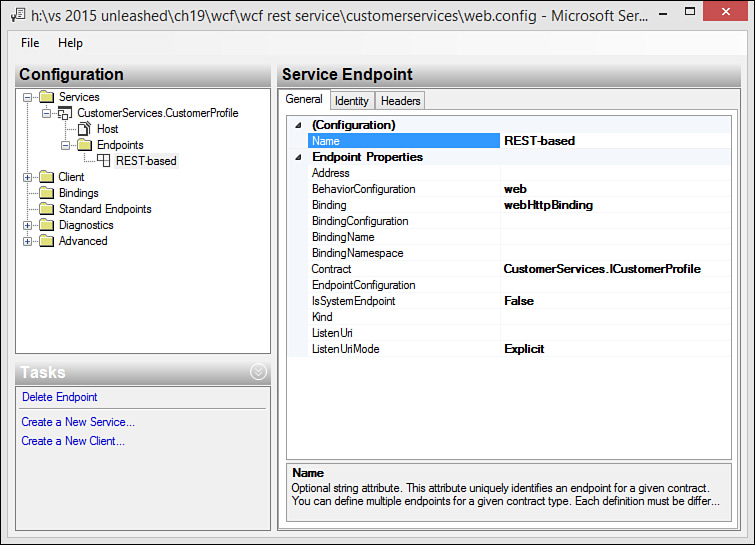
5. If an endpoint exists, use it to configure as follows. If not, right-click Endpoints and choose New Service Endpoint. Configure the service as shown in Figure 19.27.
This includes setting the Name to REST-based, the BehaviorConfiguration to web (the behavior you just created in the wizard), the Binding to webHttpBinding, and the Contract to CustomerServices.ICustomerProfile.
The WCF service is now configured to work as an HTTP, REST-based service. You can review your configuration by opening web.config. The following shows the system.serviceModel section post-configuration. (Note that you can use this to simply edit the web.config file by hand.)
<system.serviceModel>
<services>
<service name="CustomerServices.CustomerProfile">
<endpoint address="" behaviorConfiguration="web" binding="webHttpBinding"
name="REST-based" contract="CustomerServices.ICustomerProfile" />
</service>
</services>
<behaviors>
<endpointBehaviors>
<behavior name="web">
<webHttp />
</behavior>
</endpointBehaviors>
<serviceBehaviors>
<behavior name="">
<serviceMetadata httpGetEnabled="true" httpsGetEnabled="true" />
<serviceDebug includeExceptionDetailInFaults="false" />
</behavior>
</serviceBehaviors>
</behaviors>
<protocolMapping>
<add binding="basicHttpsBinding" scheme="https" />
</protocolMapping>
<serviceHostingEnvironment aspNetCompatibilityEnabled="true"
multipleSiteBindingsEnabled="true" />
</system.serviceModel>
Note
Configuring your WCF service in this way will prevent the WCF Test Client from working with your services. However, you can now access them directly from a web browser. To do so, run the application and navigate to http://localhost:xxxxx/CustomerProfile.svc/GetList (where xxxxx represents your port number).
Update ASP.NET 5 Client to Call WCF Services Using REST
We can now write client code to call the REST-based WCF services using HTTP. As an example, consider the client application we wrote for consuming the REST-based Web API services using ASP.NET 5. (See the section, “Consuming an ASP.NET Web API Service.”) We can create a similar site for working with these WCF services.
To get started, this example assumes you copy the WebApiClient project created earlier (or download the sample code for the book). To follow along reading, you might refamiliarize yourself with Listings 19.8 through 19.13.
The changes to the code are minimal and involve mostly updating the URL addresses for calling the services. The following steps you through the code changes for the CustomerController class:
1. Open the CustomerController class. At the top of the class, change the baseUri variable to point to the new CustomerProfile service as follows (your port number will likely differ). Note the slash (/) at the end of the Uri.
string baseUri = "http://localhost:6795/CustomerProfile.svc/";
2. In the Index() method, change the GetAsync call to use the new service path as the following illustrates.
HttpResponseMessage response = await hClient.GetAsync("GetList");
3. In the Edit(int? id) method, change the GetAsync method as follows.
HttpResponseMessage response = await hClient.GetAsync(
string.Format("get/{0}", id.ToString()));
4. In the Edit(Customer customer) method, change the PutAsJsonAsync call as follows.
HttpResponseMessage response =
await hClient.PutAsJsonAsync("update", customer);
That’s it for the controller changes. Recall that the Web API project we used as a basis for this sample made the calls for creating a new customer and deleting an existing customer from the user’s browser using JavaScript, jQuery, and AJAX. The following steps you through making these modifications:
1. Open the Create.cshtml page from the Views/Customer folder in Solution Explorer.
2. Navigate to the bottom of the page and edit the url variable as follows (your port number may vary).
string url = "http://localhost:6795/CustomerProfile.svc/Create";
3. Open the Index.cshtml (shows a list of customers).
4. Rewrite the form submit function to use the jQuery method, $.ajax (instead of $.post). In this case, we need to send the data to the service as JSON (instead of a serialized form as we did with the Web API sample; note that this approach can also work with Web API POST requests).
Listing 19.19 shows the full example. The JSON message is created by defining a type, formData, and adding the form values to the type. We then use JSON.stringify(formData) to convert the type to JSON.
LISTING 19.19 The Create.cshtml JavaScript and jQuery Code to Send a POST Message with Customer Form Data on Submit
<script type="text/javascript">
$('#form-create').submit(function () {
//Clear result message.
$('#result').html("");
//Verify form is valid.
if ($('#form-create').valid()) {
//Create formData to be converted to JSON.
var formData = {
"Name": $("#Name").val(),
"Email": $("#Email").val(),
"OptInEmail": $("#OptInEmail").val(),
"Notes": $("#Notes").val()
}
//Post the data as JSON and verify response code 200 - OK.
$.ajax({
url: 'http://localhost:6795/CustomerProfile.svc/Create',
type: 'POST',
data: JSON.stringify(formData),
dataType: 'json',
contentType: 'application/json; charset=utf-8',
processData: true,
complete: function (response) {
if (response.status == 200) {
window.location = '/customer';
} else {
$('#result').html('Error saving customer.'),
}
}
});
return false;
}
});
</script>
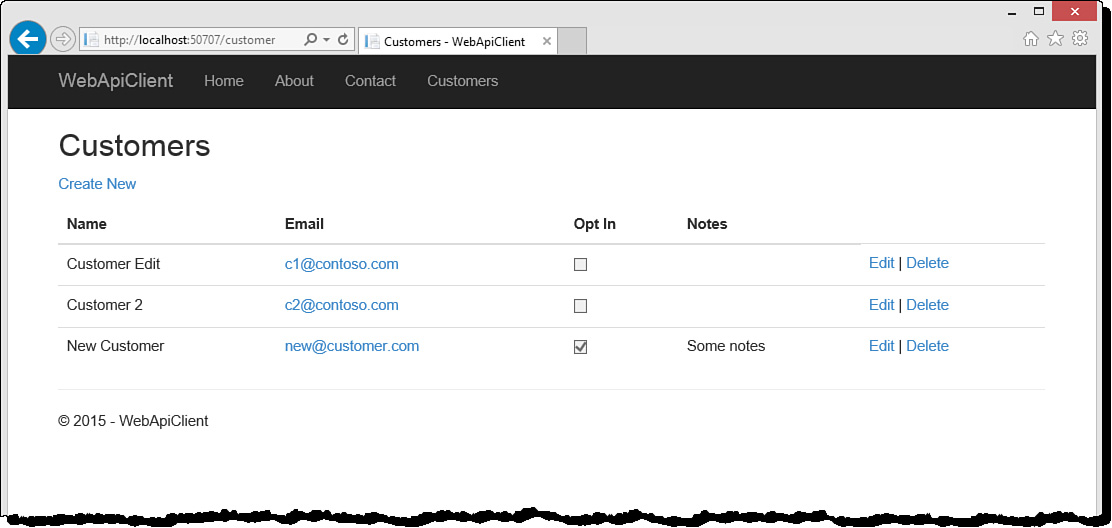
The final step is to run the application. Be sure to have the WCF REST-based service application running in a host. (A Visual Studio debug session using IIS Express will work.) Figure 19.28 shows the client running against the WCF, REST-based services. Notice the additional customer added to the default collection (using the client-side code in Listing 19.19).