
Creating the Windows Phone UI
Thinking back to our prototype, we know that we need two pages within our Phone app: a master “list” page and a details page. When Visual Studio created the Windows Phone 8 project, it added a MainPage.xaml by default. We’ll make that our master list page.
We have a few options for controls to display our list of meals. ListView is a great choice; it’s easy to work with but still provides enough flexibility for multiple line templates, and so on.
The Master Page
With the MainPage open, create a new ListView control within the XAML. You can hand-craft the code or drag the control over from the toolbox. With the control in place, we need to tweak a few things. First, we need to bind the control to the view model that we previously created. We also need to react when the user selects an item in the list, so we have to wire up an event for that. And we have to provide a quick set of data templates for showing the data.
Here is an initial declaration for our ListView.
<ListView x:Name="ListViewMeals"
ItemsSource="{Binding Meals}"
SelectionChanged="ListViewMeals_SelectionChanged"
Tapped="ListViewMeals_Tapped" >
<ListView.ItemTemplate>
<DataTemplate>
<StackPanel Margin="0,0,0,17">
<TextBlock Text="{Binding DateString}"
TextWrapping="Wrap"
Style="{StaticResource ListViewItemTextBlockStyle}" />
<TextBlock Text="{Binding Description}"
TextWrapping="Wrap"
Margin="12,-6,12,0"
Style="{StaticResource GroupHeaderTextBlockStyle}"
FontSize="14" />
</StackPanel>
</DataTemplate>
</ListView.ItemTemplate>
</ListView>
Note that we have added an event handler for the Tapped event on the ListView control. We’ll use that later to start the editing process for that selected meal. The styles we are using are built-in, WinRT styles. Because IntelliSense is supported inside of XAML, you can get the list of available styles by starting to fill out the syntax for the Style property; then just select from the available list of StaticResource entries.
If you look at our binding syntax within the DataTemplate elements, you will see that we are referencing the DateString and Description property. But in order for the view to pick up on that binding, we have to set an overall data context to our page. That is done in the code-behind file like this:
public MainPage()
{
this.InitializeComponent();
this.NavigationCacheMode = NavigationCacheMode.Disabled;
DataContext = App.ViewModel;
}
When everything is wired up and working, our collection of meals (for example, our view model) will automatically connect to the ListView, which will automatically display all the Meal objects contained within the collection.
We need one more piece of functionality to allow users to add a new meal to the list. We’ll trigger that action via an app bar placed at the bottom of the page. Dragging and dropping a Command Bar control from the toolbox will add the initial XAML to our page, which we can then tweak.
<Page.BottomAppBar>
<CommandBar x:Name="BottomAppBar1" Padding="10,0,10,0">
<AppBarButton x:Name="AddButton"
Icon="Add"
Label="Add"
Click="AddButton_Click" />
</CommandBar>
</Page.BottomAppBar>
The AddButton_Click event handler simply creates a new Meal instance and adds it to our view model.
private void AddButton_Click(object sender, RoutedEventArgs e)
{
Meal newMeal = new Meal();
newMeal.Date = DateTime.Today;
newMeal.Parties = 1;
newMeal.TipPercent = .20;
newMeal.SubTotal = 50.00;
App.ViewModel.Meals.Add(newMeal);
this.Frame.Navigate(typeof(MealPage), newMeal);
}
Now we have to worry about how we will deal with a user clicking on an item in the ListView and adding a new item to the ListView. Both require the details page to be in place, so let’s build that next.
The Details Page
Right-click on the Windows Phone 8.1 project and select Add New Item. Then select a blank XAML page. Name the page MealPage, and click OK. Your solution/project tree should now look similar to Figure 24.14.

On the details page, we need to build out a series of controls for displaying, and allowing the editing of, the data from a selected Meal object. A Grid offers an easy way to position the items on the page. Within the Grid, we’ll need items like TextBlock, TextBox, and Button controls to implement our UI design (refer to Figure 24.10). We also need a DatePicker control to allow us to display and edit the date. All the controls that are meant to display dynamic data associated with the selected will have to have the appropriate binding setup within the XAML.
For instance, the TextBox that holds the subtotal amount will look something like this:
<TextBox x:Name="TextBoxTotal"
Grid.Column="1"
Grid.Row="2"
VerticalAlignment="Center"
Text="{Binding SubTotal}"/>
The bindings that we establish are a direct link back to the model and view model properties that are exposed.
The Button controls need to have their click events wired up to enable the end user to change the values for SubTotal and TipPercent. That is a straightforward effort. Add the event handler in the XAML, and let Visual Studio create the code-behind C# routine for you automatically. Then add the code in the event handler to increment or decrement the property. Here is the “decrease tip” code.
<Button x:Name="ButtonDownTip"
Grid.Row="4"
Grid.Column="0"
VerticalAlignment="Center"
HorizontalAlignment="Center"
FontSize="60"
Click="ButtonDownTip_Click"
>-
</Button>
private void ButtonDownTip_Click(object sender, RoutedEventArgs e)
{
this.MealInstance.TipPercent = this.MealInstance.TipPercent - .05;
}
When the user adjusts any of these properties, we will need to recompute the totals. A brute force approach would just make those calculations in the button click events based on the adjusted values. But here, inside of the view, is exactly where we don’t want the code to live. That would mean re-implementing the code again within the Windows UI project. Because this is simple arithmetic and code that doesn’t need to change based on the deployment platform, the best place for this code to live is within the Shared project as part of our data model (part of the Meal class itself).
First add a routine to the Meal class that performs the required arithmetic to adjust all our read-only properties anytime one of our writable properties changes.
/// <summary>
/// Update the GrandTotal and PerPartyGrandTotal properties based on
/// changes to either subtotal or tip percent.
/// </summary>
private void ComputeGrandTotals()
{
_grandTotal = _subTotal + (_subTotal * _tipPercent);
_grandTotal = Math.Round(_grandTotal, 2);
_perPartyGrandTotal = _grandTotal / _parties;
_perPartyGrandTotal = Math.Round(_perPartyGrandTotal, 2);
NotifyPropertyChanged("GrandTotal");
NotifyPropertyChanged("PerPartyGrandTotal");
}
Note that we are raising the property changed event via NotifyPropertyChanged for our two properties. Because this routine needs to be called every time we touch SubTotal, TipPercent, or Parties, we will add a call to the routine from each of the property setters.
Here is the example for SubTotal.
public double SubTotal
{
get
{
return _subTotal;
}
set
{
if (value != _subTotal)
{
_subTotal = value;
ComputeGrandTotals();
NotifyPropertyChanged("SubTotal");
}
}
}
With the UI for the detail page in place, we now need to ensure that our page is being passed the correct object from the master page. As we mentioned previously in the chapter, data can be passed from one page to another using the Frame.Navigate method. This is how we will capture the currently selected Meal object from the master page and display its details on the detail page.
Revisit MainPage.xaml, and put the appropriate Navigate call into the previously created ListView_Tapped event.
private void ListViewMeals_Tapped(object sender, TappedRoutedEventArgs e)
{
//Cast selected item to Meal.
Meal meal = (Meal)ListViewMeals.SelectedItem;
this.Frame.Navigate(typeof(MealPage), meal);
}
This will pull the Meal object from the item in the list that was clicked/tapped and pass it onto the details page by way of the second Navigate parameter.
Then, within the MealPage.xaml, we add the code within OnNavigatedTo to pull the passed Meal object out and then bind it to the data context of the page (thus making all our bound controls “live”).
protected override void OnNavigatedTo(NavigationEventArgs e)
{
base.OnNavigatedTo(e);
var mealInstance = e.Parameter as Meal;
MealInstance = mealInstance;
DataContext = MealInstance;
}
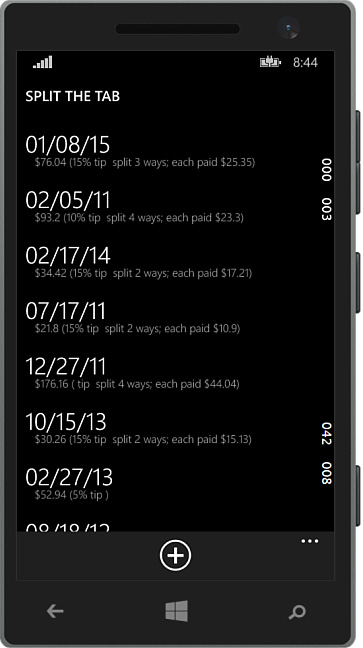
Barring some minor clean-up and debugging here and there, the Windows Phone project should now be complete. Figures 24.15 and 24.16 show the project running in the Phone emulator. We won’t provide all the code here, but Listing 24.1 shows the MainPage.xaml content, and Listing 24.2 has the MainPage.xaml.cs. The other code files are available at this book’s website.

LISTING 24.1 The MainPage.xaml Code
<Page
x:Class="SplitTheTab.MainPage"
xmlns="http://schemas.microsoft.com/winfx/2006/xaml/presentation"
xmlns:x="http://schemas.microsoft.com/winfx/2006/xaml"
xmlns:local="using:SplitTheTab"
xmlns:d="http://schemas.microsoft.com/expression/blend/2008"
xmlns:mc="http://schemas.openxmlformats.org/markup-compatibility/2006"
mc:Ignorable="d"
Background="{ThemeResource ApplicationPageBackgroundThemeBrush}">
<Grid x:Name="LayoutRoot" Background="Transparent">
<Grid.RowDefinitions>
<RowDefinition Height="Auto"/>
<RowDefinition Height="*"/>
</Grid.RowDefinitions>
<!--TitlePanel contains the name of the application and page title-->
<StackPanel Grid.Row="0"
Margin="12,17,0,28">
<TextBlock Text="SPLIT THE TAB"
Style="{StaticResource TitleTextBlockStyle}" />
</StackPanel>
<!--ContentPanel contains ListView and its data templates -->
<Grid x:Name="ContentPanel"
Grid.Row="1"
Margin="12,0,12,0">
<ListView x:Name="ListViewMeals"
ItemsSource="{Binding Meals}"
Tapped="ListViewMeals_Tapped" >
<ListView.ItemTemplate>
<DataTemplate>
<StackPanel Margin="0,0,0,17">
<TextBlock Text="{Binding DateString}"
TextWrapping="Wrap"
Style="{StaticResource ListViewItemTextBlock
Style}" />
<TextBlock Text="{Binding Description}"
TextWrapping="Wrap"
Margin="12,-6,12,0"
Style="{StaticResource GroupHeaderTextBlock
Style}"
FontSize="14" />
</StackPanel>
</DataTemplate>
</ListView.ItemTemplate>
</ListView>
</Grid>
</Grid>
</Page>
LISTING 24.2 The MainPage.xaml.cs Code
using System;
using Windows.ApplicationModel;
using Windows.ApplicationModel.Activation;
using Windows.UI.Xaml;
using Windows.UI.Xaml.Controls;
using Windows.UI.Xaml.Media.Animation;
using Windows.UI.Xaml.Navigation;
//The Blank Application template is documented at
//http://go.microsoft.com/fwlink/?LinkId=234227.
namespace SplitTheTab
{
/// <summary>
/// Provides application-specific behavior to supplement
/// the default Application class.
/// </summary>
public sealed partial class App : Application
{
#if WINDOWS_PHONE_APP
private TransitionCollection transitions;
#endif
private static ViewModel.MainViewModel viewModel = null;
/// <summary>
/// Initializes the singleton application object.
/// This is the first line of authored code
/// executed, and as such is the logical equivalent of
/// main() or WinMain().
/// </summary>
public App()
{
this.InitializeComponent();
this.Suspending += this.OnSuspending;
}
/// <summary>
/// A static ViewModel used by the views to bind against.
/// </summary>
/// <returns>The MainViewModel object.</returns>
public static ViewModel.MainViewModel ViewModel
{
get
{
// Delay creation of the view model until necessary
if (viewModel == null)
viewModel = new ViewModel.MainViewModel();
return viewModel;
}
}
/// <summary>
/// Invoked when the application is launched normally by the end user.
/// Other entry points will be used when the application is launched
/// to open a specific file, to display search results, and so forth.
/// </summary>
/// <param name="e">Details about the launch request and process.</param>
protected override void OnLaunched(LaunchActivatedEventArgs e)
{
#if DEBUG
if (System.Diagnostics.Debugger.IsAttached)
{
this.DebugSettings.EnableFrameRateCounter = true;
}
#endif
Frame rootFrame = Window.Current.Content as Frame;
//Do not repeat app initialization when the window already has
//content; just ensure that the window is active.
if (rootFrame == null)
{
//Create a frame to act as the navigation context and
//navigate to the first page.
rootFrame = new Frame();
//TODO: Change this value to a cache size that is appropriate
//for your application.
rootFrame.CacheSize = 1;
if (e.PreviousExecutionState ==
ApplicationExecutionState.Terminated)
{
//TODO: Load state from previously suspended
//application.
}
//Place the frame in the current window.
Window.Current.Content = rootFrame;
}
if (rootFrame.Content == null)
{
#if WINDOWS_PHONE_APP
//Removes the turnstile navigation for startup.
if (rootFrame.ContentTransitions != null)
{
this.transitions = new TransitionCollection();
foreach (var c in rootFrame.ContentTransitions)
{
this.transitions.Add(c);
}
}
rootFrame.ContentTransitions = null;
rootFrame.Navigated += this.RootFrame_FirstNavigated;
#endif
//When the navigation stack isn't restored navigate to the
//first page,
//configuring the new page by passing required information
//as a navigation parameter.
if (!rootFrame.Navigate(typeof(MainPage),
e.Arguments))
{
throw new
Exception("Failed to create initial page");
}
}
//Ensure the current window is active.
Window.Current.Activate();
}
#if WINDOWS_PHONE_APP
/// <summary>
/// Restores the content transitions after the app has launched.
/// </summary>
/// <param name="sender">The object where the handler is attached.</param>
/// <param name="e">Details about the navigation event.</param>
private void RootFrame_FirstNavigated(object sender, NavigationEventArgs e)
{
var rootFrame = sender as Frame;
rootFrame.ContentTransitions = this.transitions ??
new TransitionCollection() { new NavigationThemeTransition() };
rootFrame.Navigated -= this.RootFrame_FirstNavigated;
}
#endif
private void OnSuspending(object sender, SuspendingEventArgs e)
{
var deferral = e.SuspendingOperation.GetDeferral();
// TODO: Save application state and stop any background activity.
deferral.Complete();
}
}
}